How to Use Bulk Video Generation
HuHu AI's Bulk Video Generation feature allows you to create multiple product videos simultaneously from uploaded images. This is perfect for e-commerce businesses that need to produce fashion videos for multiple SKUs at scale. Instead of generating videos one by one, you can upload all your product images in a single ZIP file and generate videos for all SKUs in one go.
In this tutorial, you will learn how to create a bulk video generation project, prepare and upload your product images, configure video settings for each SKU, generate AI-powered prompts, and produce high-quality fashion videos.
Before You Begin
- A HuHu AI account with available credits
- Product images organized by SKU (JPG, PNG, or WebP format)
- At least 2 images per SKU (different angles or poses recommended)
- Up to 50 SKUs per project
Step 1: Create a New Bulk Video Project
Navigate to Video > Bulk Video Generation in the left sidebar. You will see a dashboard showing all your existing bulk video projects with their statuses. Click the + Create New Project button in the top right corner to start a new project.
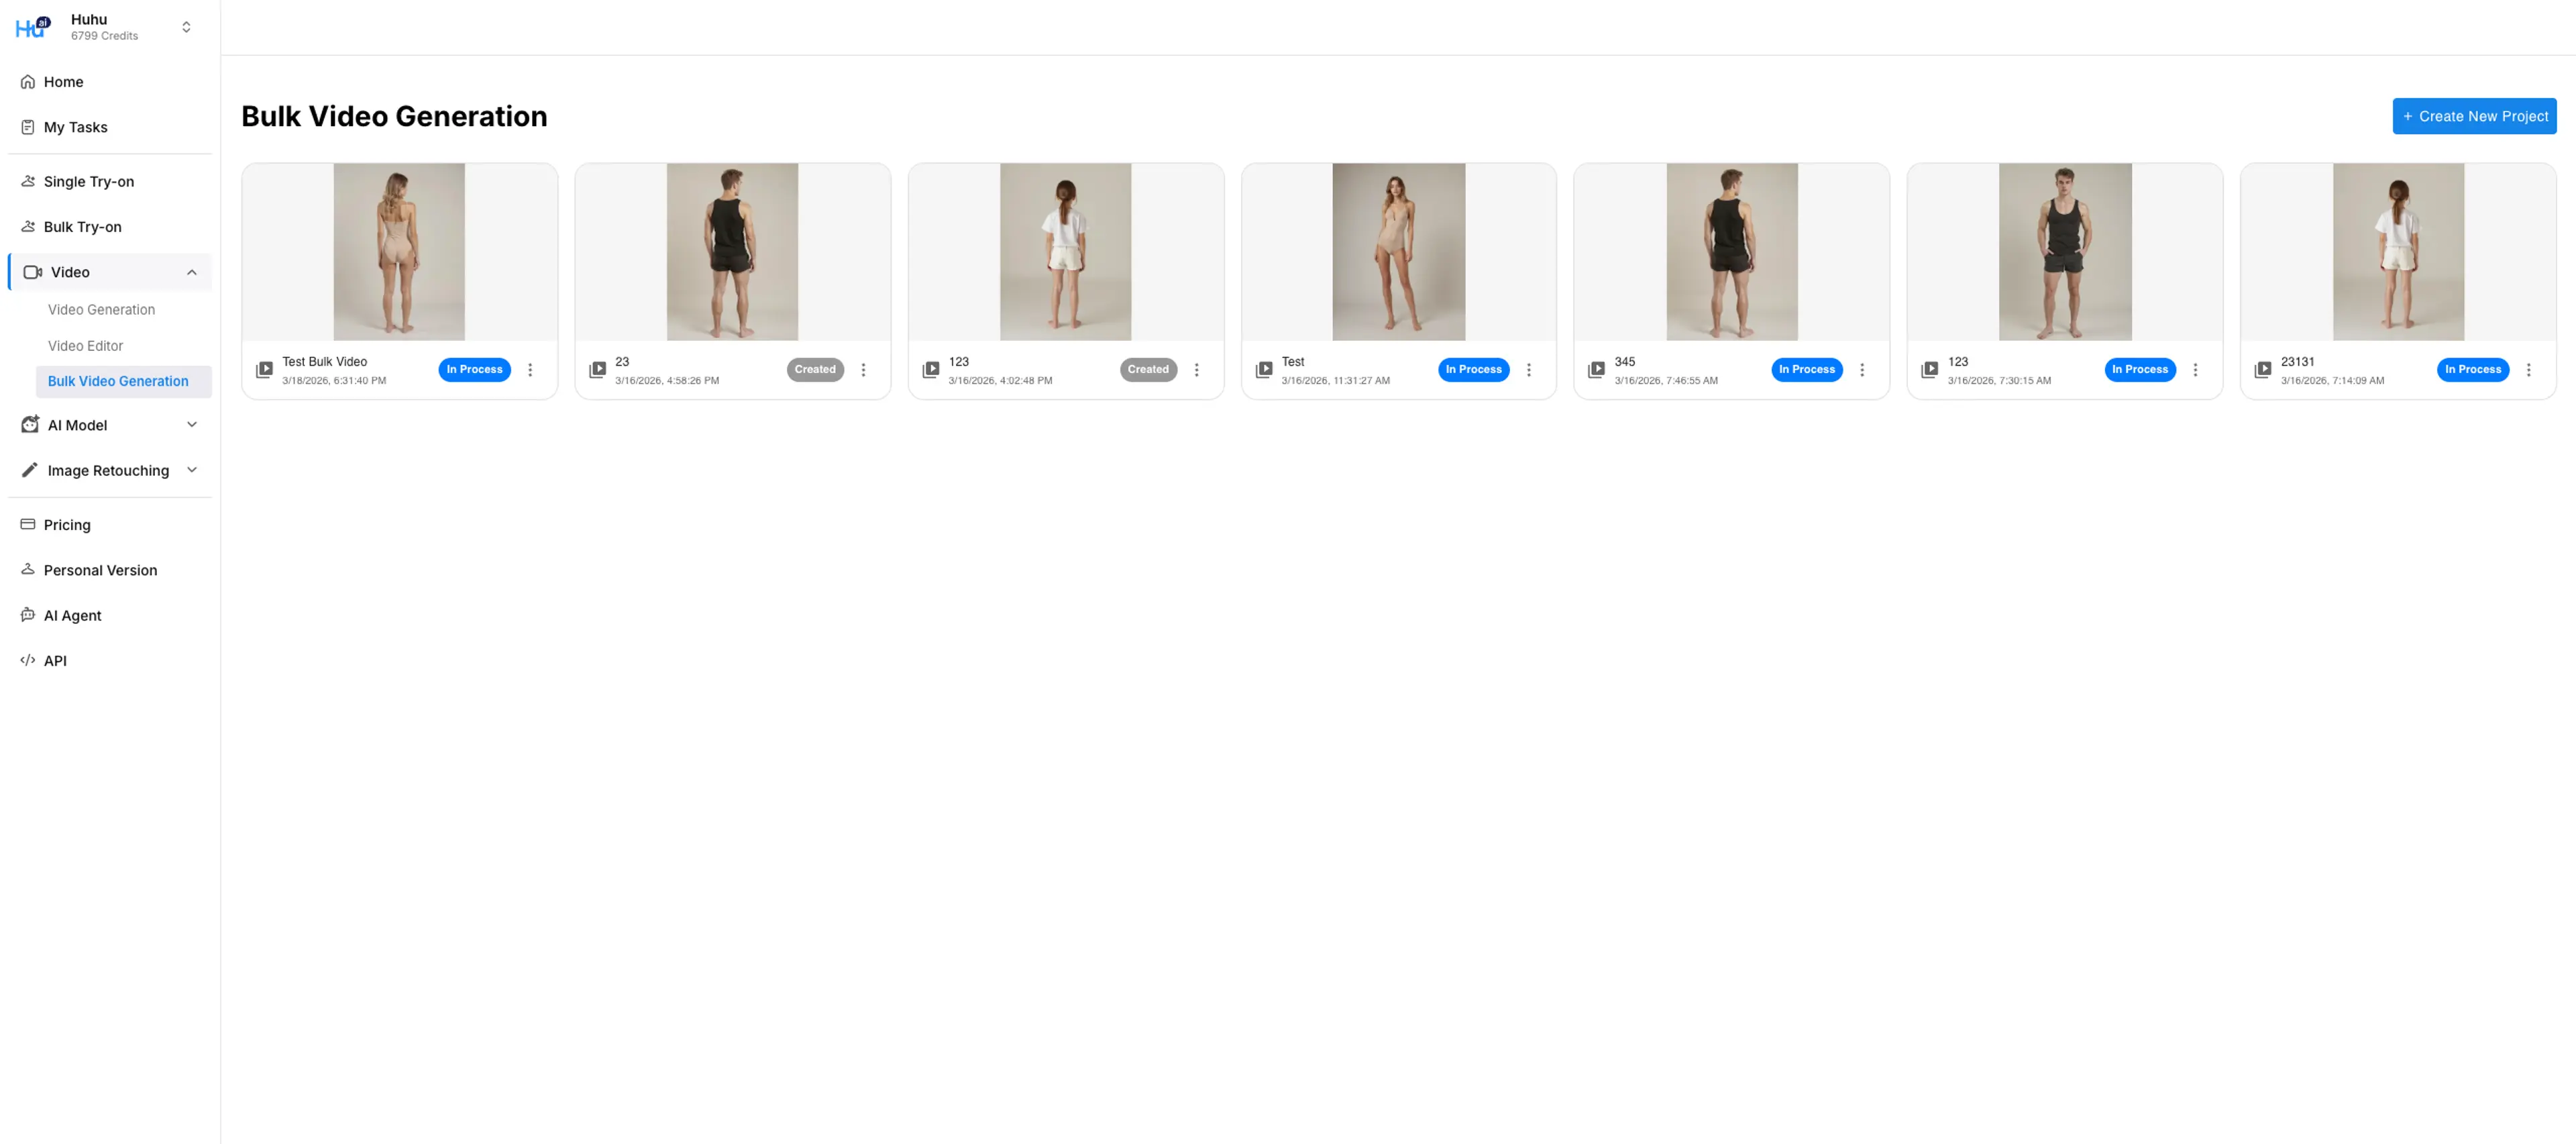
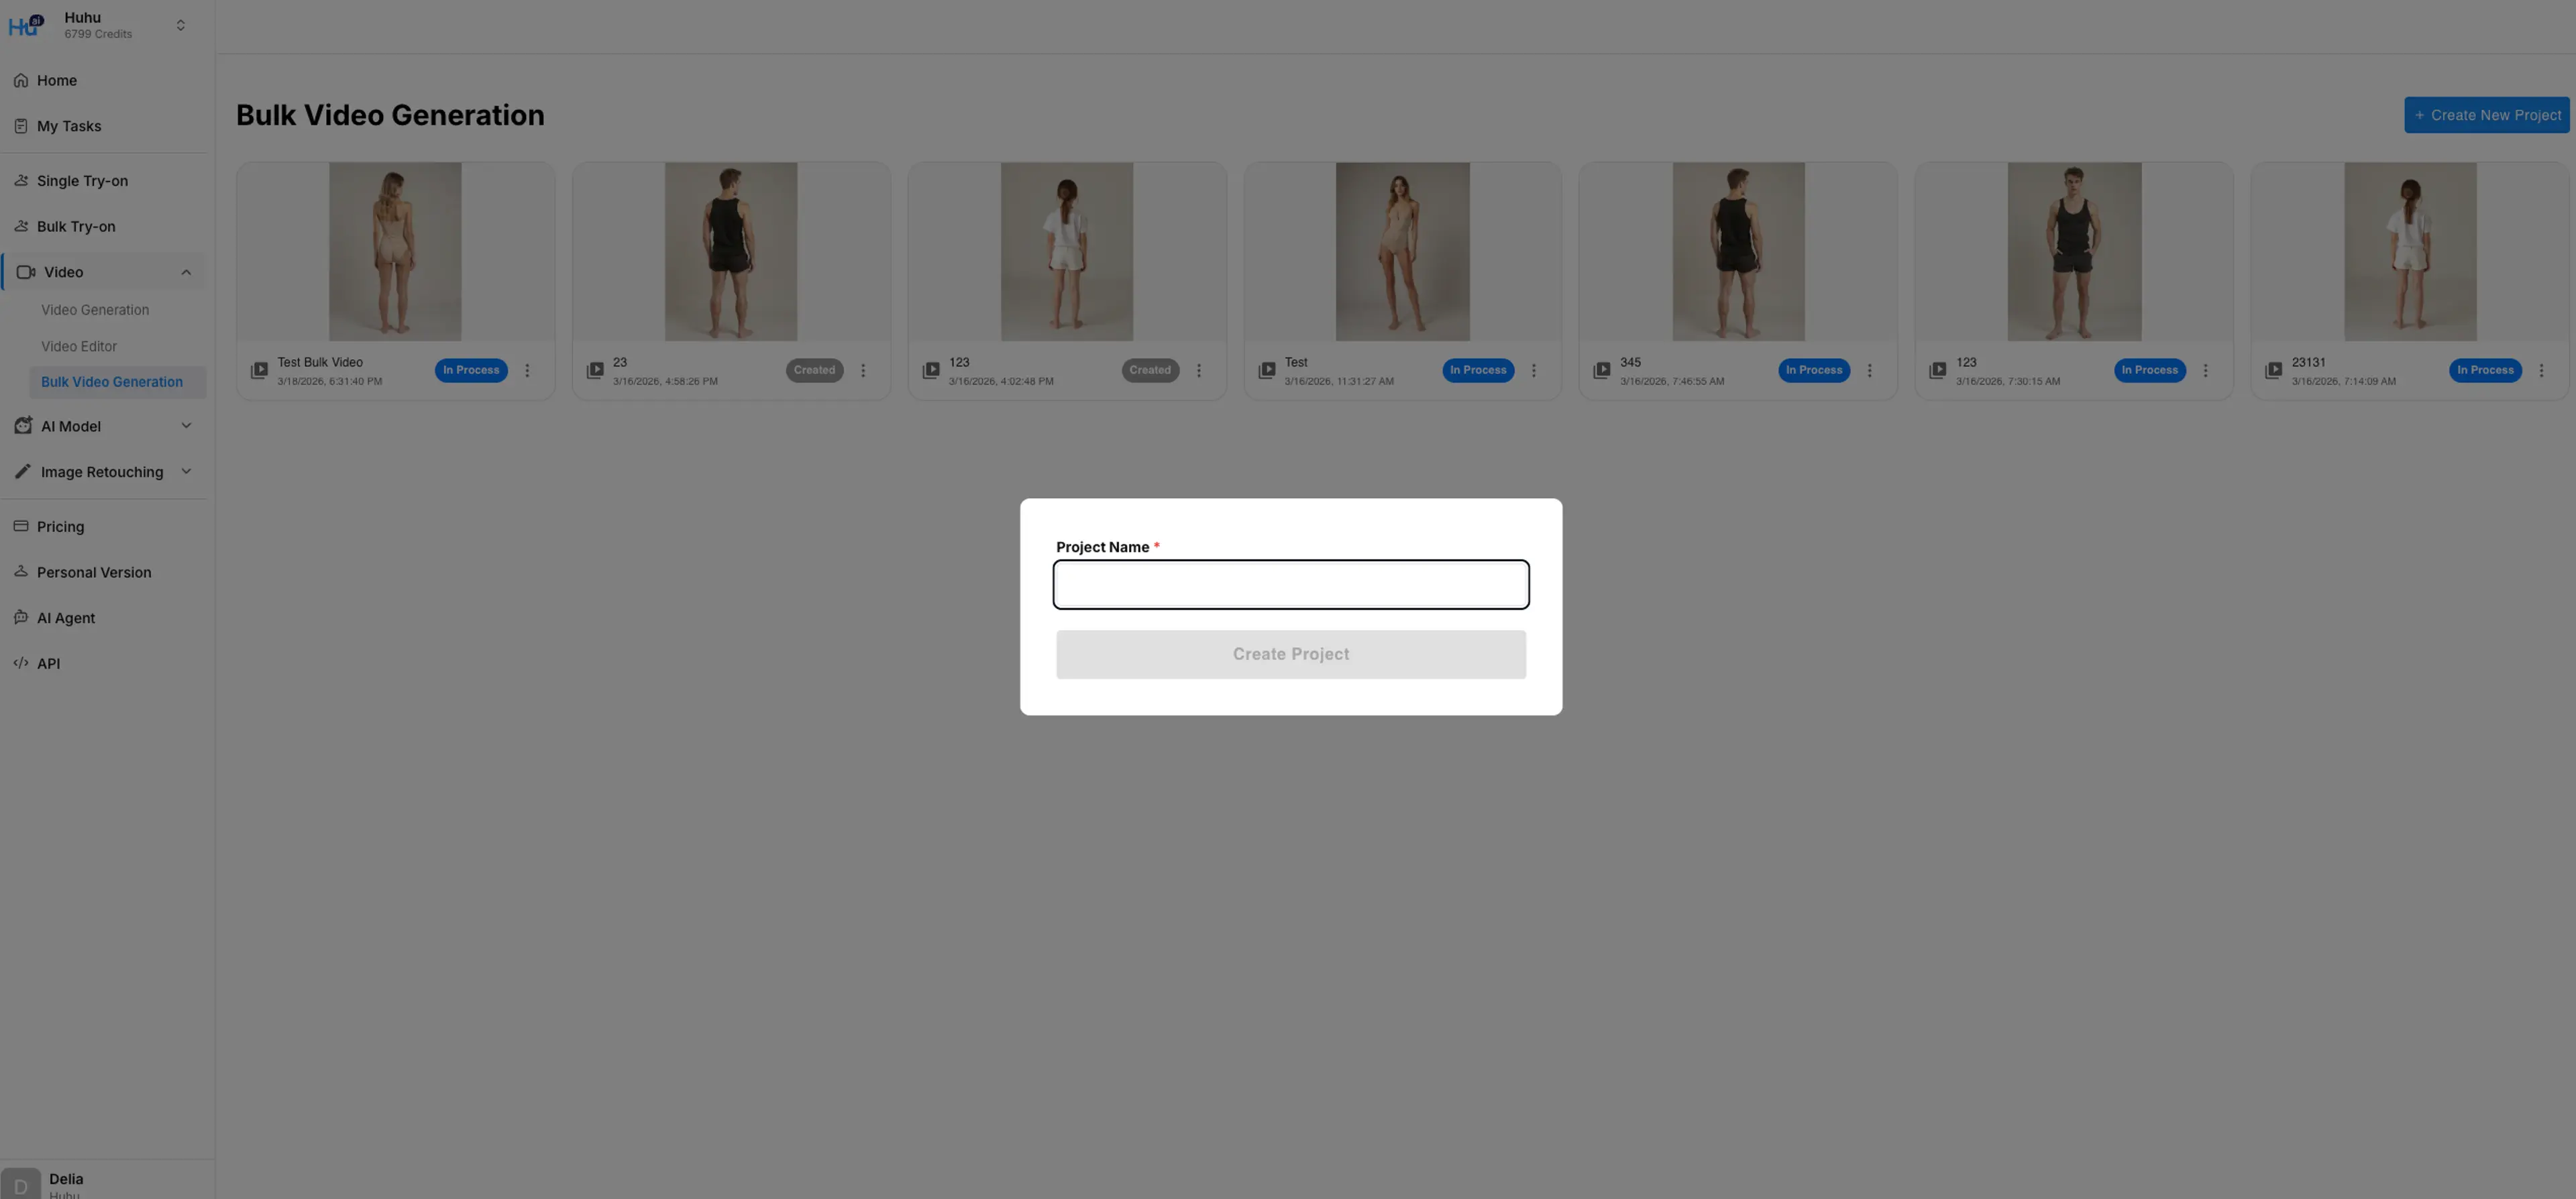
A dialog will appear asking you to enter a Project Name. Give your project a descriptive name (e.g., "Spring Collection 2026") and click Create Project.
Step 2: Prepare Your Product Images
Before uploading, you need to organize your product images into a specific folder structure and compress them into a ZIP file.
Folder Structure
Create a main folder and inside it, create one subfolder for each SKU. Name each subfolder with the SKU identifier (e.g., SKU1, SKU2, SKU3). Place the product images for each SKU inside its respective folder.
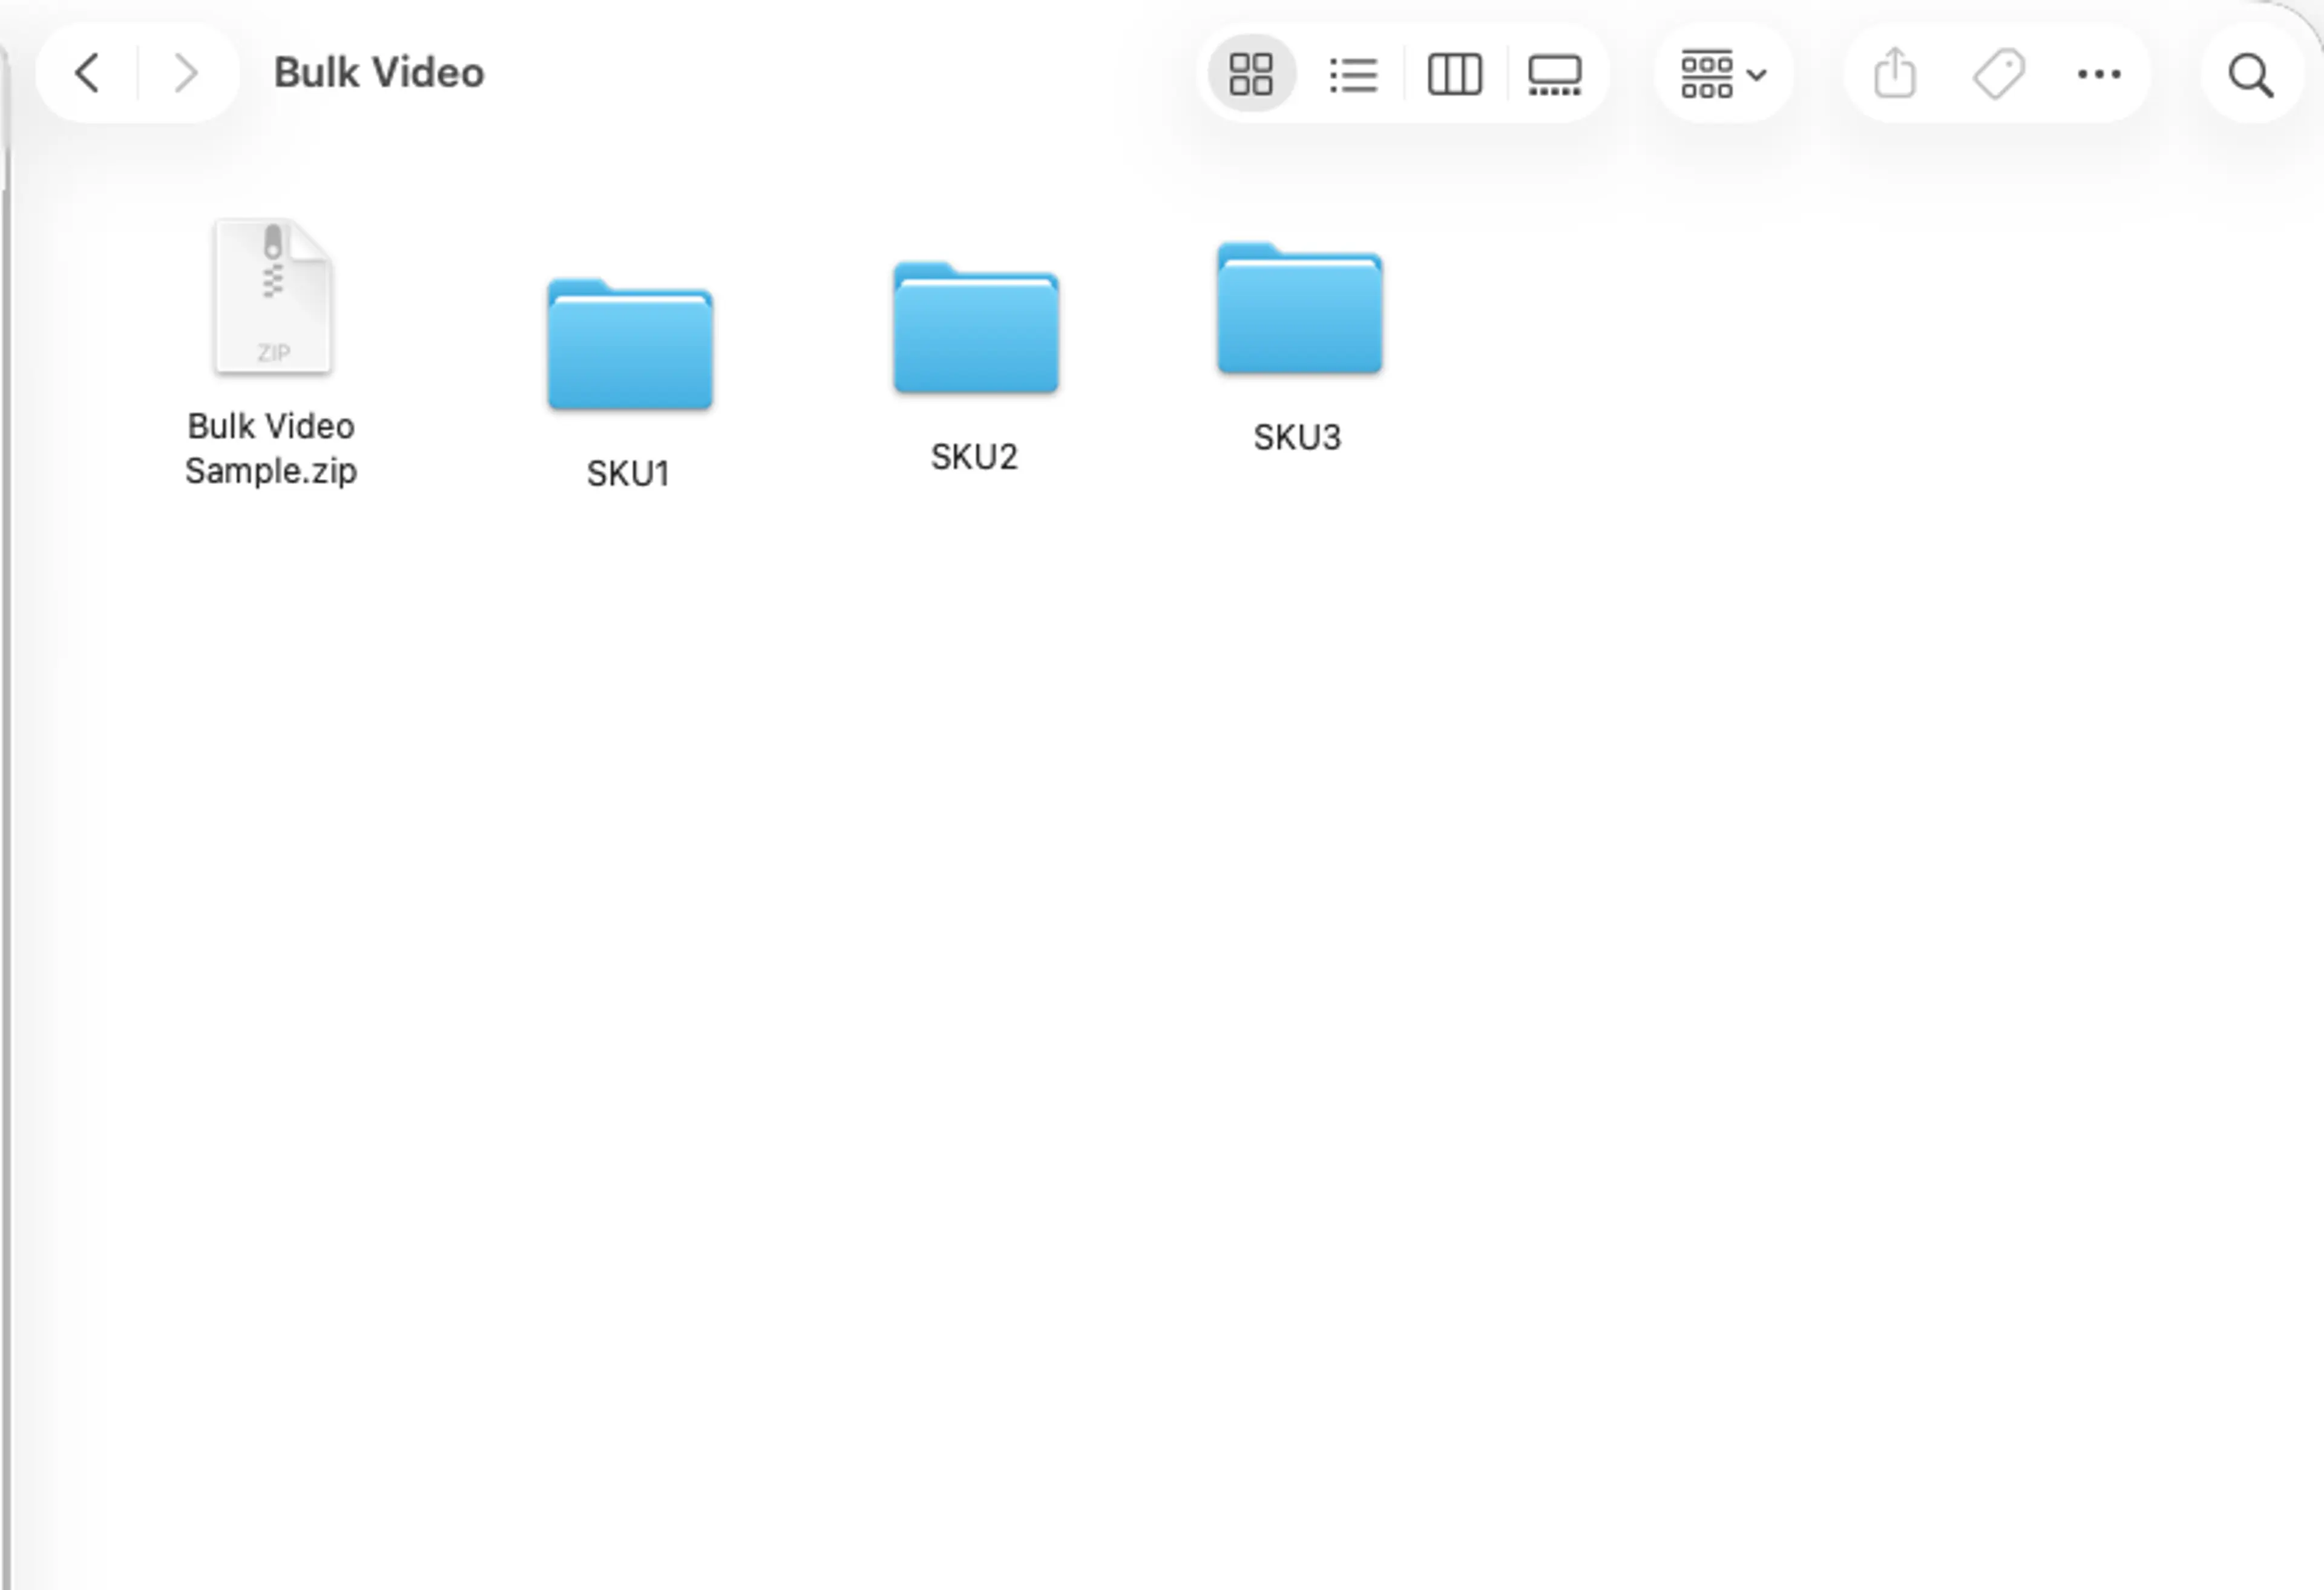
Each SKU folder should contain at least 2 images of the product from different angles or poses. The supported image formats are JPG, PNG, and WebP.

Once your folders are organized, compress the main folder into a ZIP file. You can also download the Sample Folder.zip provided on the upload page as a reference for the correct structure.
Step 3: Upload Your ZIP File
After creating your project, you will be taken to the upload screen. You can either click the Upload Files button or drag and drop your ZIP file directly into the upload area.

Your images will be automatically classified and paired by SKU. The system reads the folder names inside your ZIP file to identify each SKU and groups the images accordingly. Each project supports up to 50 SKUs.
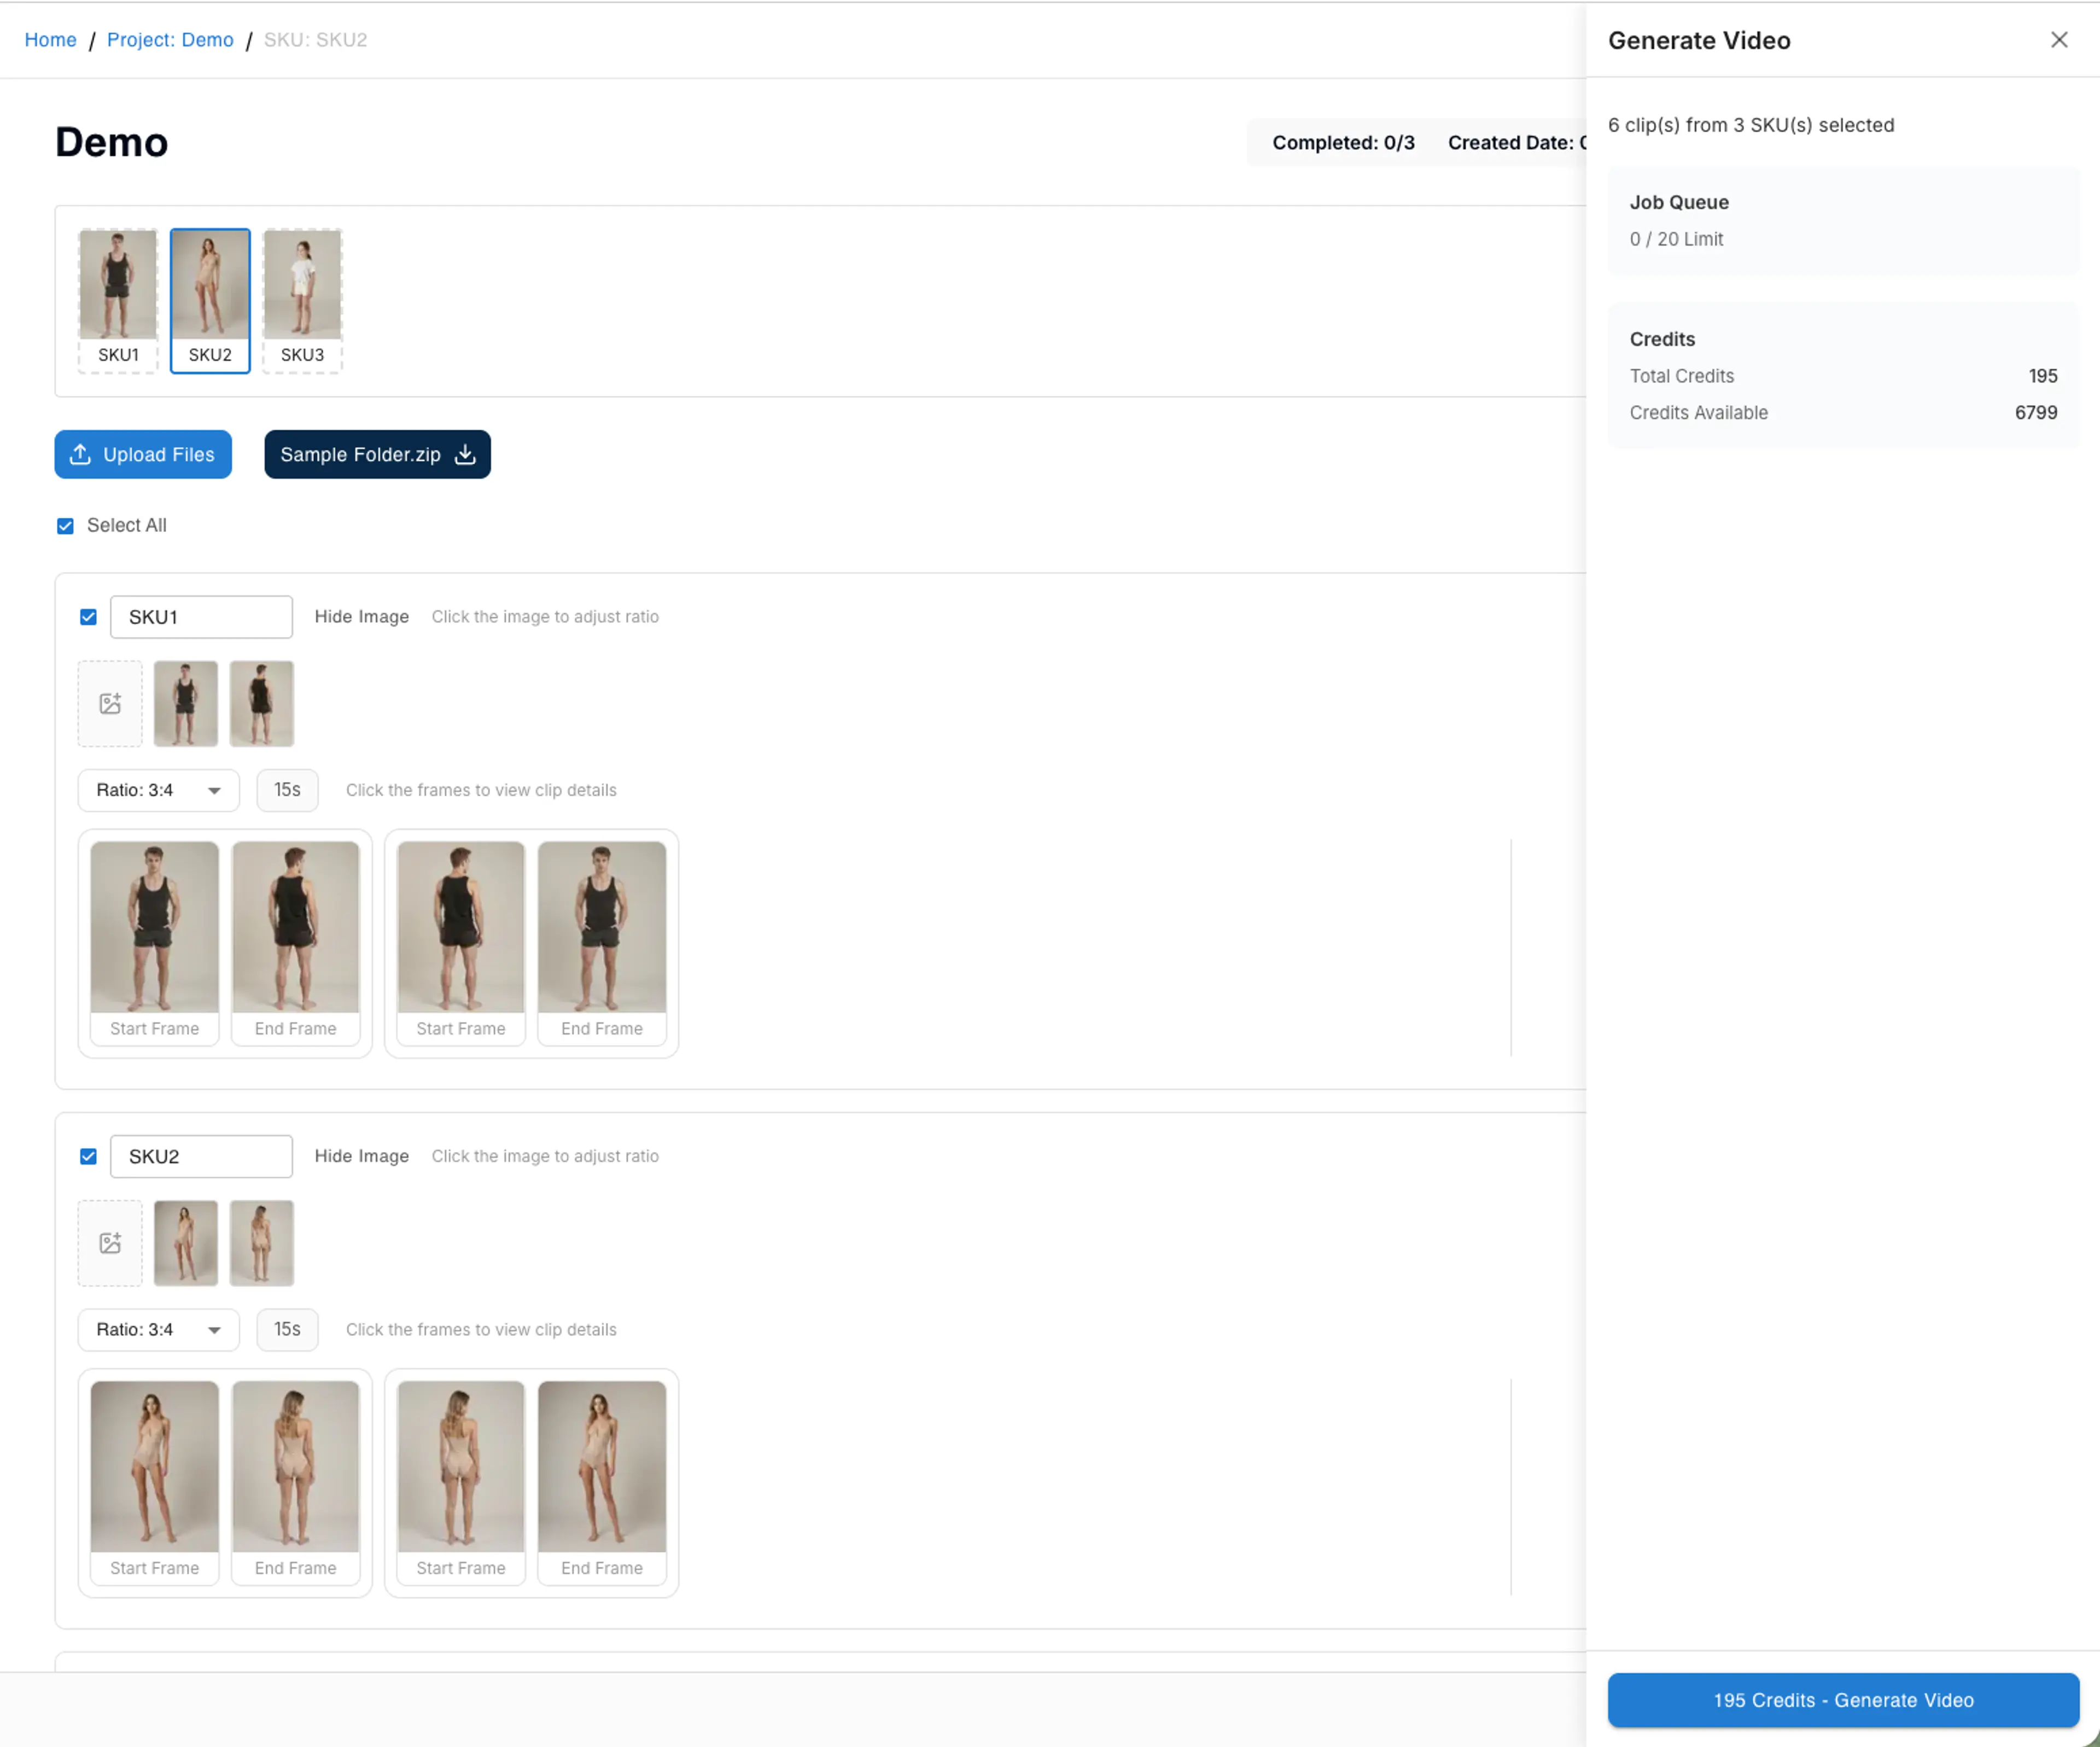
Step 4: Configure Video Style and Length
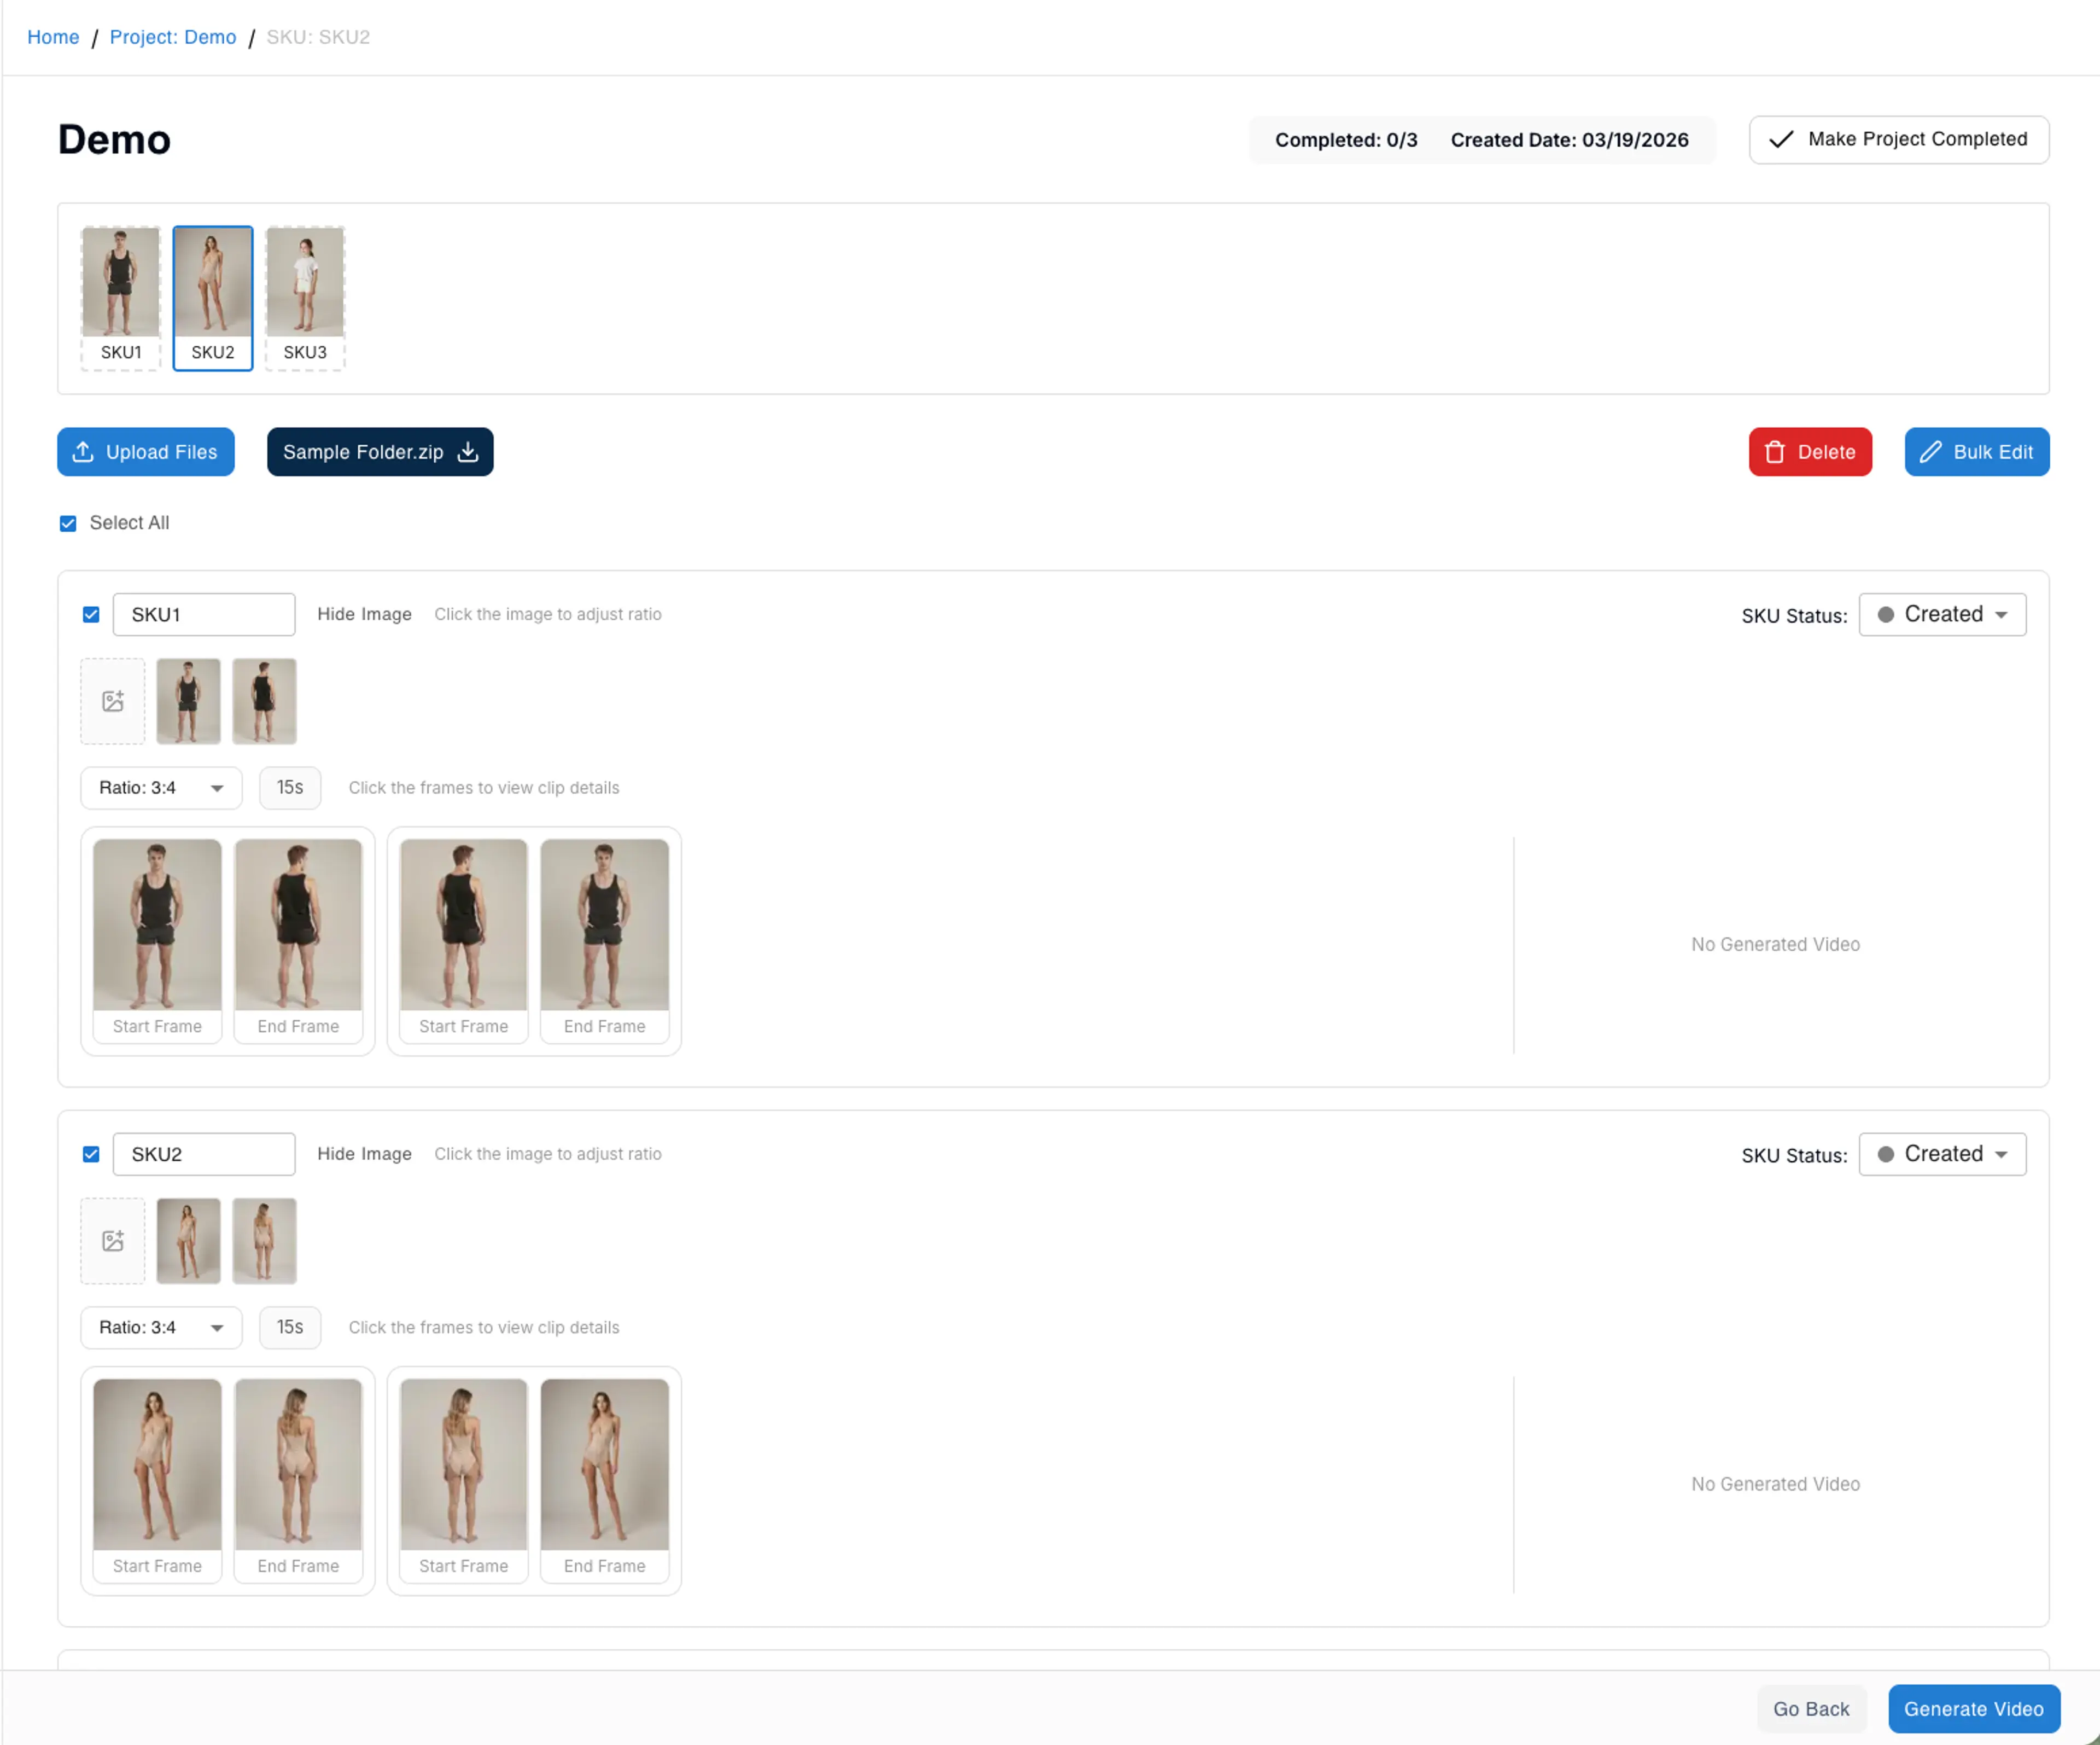
After uploading, click Next to proceed to the video configuration screen. Here you can set the video parameters for each SKU:
- Ratio: Choose the aspect ratio for your video (e.g., 3:4 for portrait, 16:9 for landscape)
- Duration: Set the video length (e.g., 5 Second, 10 Second, 15 Second)
- Template: Select the video template (e.g., Multi Clips for videos with multiple scene transitions)
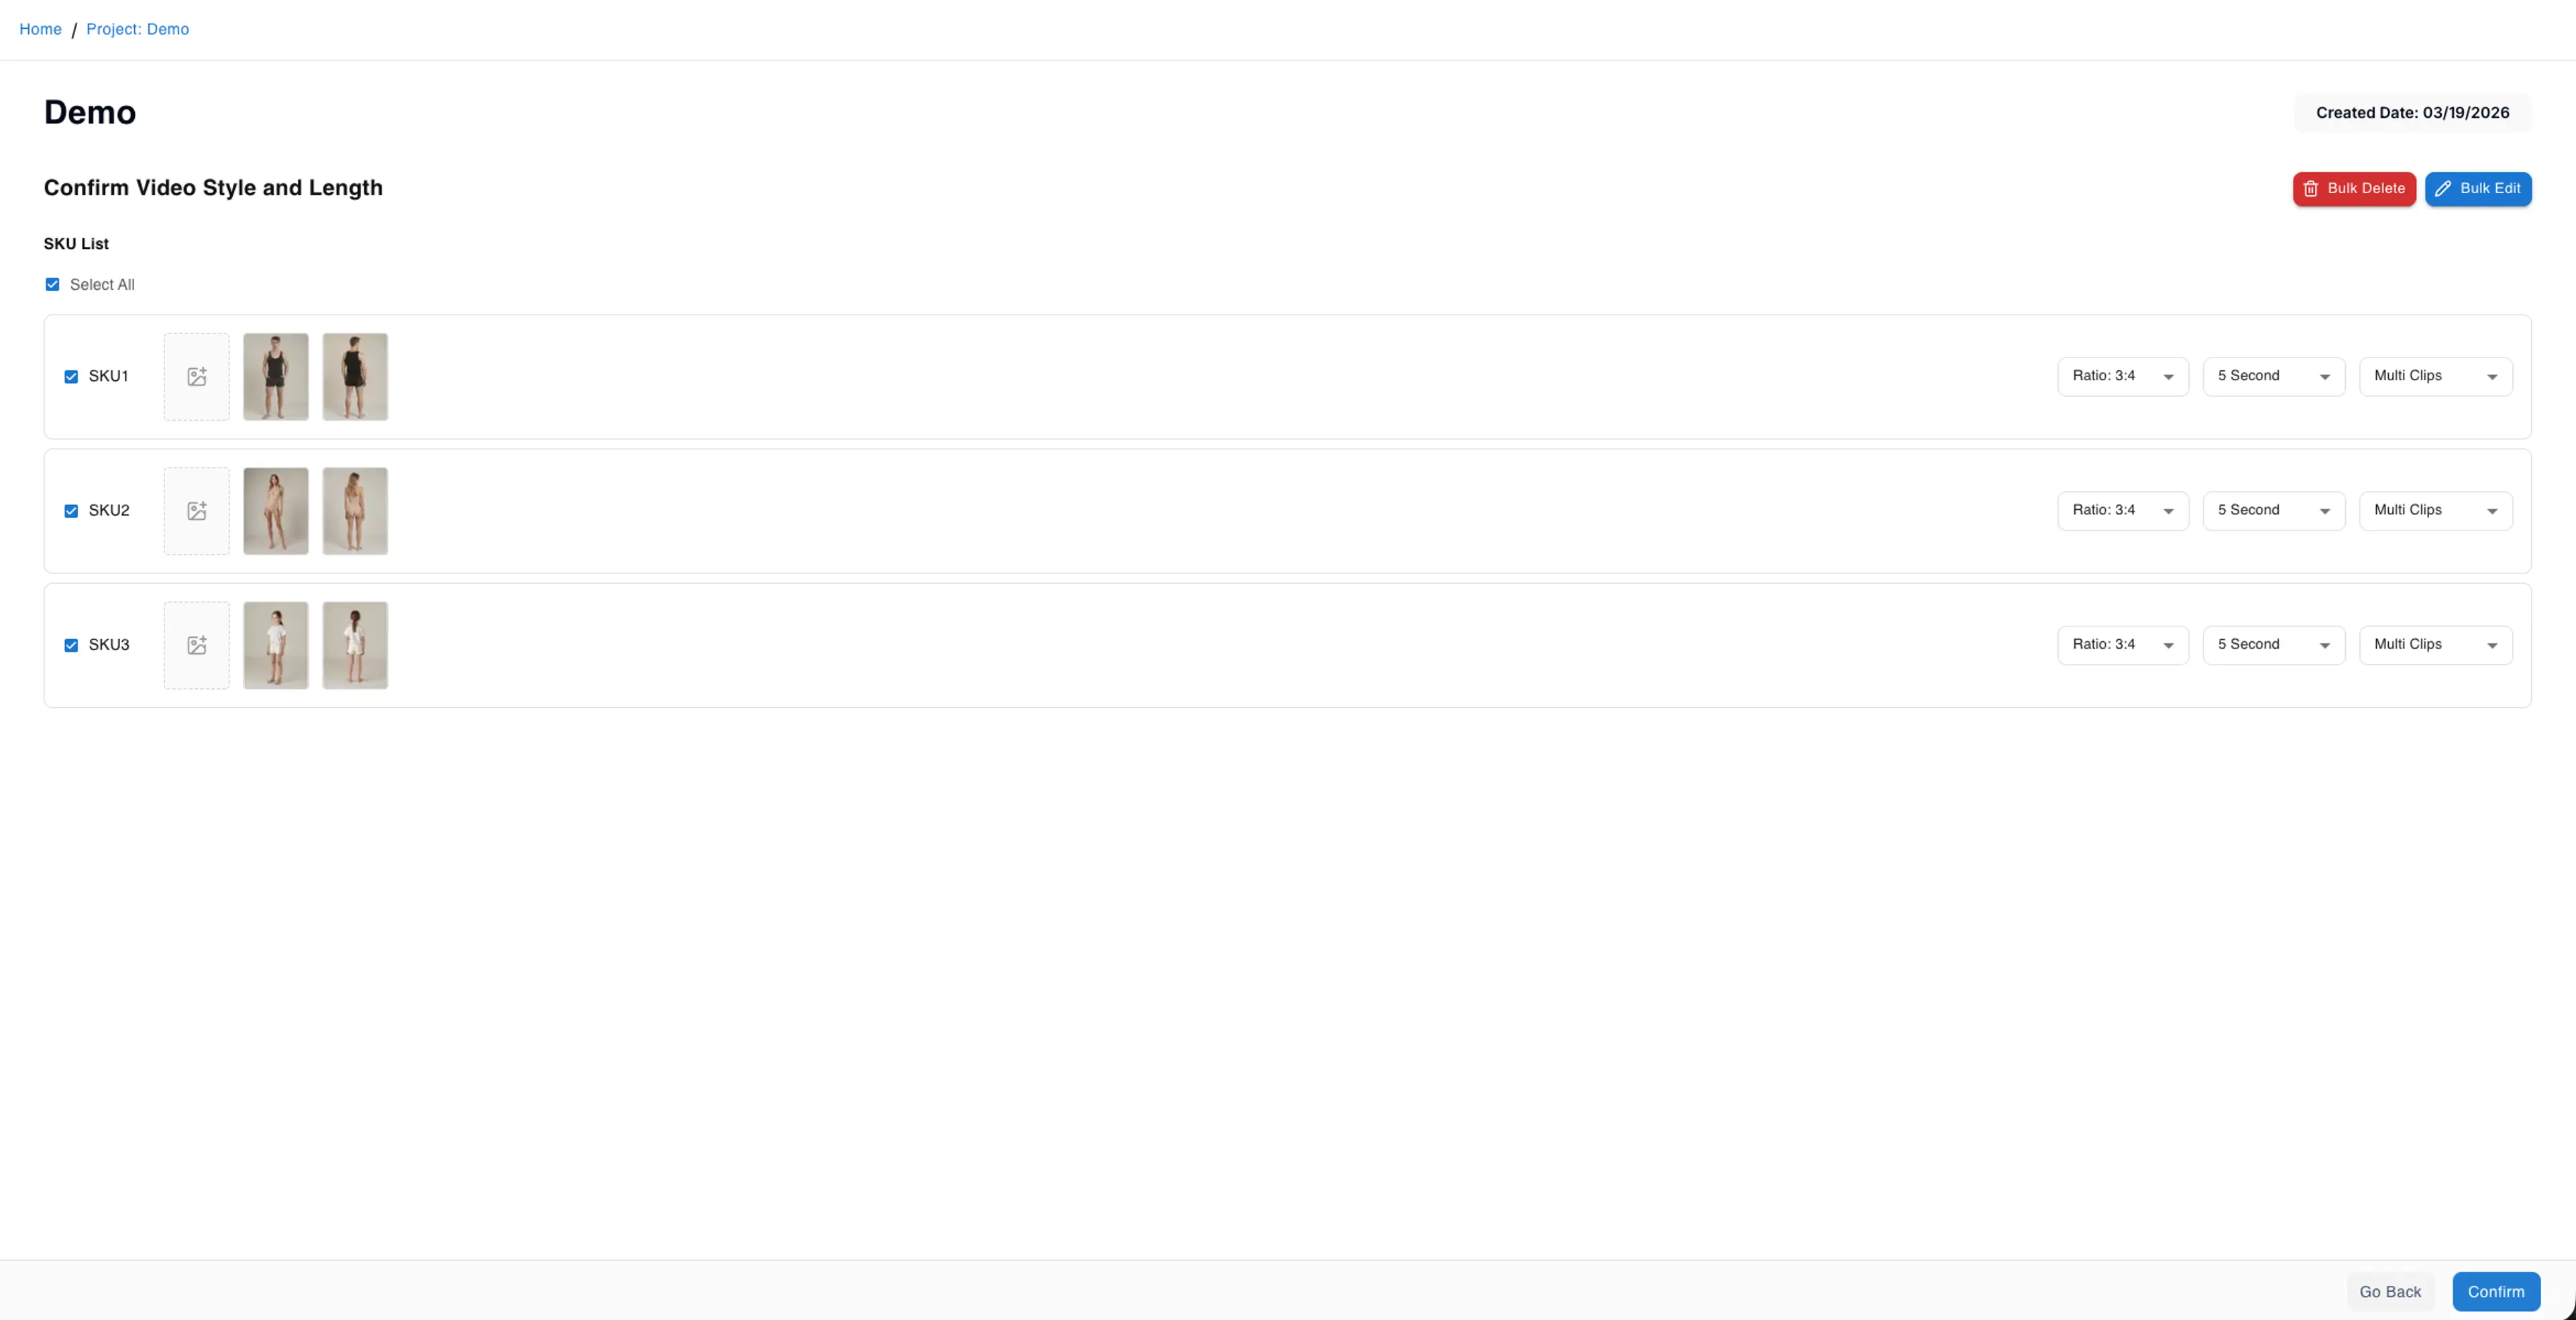
Use the Select All checkbox to select all SKUs, then use Bulk Edit to apply the same settings to all SKUs at once. You can also adjust settings for individual SKUs as needed. Click Confirm when you are done.
Step 5: Review the Project Overview
The overview page displays all your SKUs with their video clips. Each SKU shows the uploaded images along with the auto-generated clip segments. You can see the Start Frame and End Frame for each clip, which represent the beginning and ending poses of the video transition.
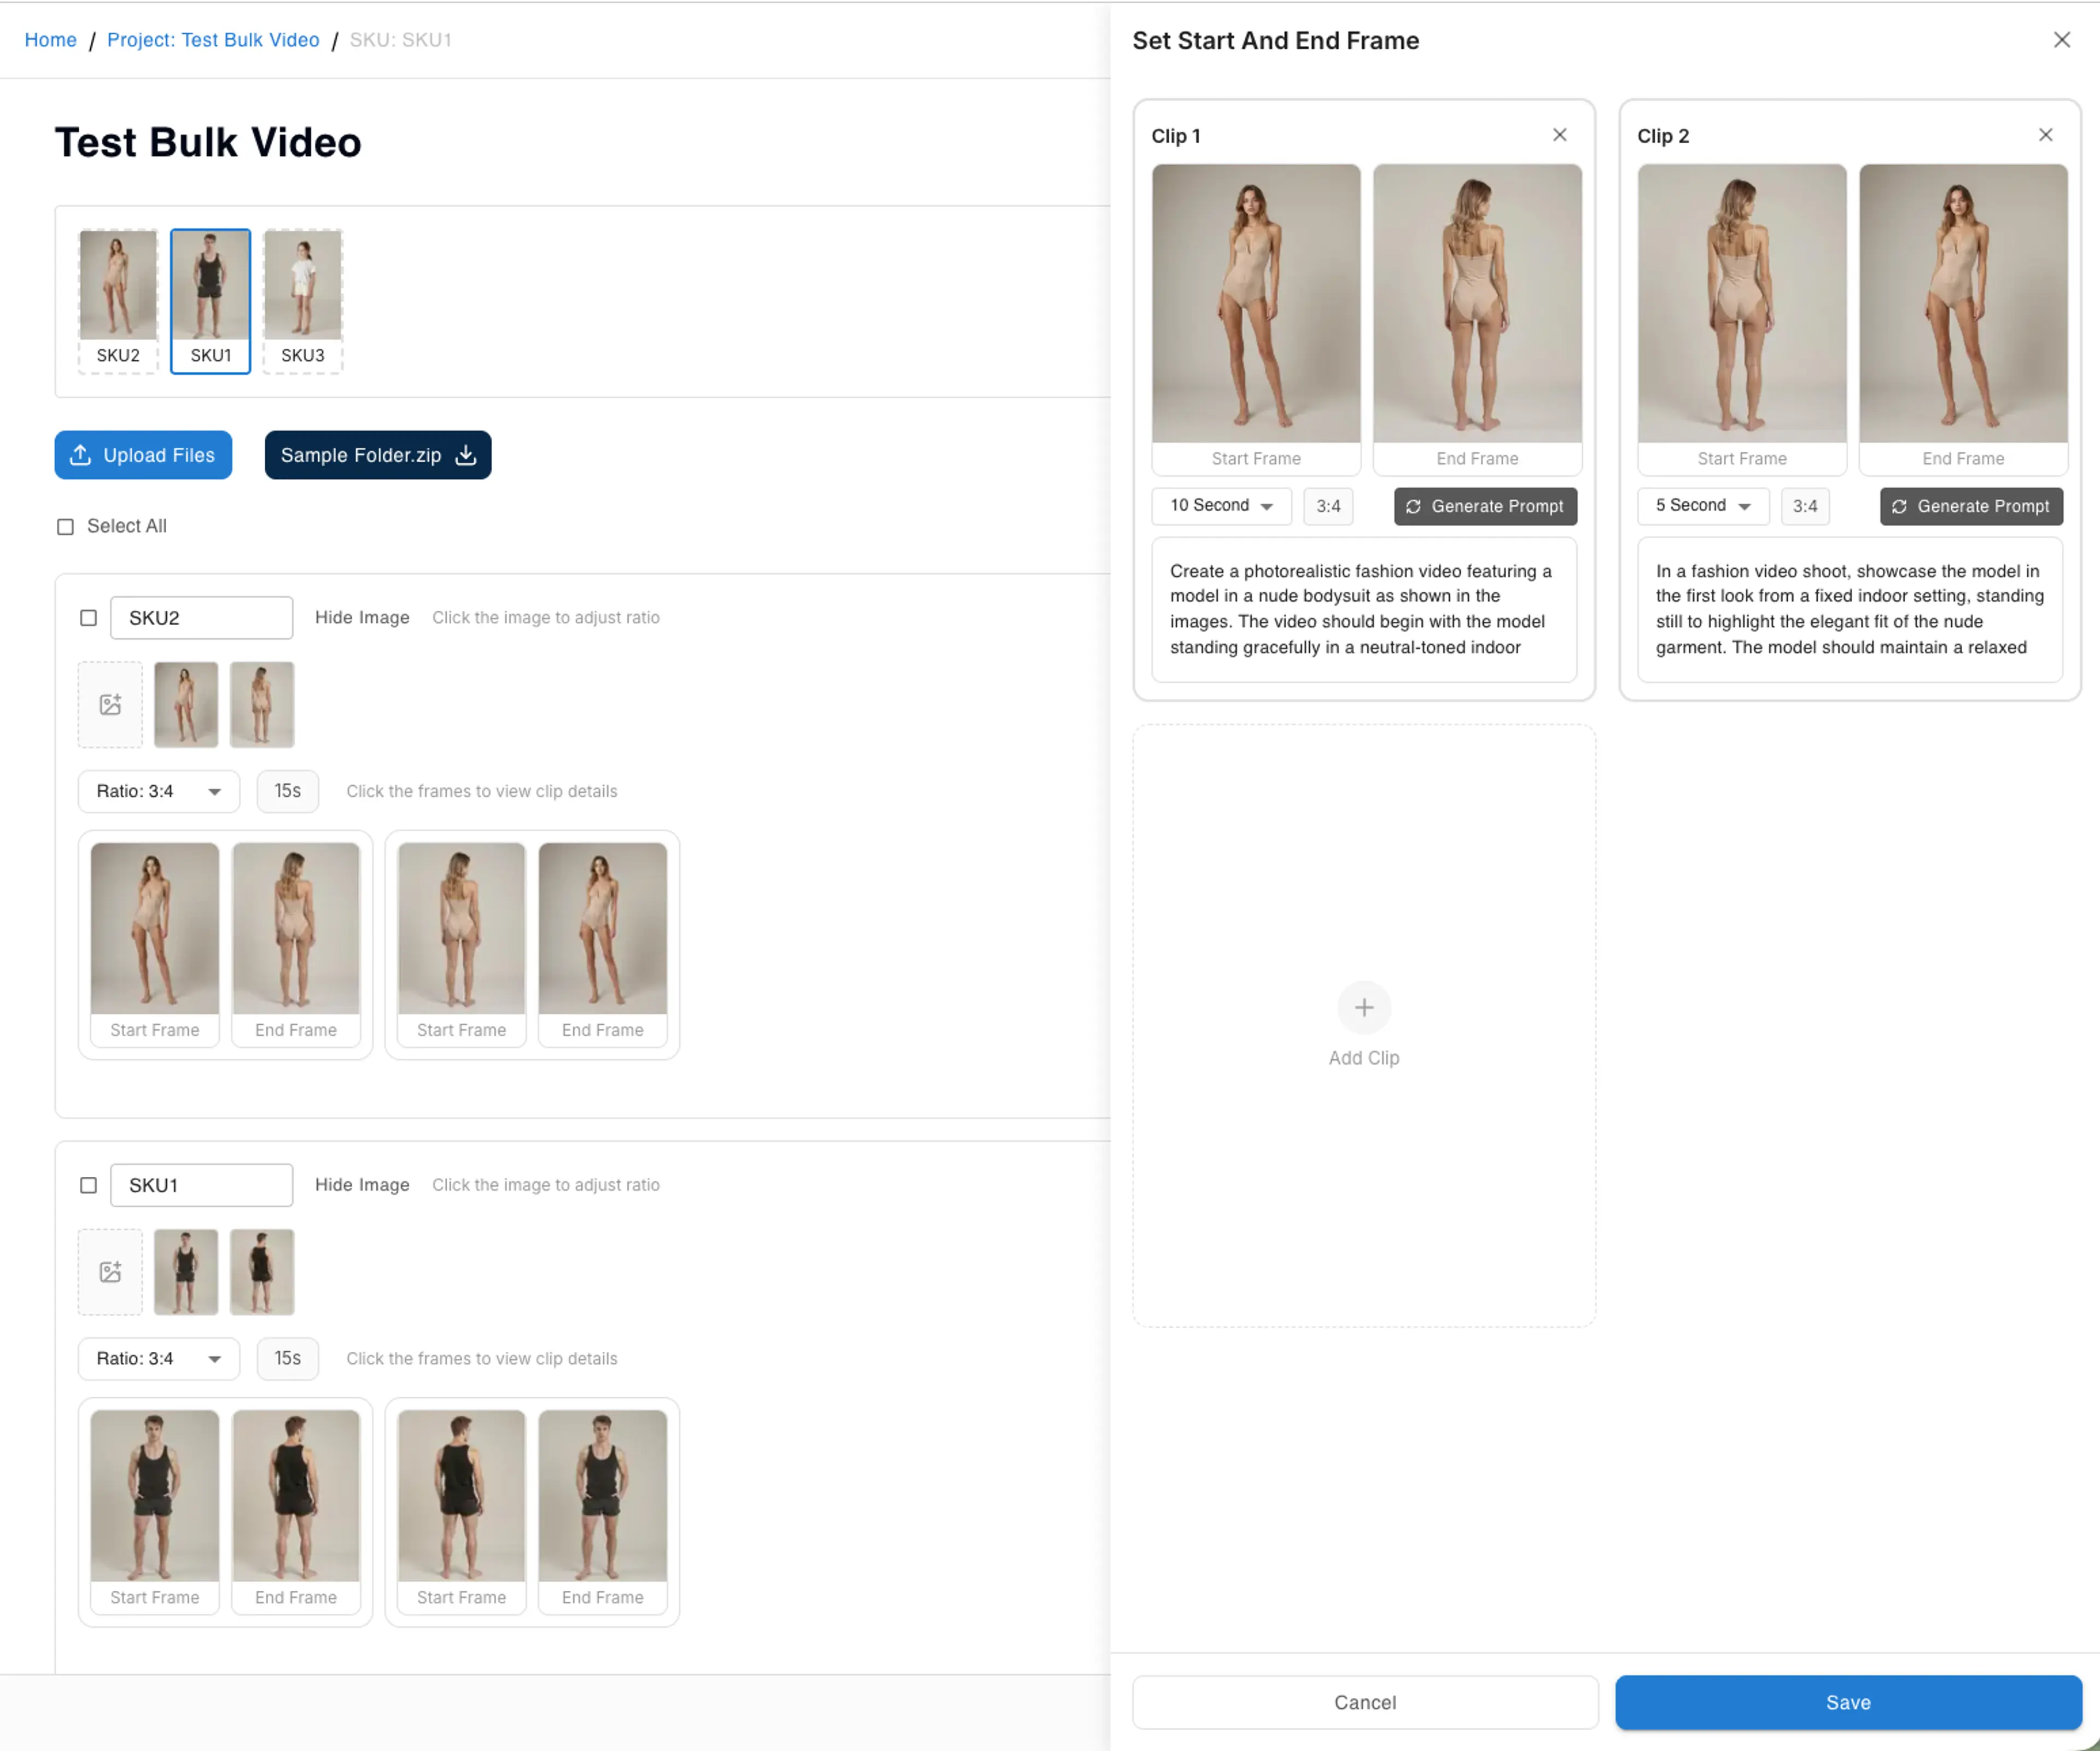
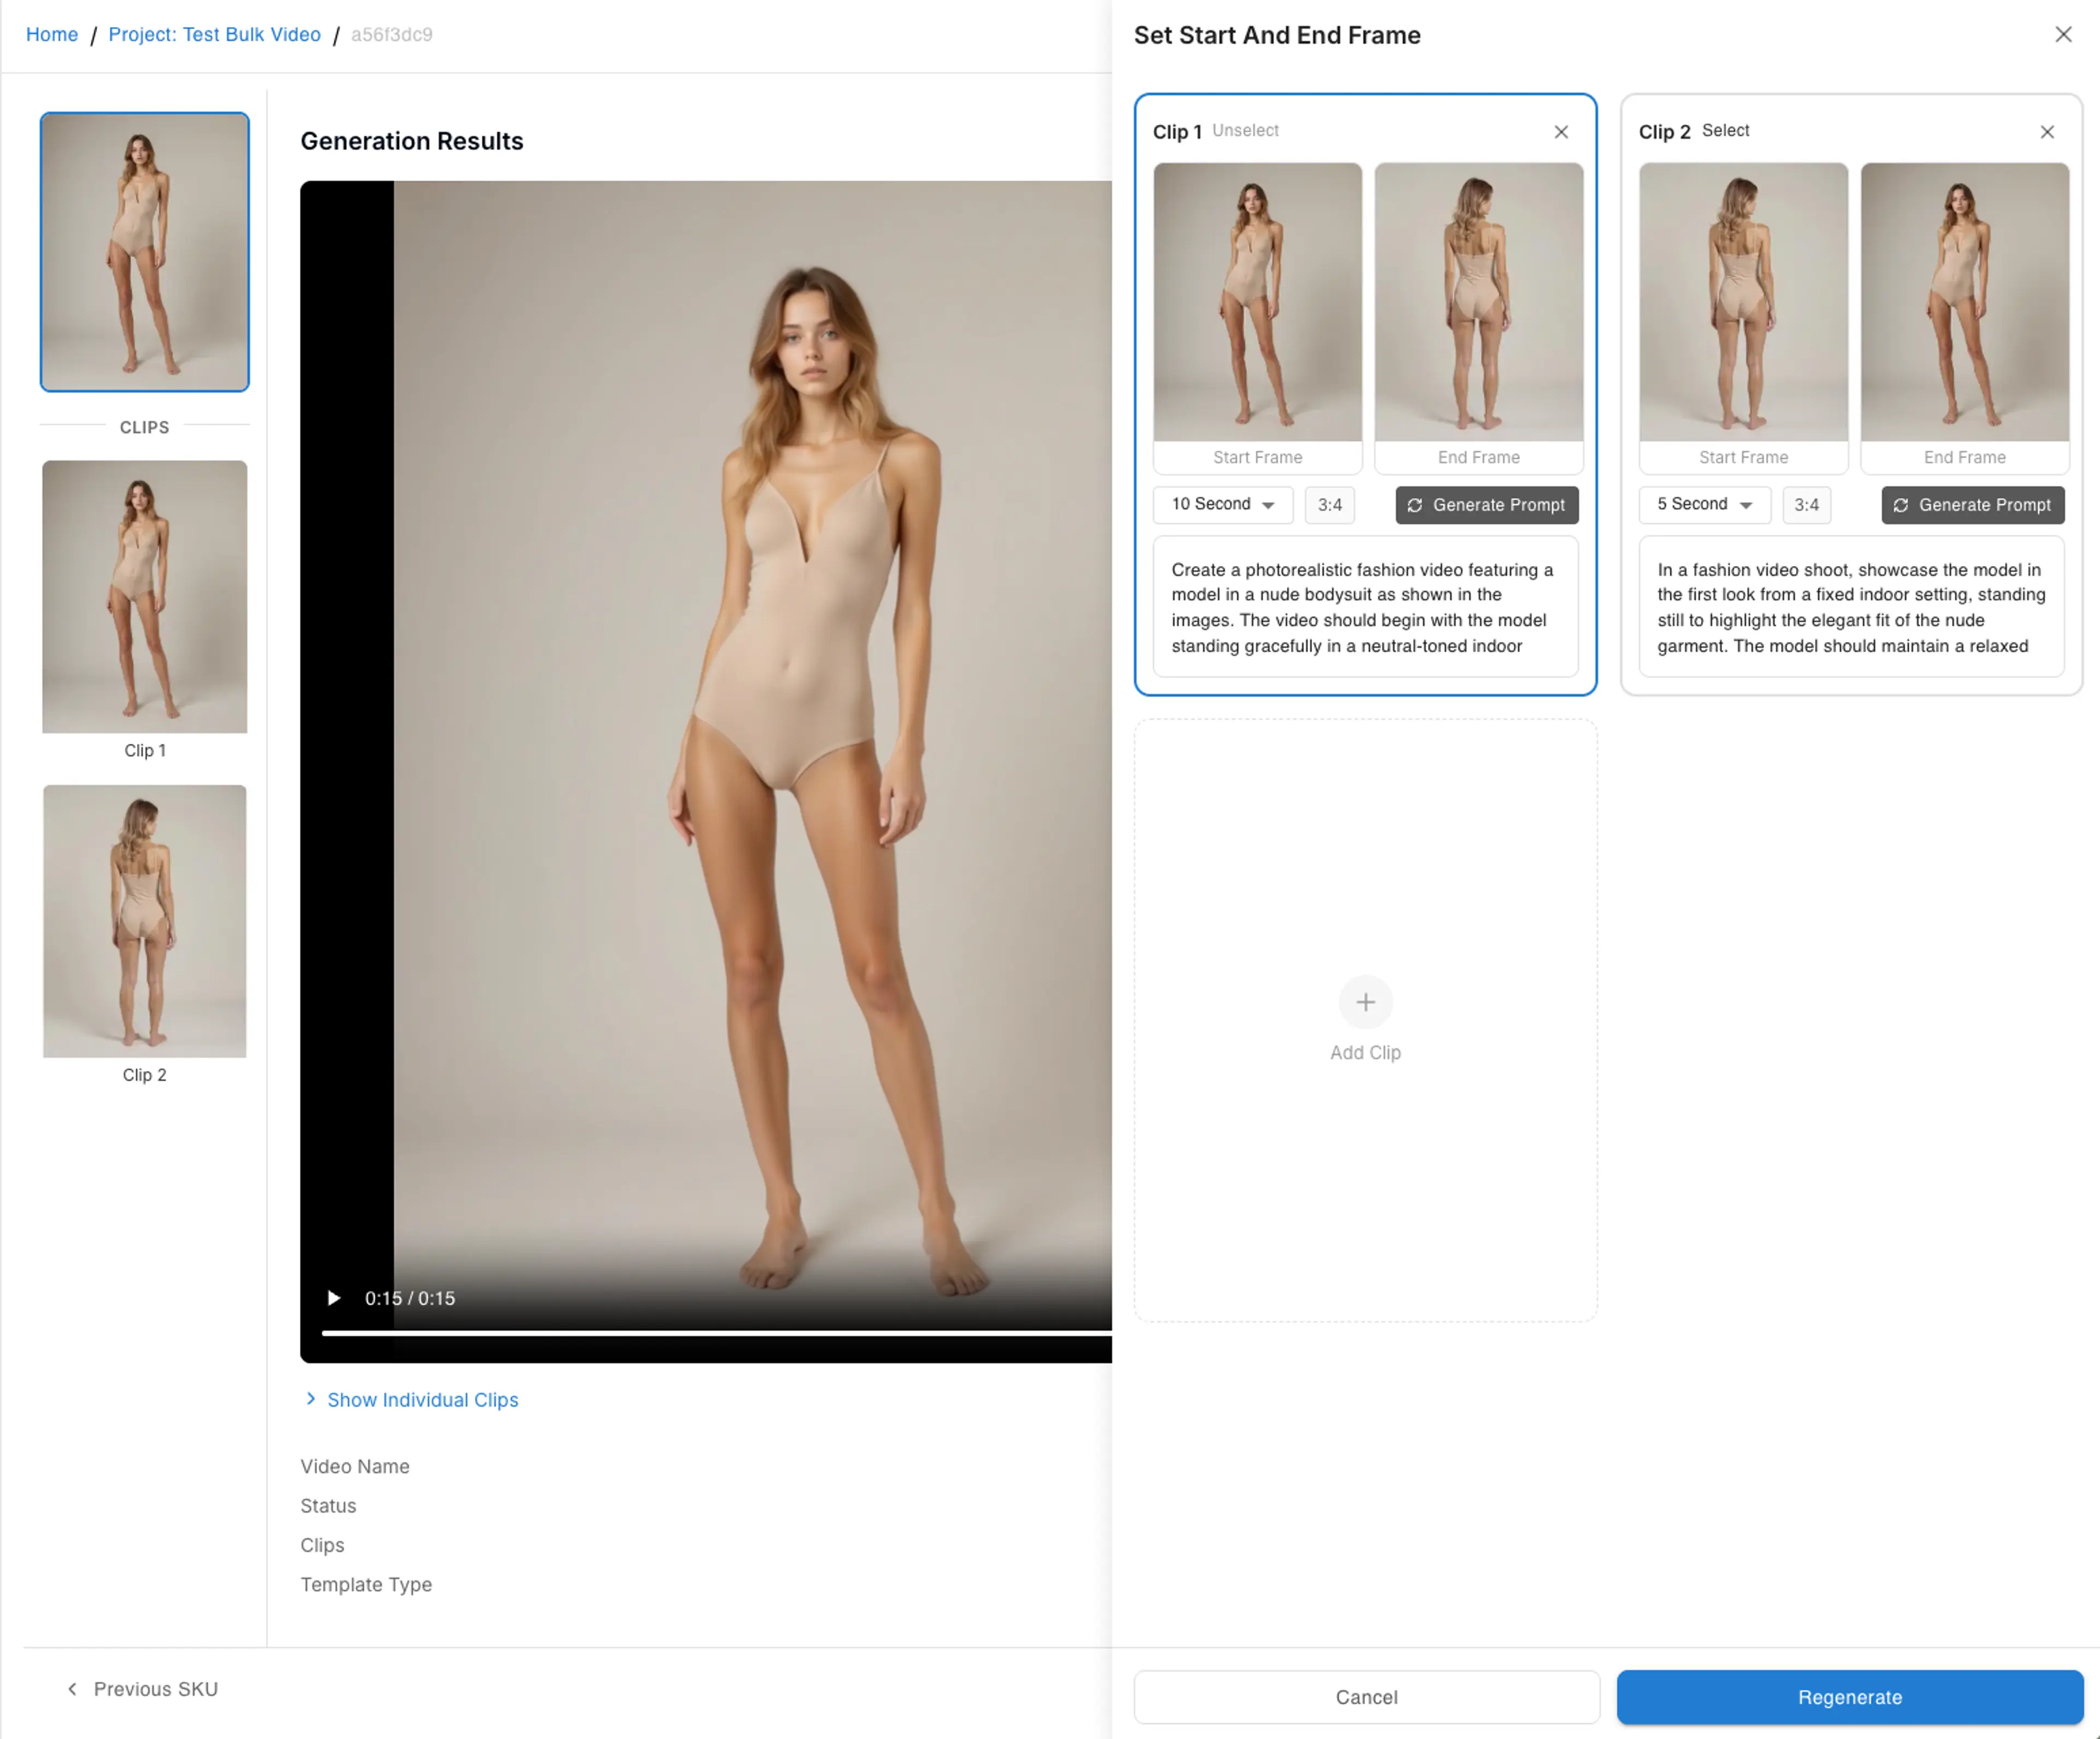
Editing Clip Details
Click on any clip to view and edit its details. The Set Start And End Frame panel lets you:
- View and adjust the Start Frame and End Frame for each clip
- Change the video duration and aspect ratio per clip
- Generate or edit the AI prompt that describes the video motion
- Add additional clips using the Add Clip option
Step 6: Generate AI Prompts
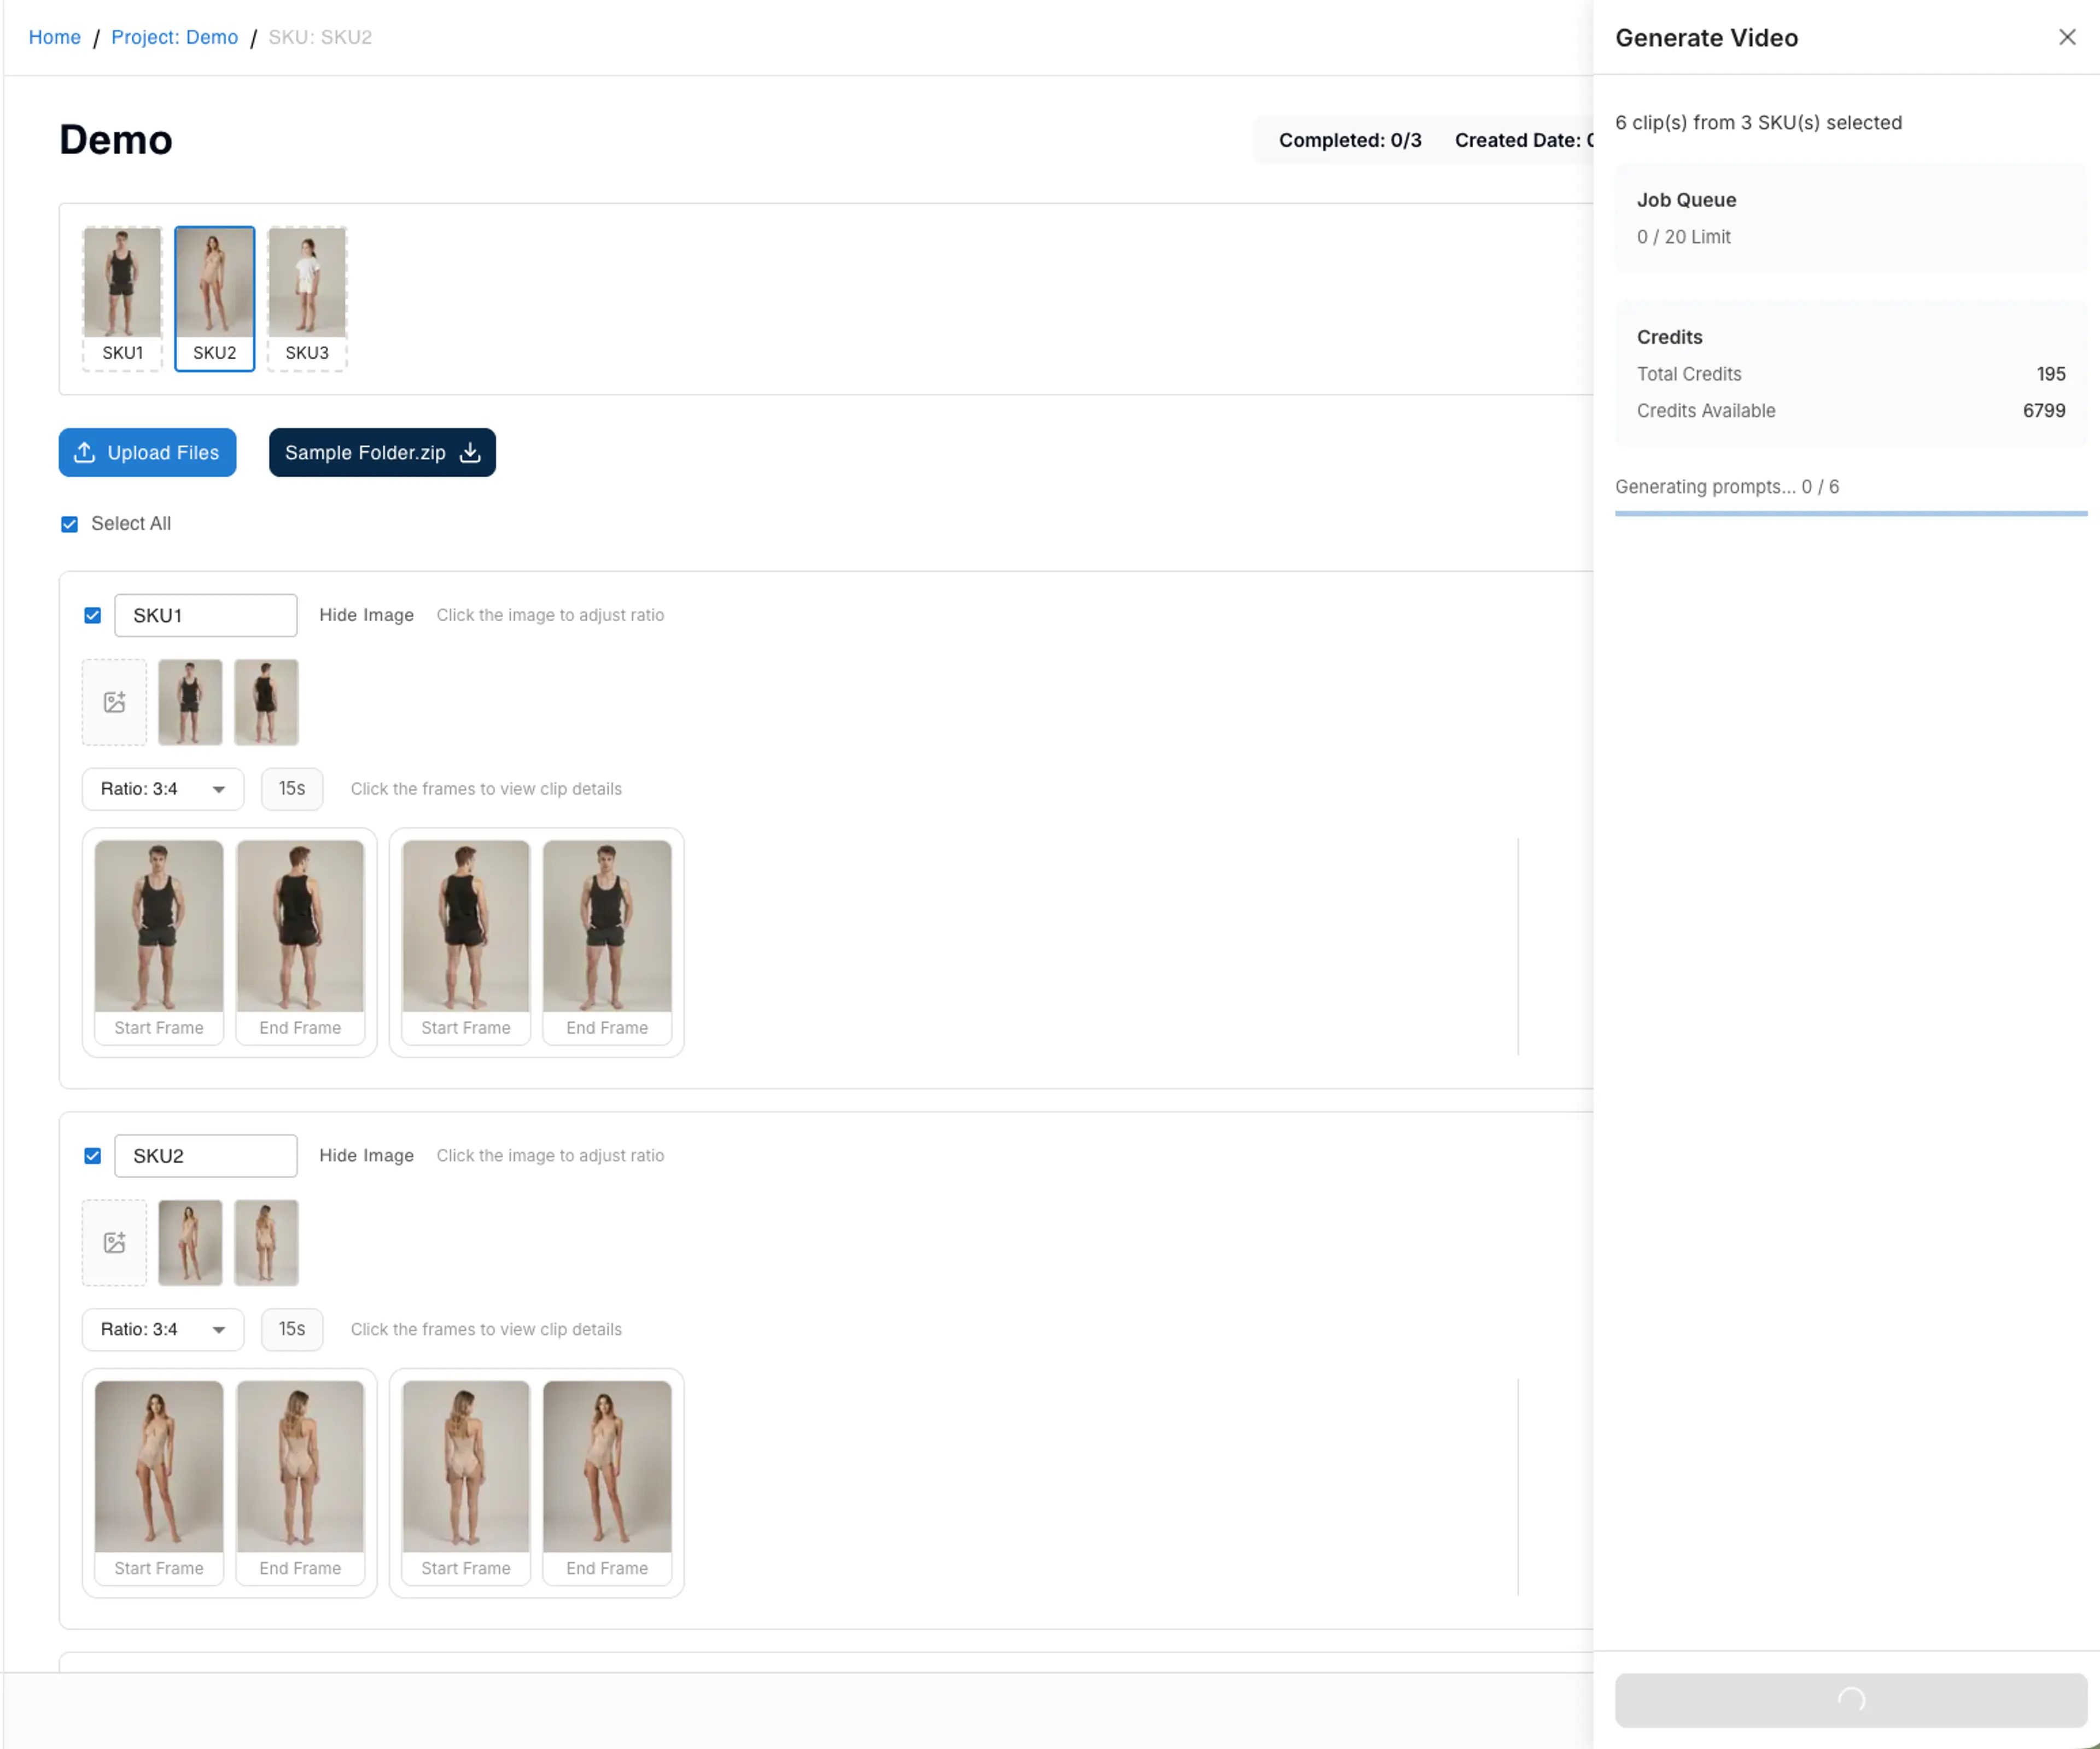
Click the Generate Video button to open the generation panel. If your clips are missing prompts, you will see a warning indicating how many clips need prompts. Click Generate Prompt to have the AI automatically create descriptive prompts for all selected clips.
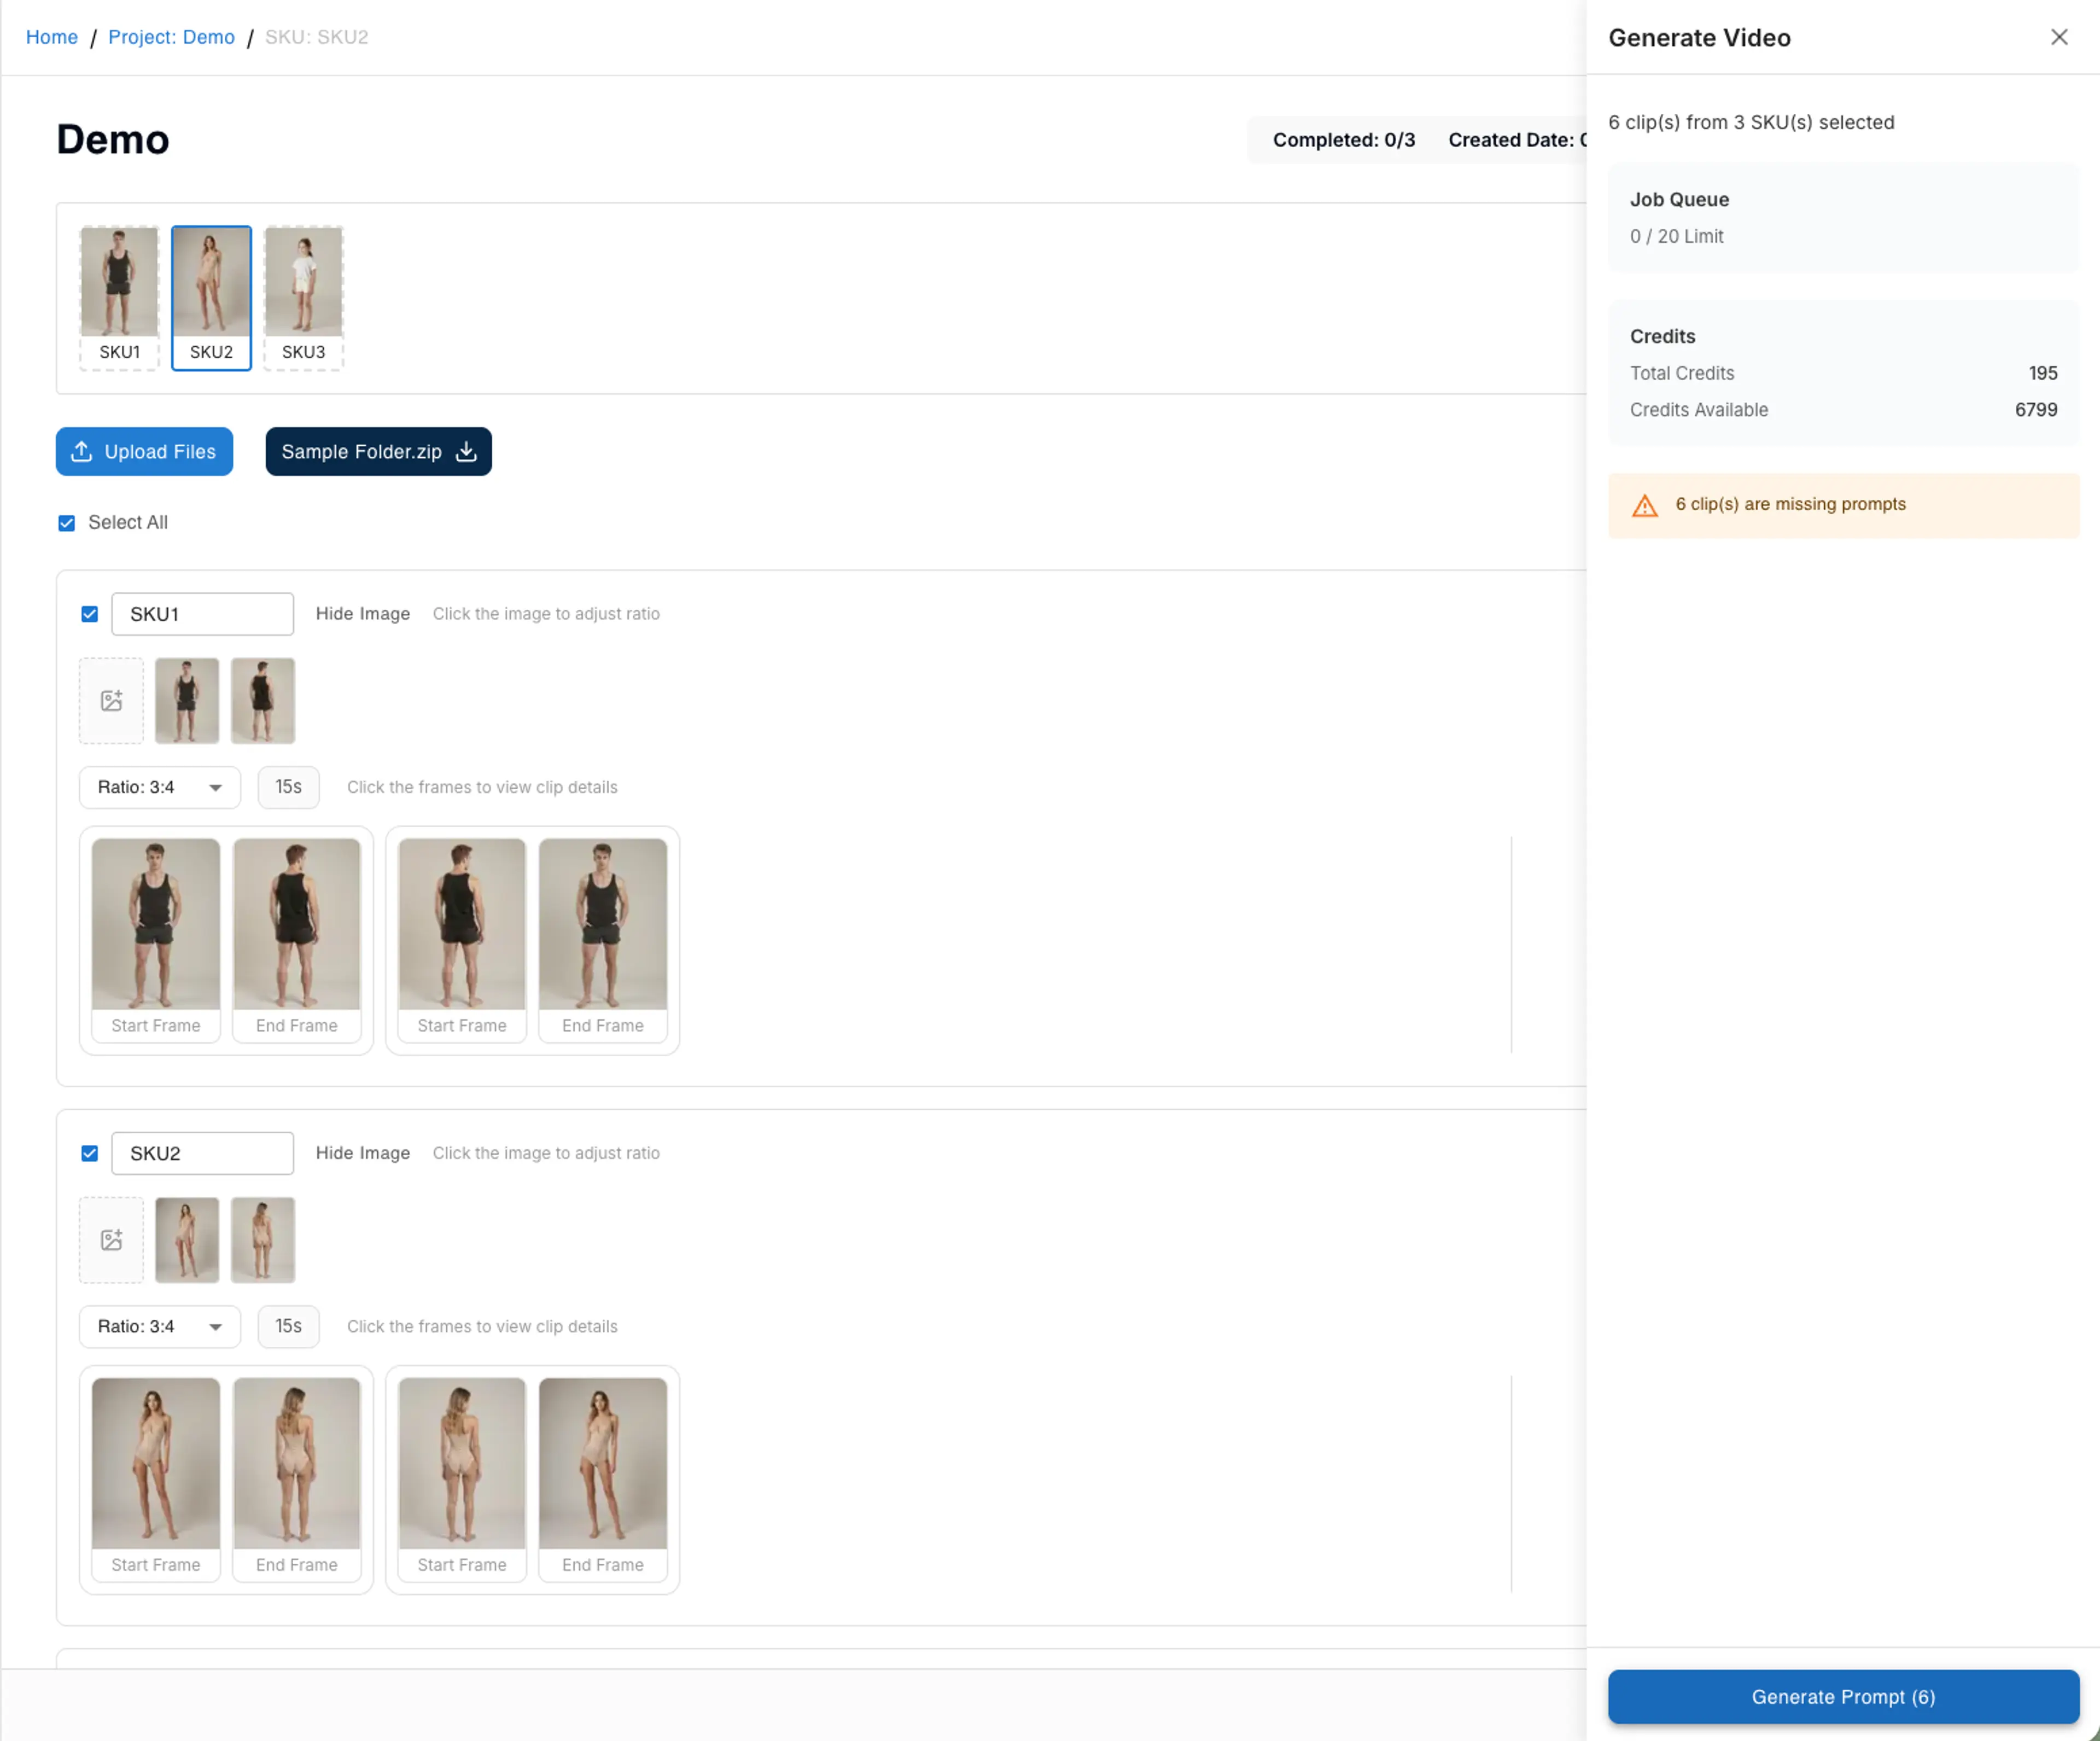
The system will analyze the images in each clip and generate detailed fashion video prompts describing the model's pose, clothing, and movement. You can see the progress as prompts are generated for each clip.
Step 7: Generate Videos
Once all prompts are generated, review the credit cost shown in the Generate Video panel. The panel displays the total credits needed and your available credit balance. The Job Queue shows how many video generation jobs are currently in progress (up to 20 concurrent jobs).
Click Confirm to start the video generation process. The generation may take a few minutes depending on the number of clips and video length.
Step 8: View and Download Results
Once generation is complete, you can view the results on the project overview page. Each clip will display its generated video alongside the original start and end frames. You can play each video directly in the browser to review the quality.
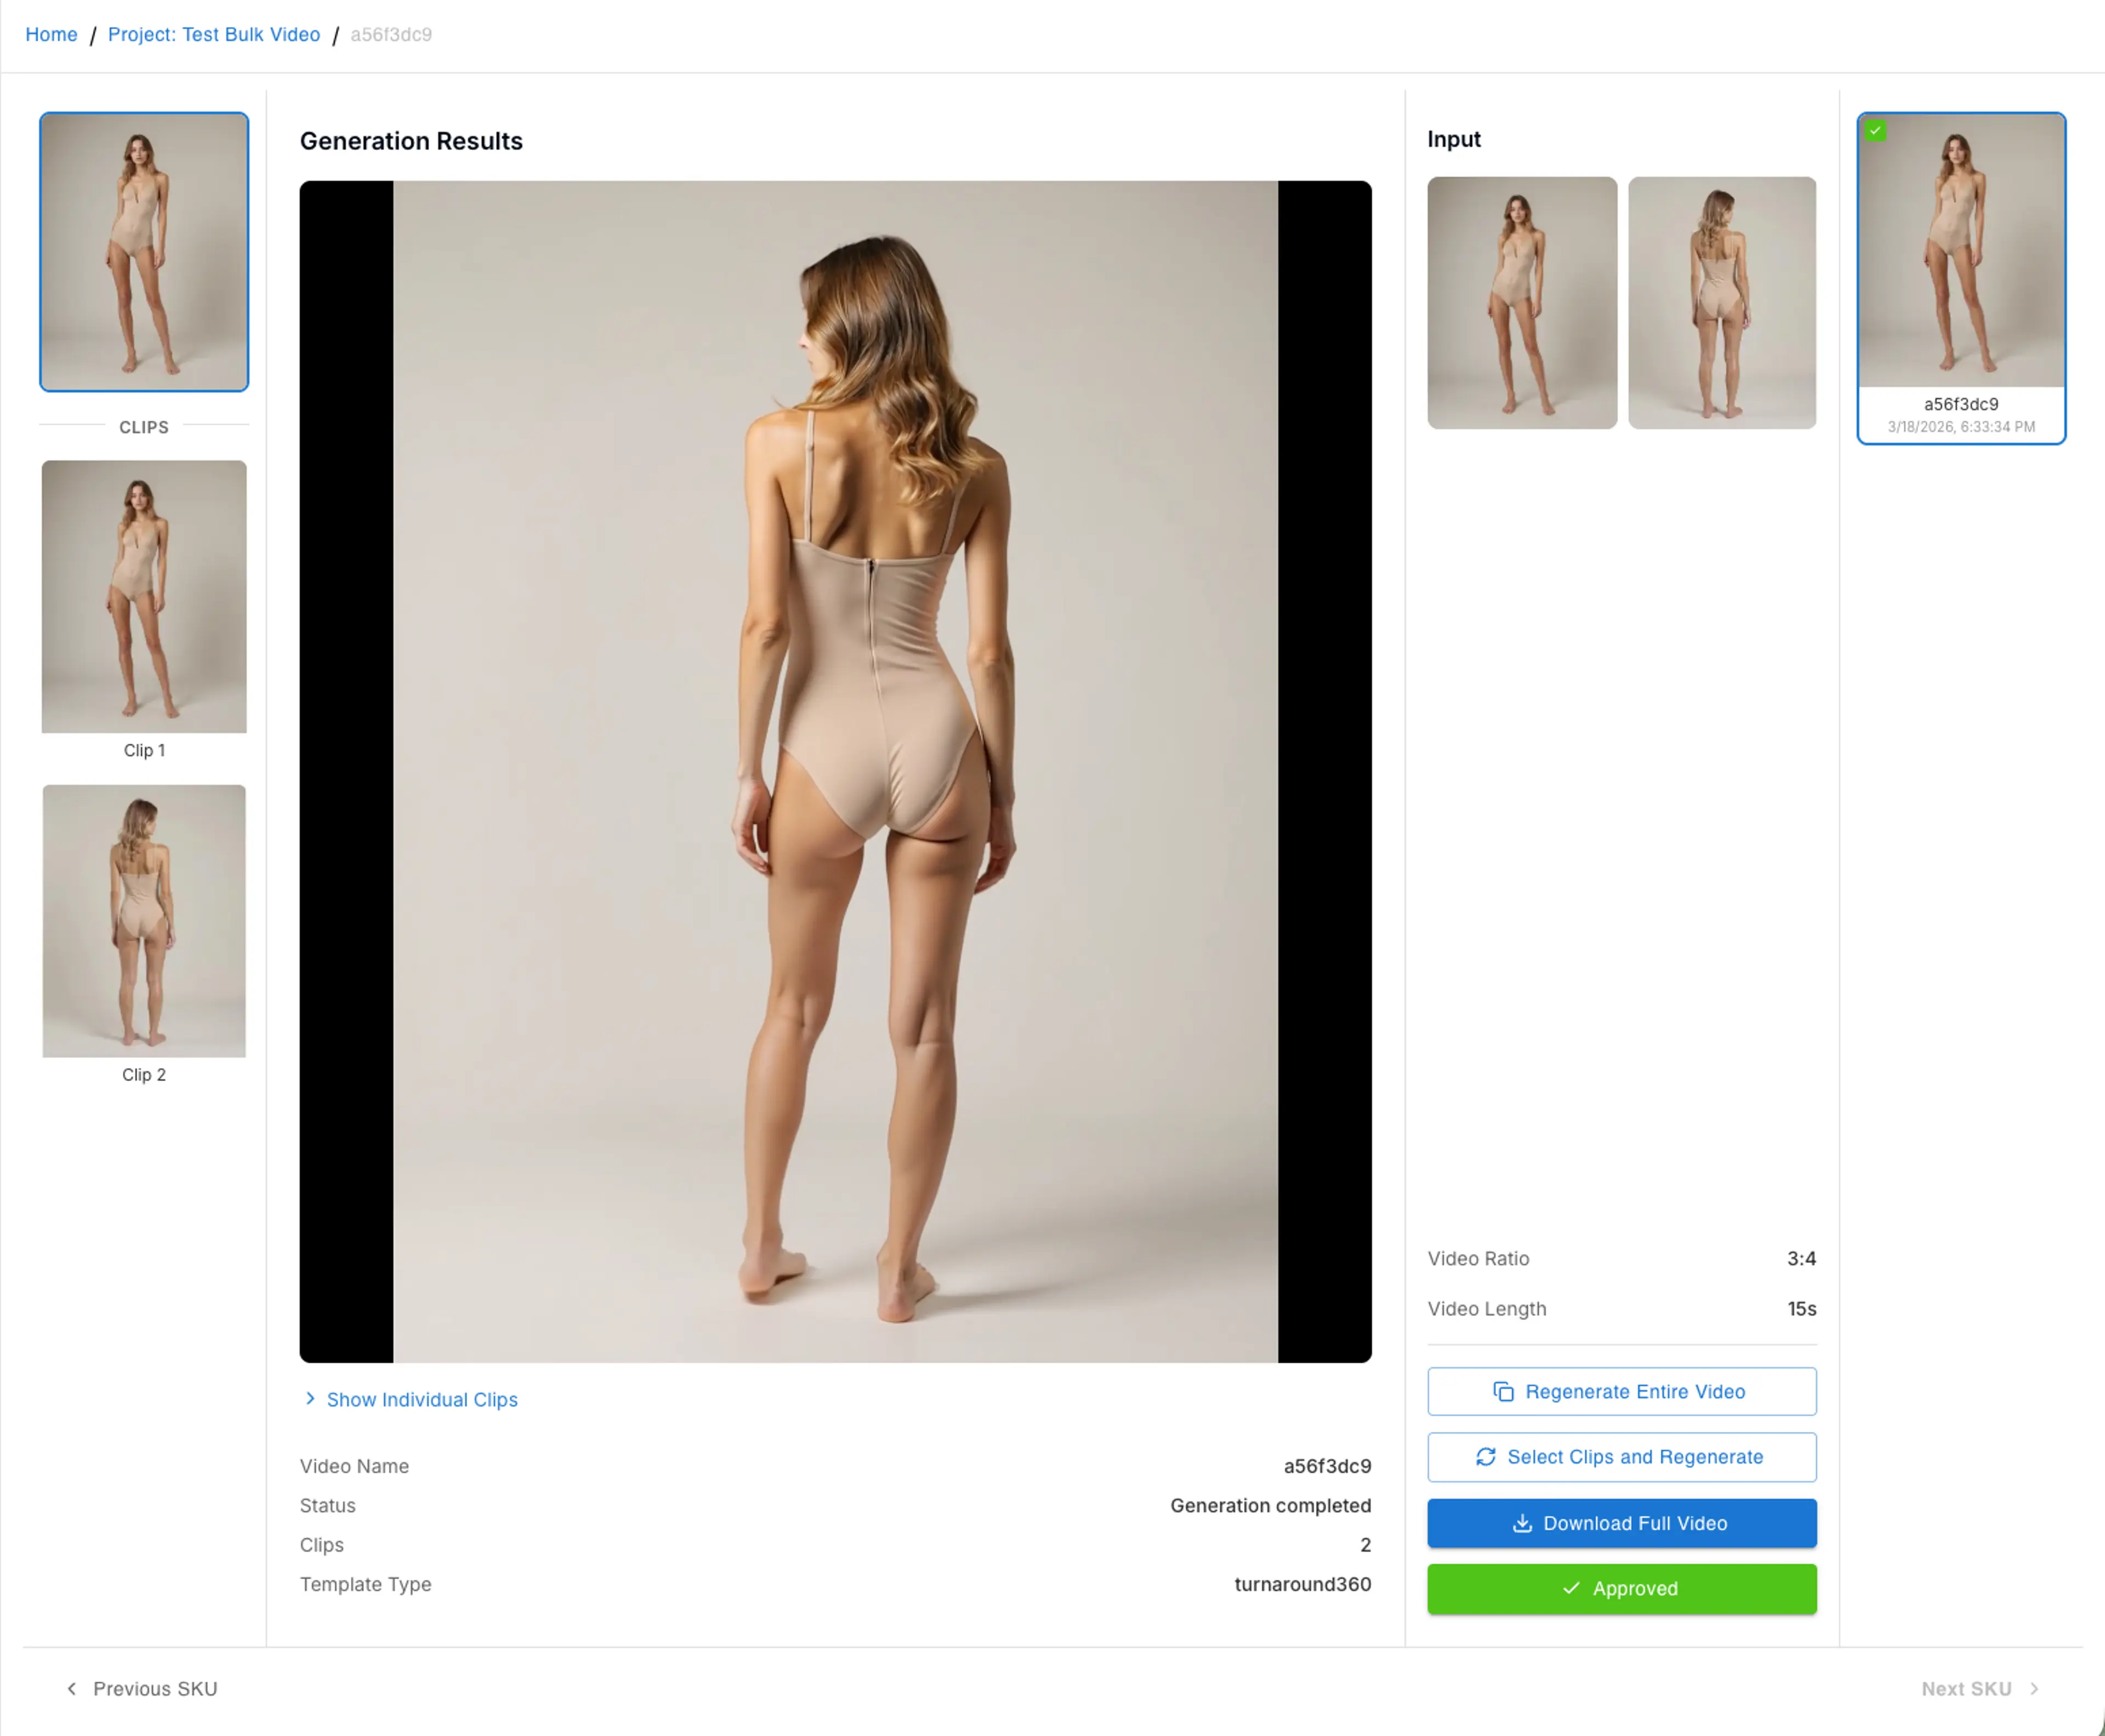
Step 9: Regenerate Clips (Optional)
If any video clip does not meet your expectations, you can regenerate individual clips without affecting the others. Simply click on the clip you want to redo and select the regenerate option. You can also edit the prompt before regenerating to get a different result.
Tips for Best Results
- Use high-resolution images (at least 1024px on the shorter side) for the best video quality
- Include images from multiple angles — front, back, and side views create more dynamic video transitions
- Keep consistent lighting and background across images within the same SKU for smoother videos
- Use the Multi Clips template for longer videos with multiple scene transitions
- Review and edit AI-generated prompts before generating to ensure they match your creative vision
- Start with a small batch (3-5 SKUs) to test settings before processing your full catalog
Related Tutorials
How to Generate Video From Uploaded Images
If you want to create video from uploaded images, you can upload any image you like without being restricted to the try-on images created from the projects.
How to Regenerate Try-On Images
Learn three ways to regenerate try-on images: with the same input, using a result as model image, or using a result as garment image for consistent looks.