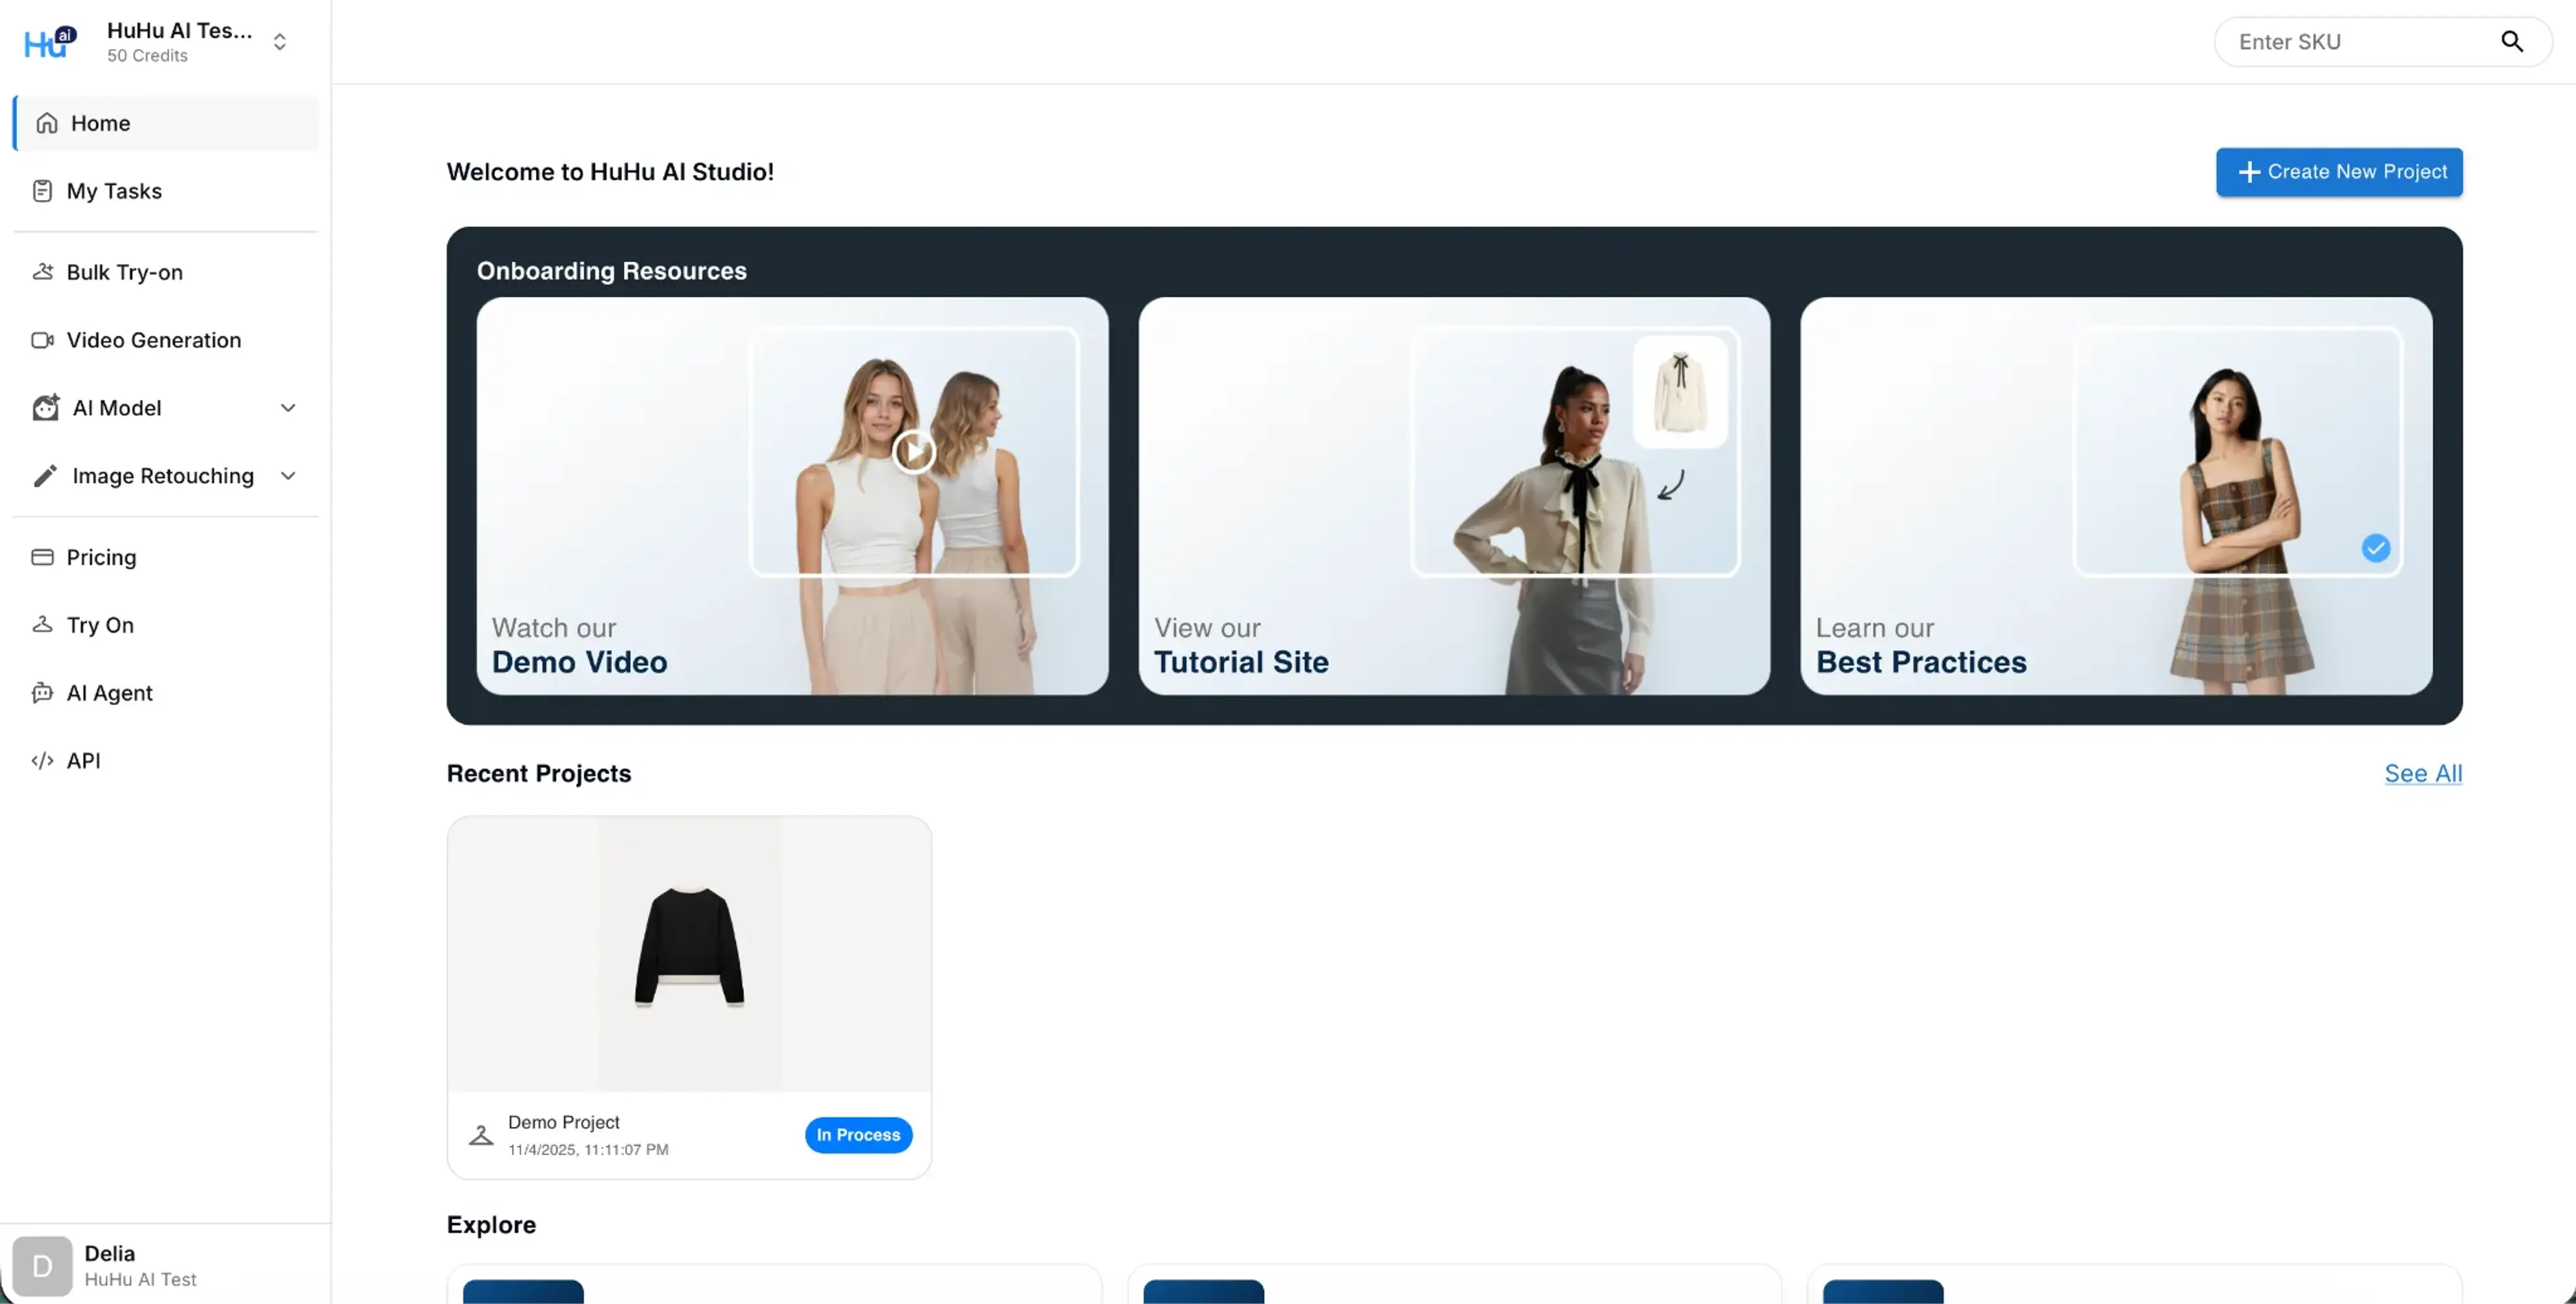
How to Create a Bulk Garment Try-On Project
Step 1: Visit the Try-on Projects
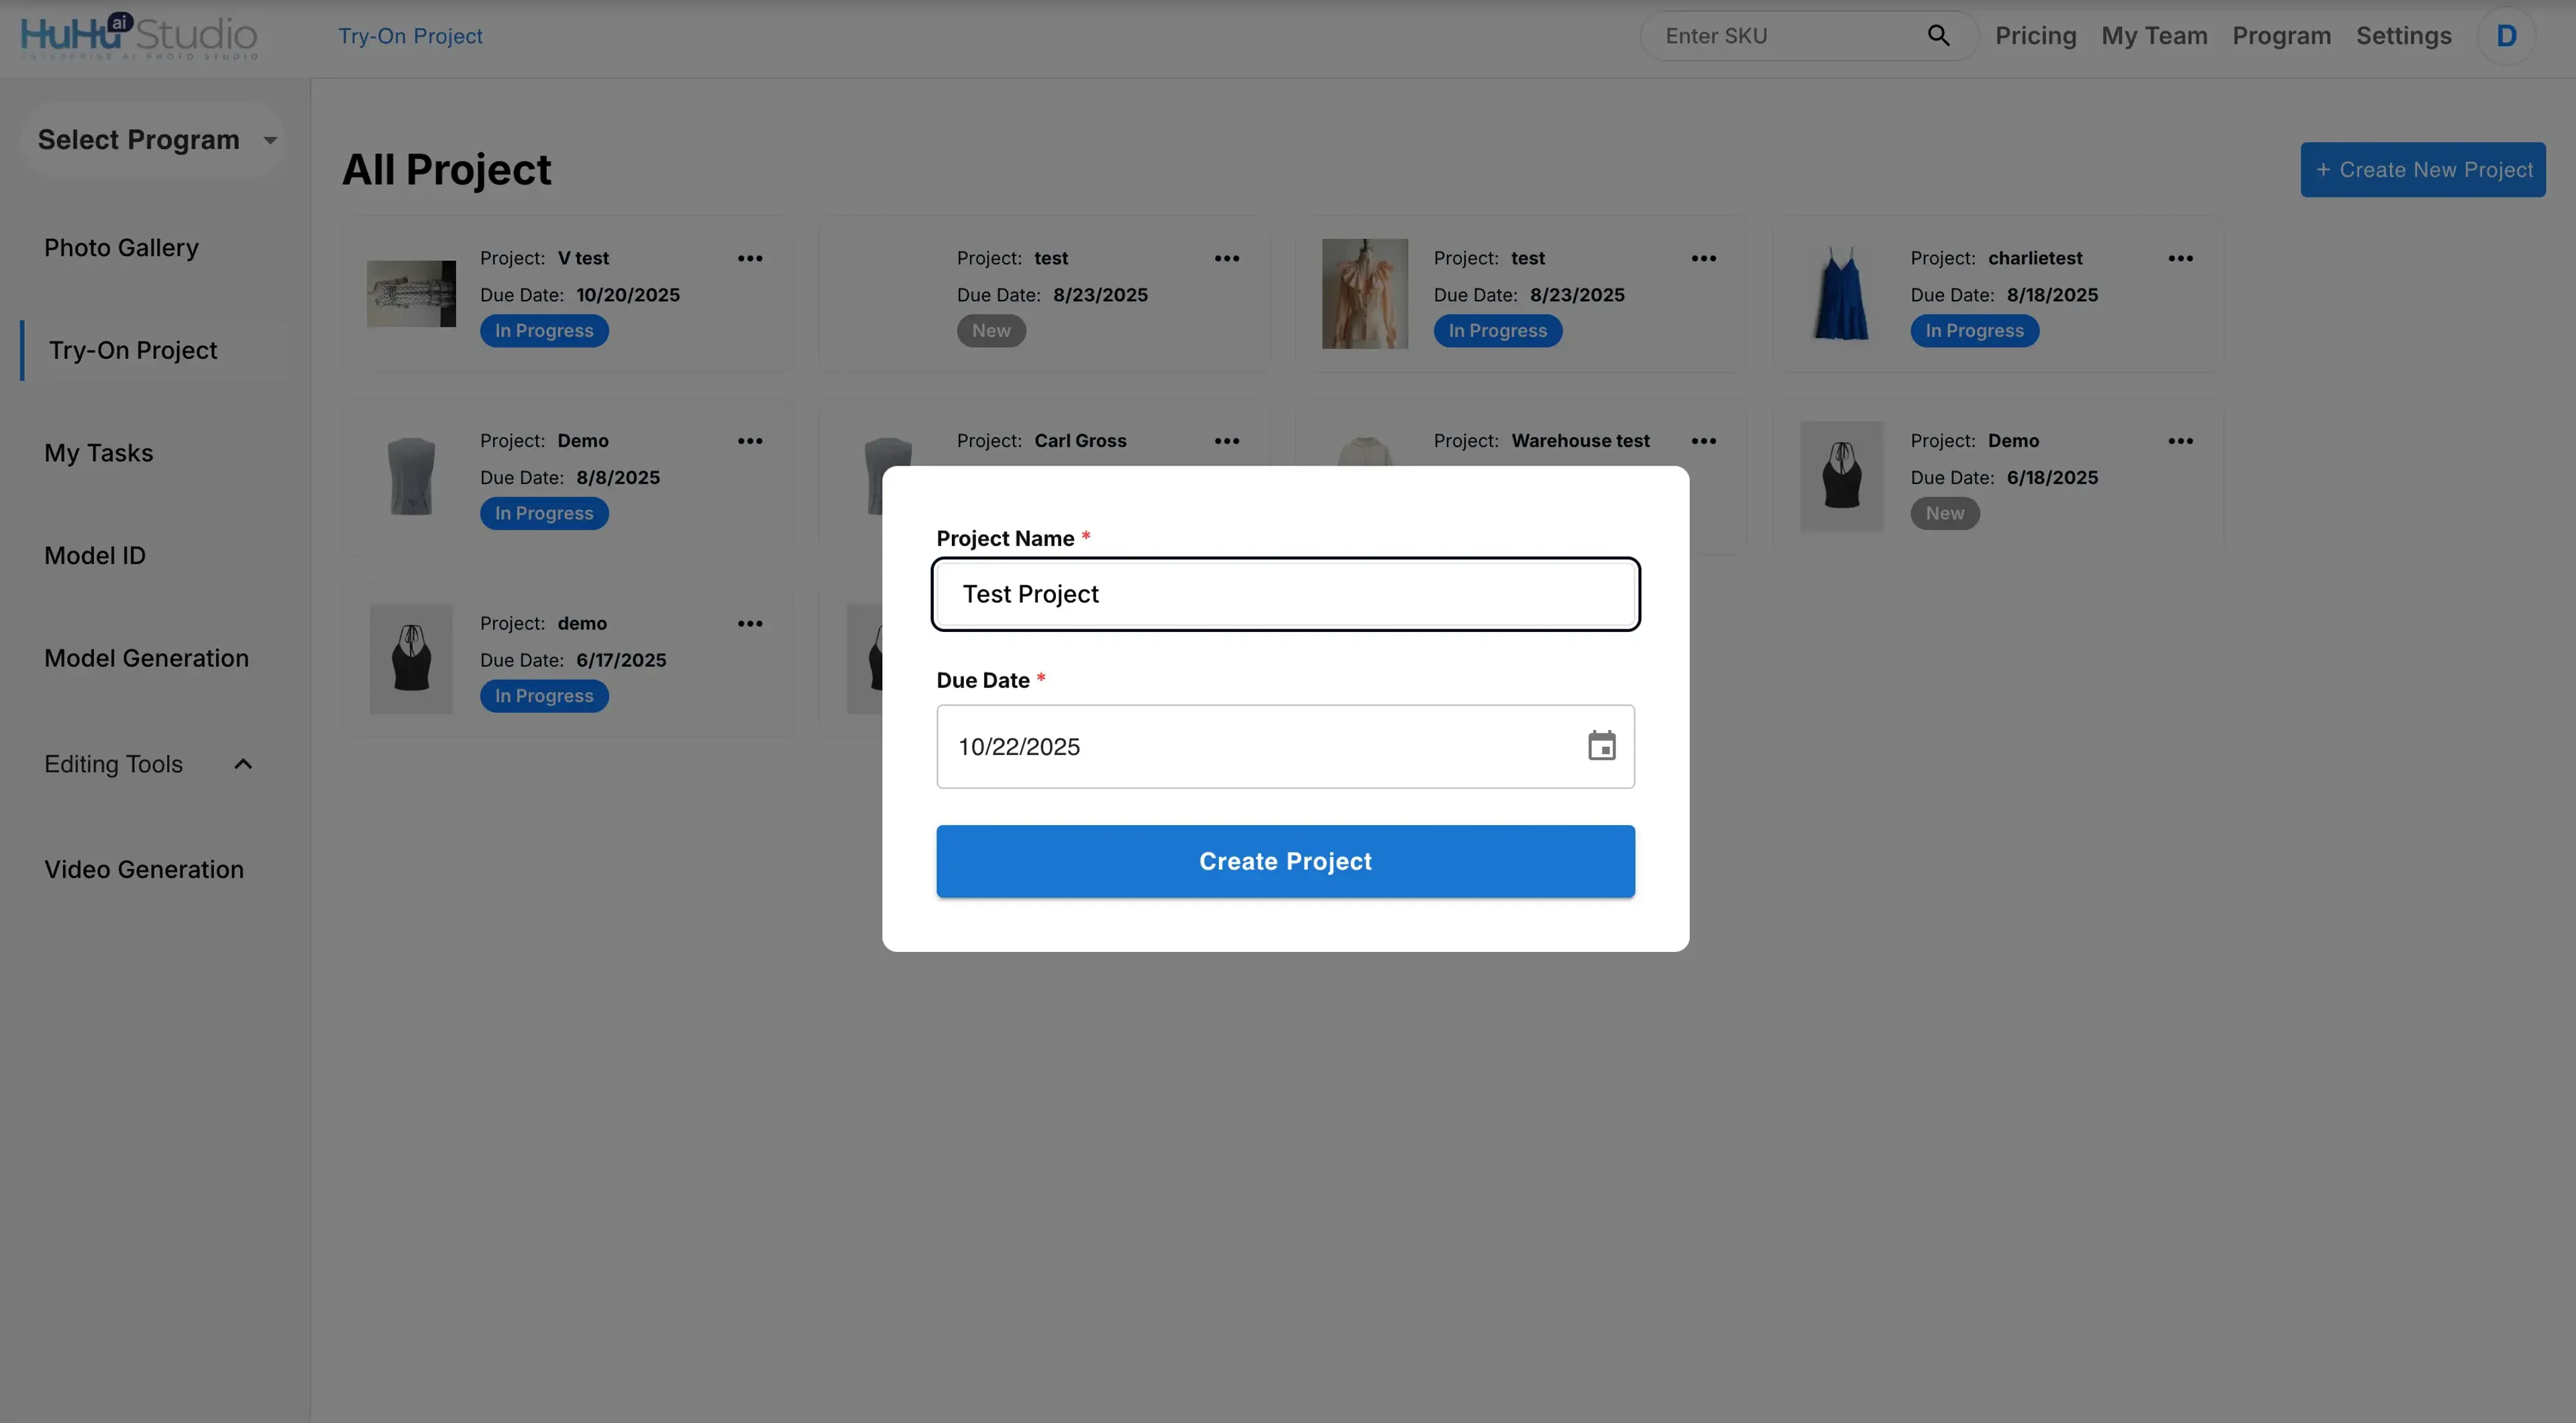
From the navigation bar on the left, navigate to the Try-on Project tab. Click the “Create New Project” button on the upper right corner.
You’ll be prompted to enter the project name and its deadline.
Step 2: Download the sample zip file
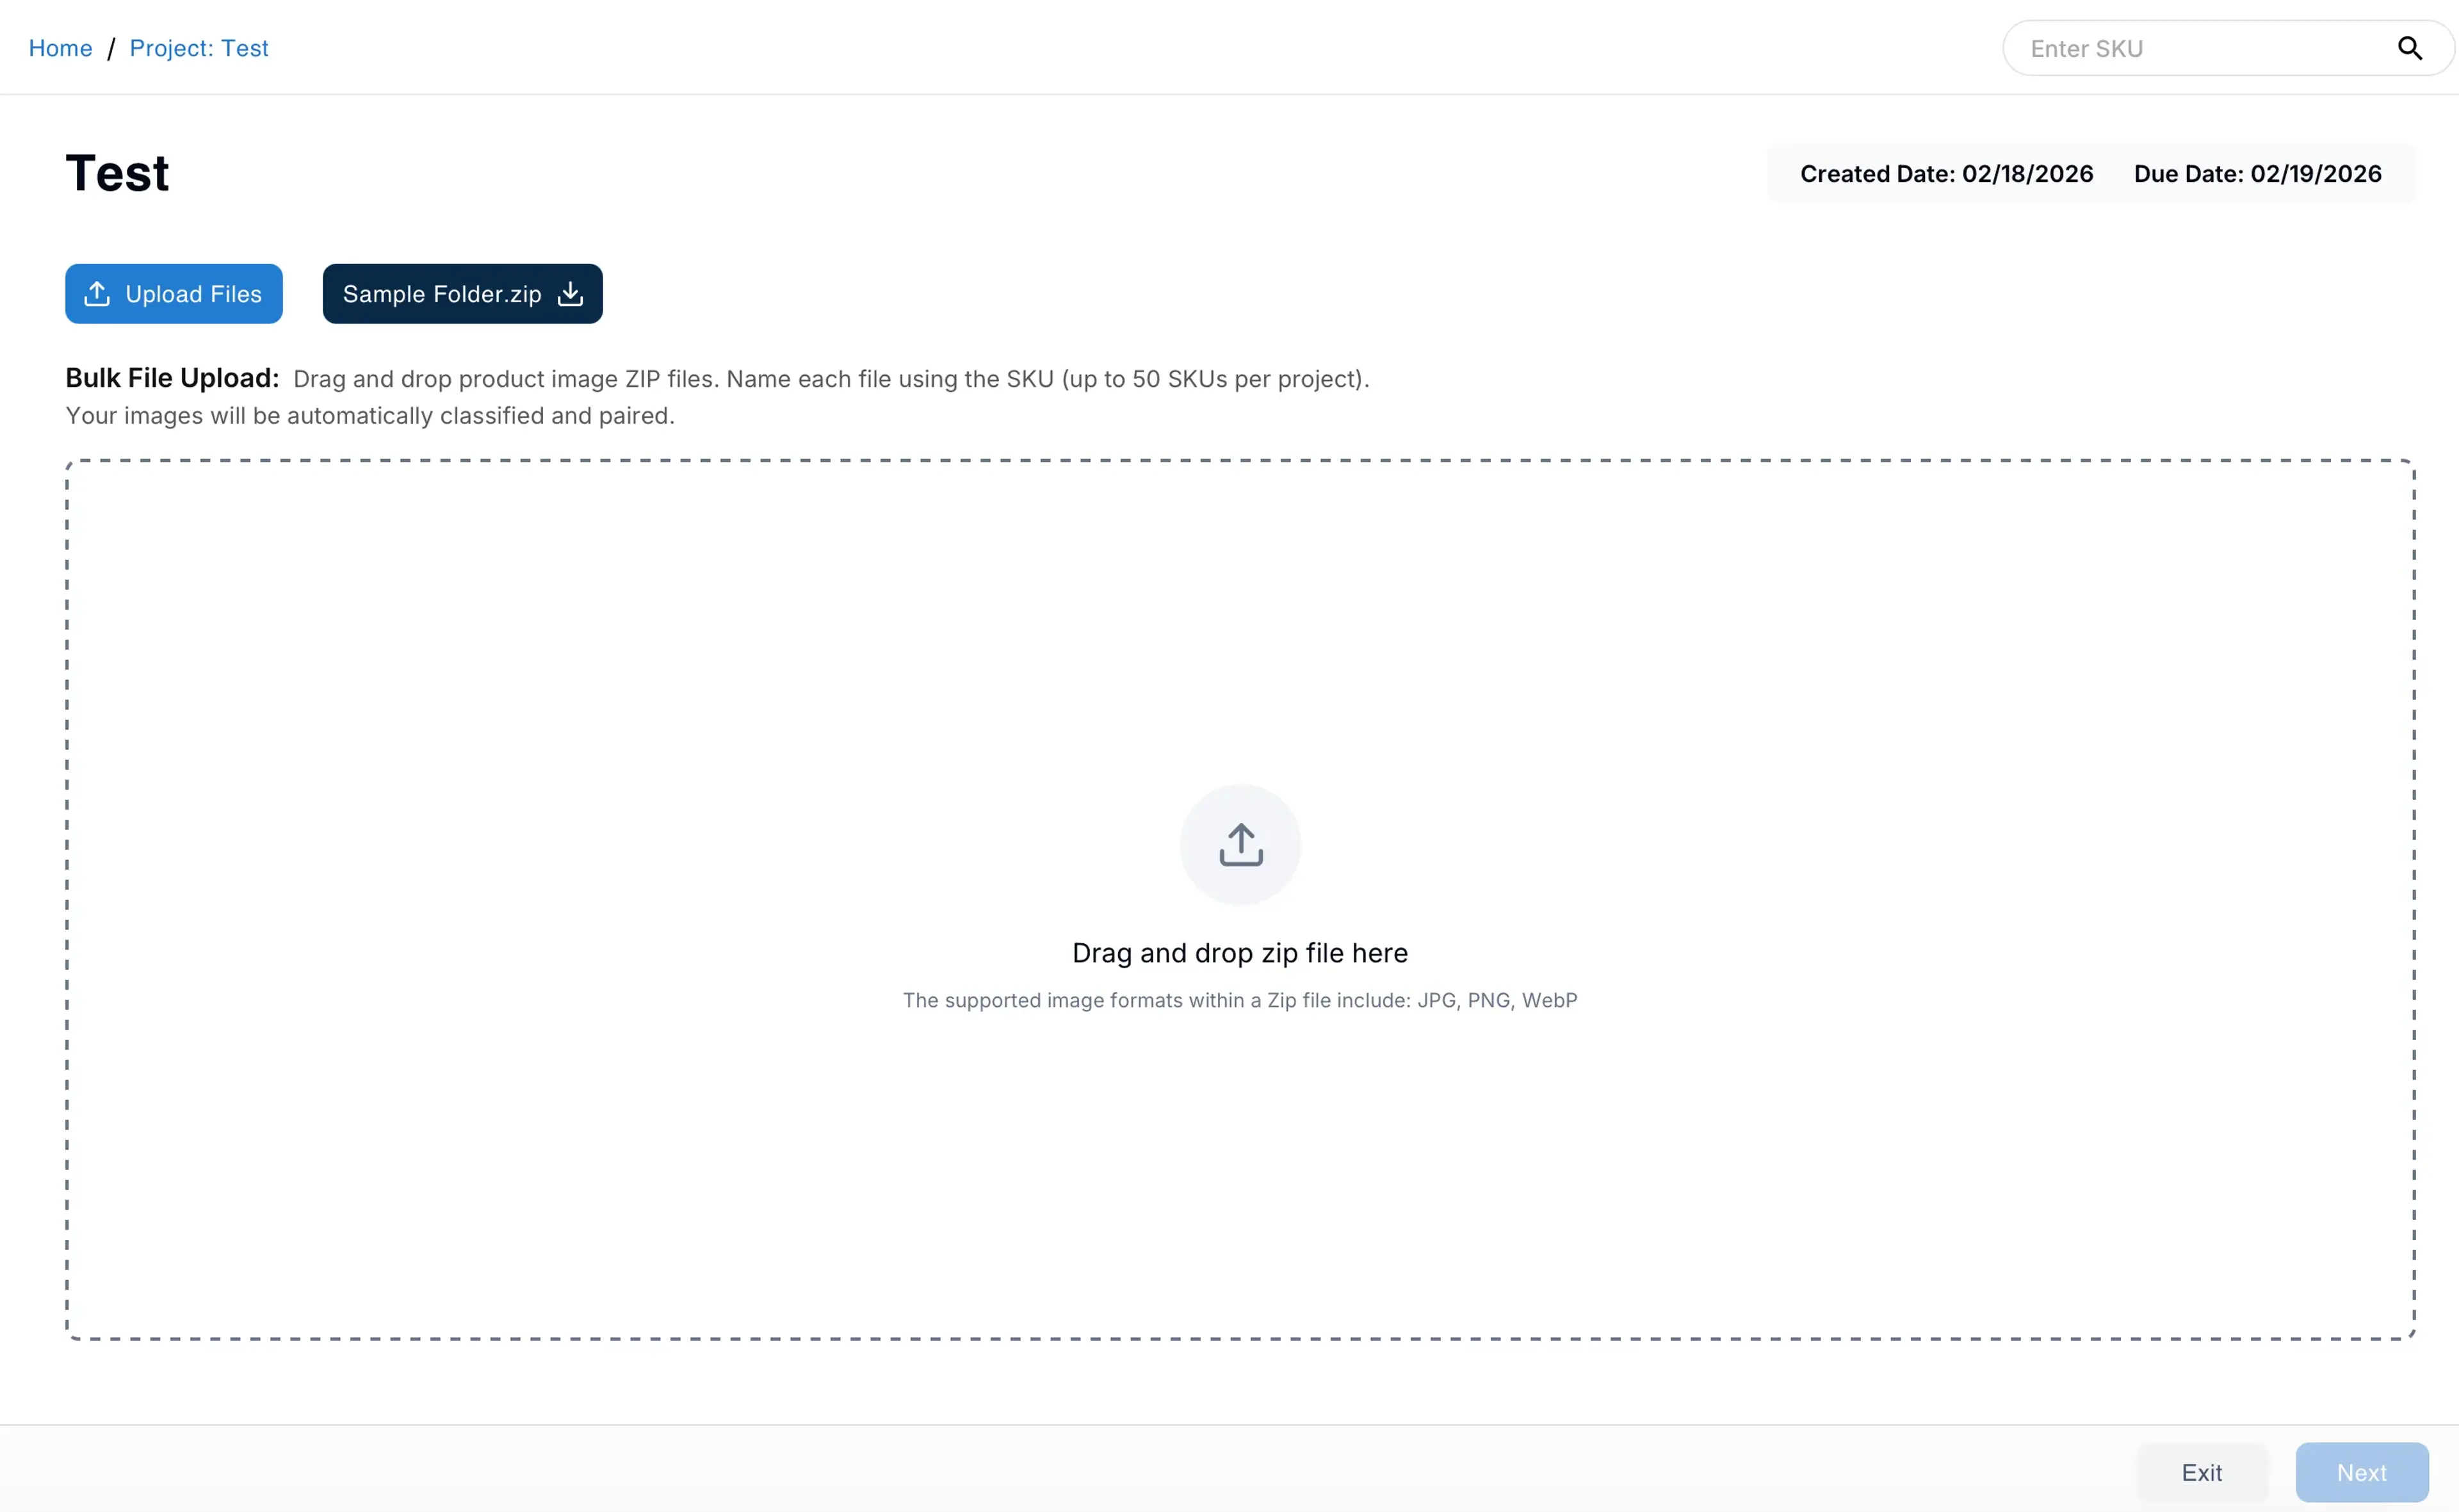
You’ll see a project creation screen. Click the sample folder zip button to download the zip file template, unzip it in your computer.
Step 3: Prepare your garment folder
Inside the unzip file, you will see a few subfolders. Organize your folder one SKU per folder. You can name the folder name in any way you like. A best practice is to name it with the SKU ID in your system.
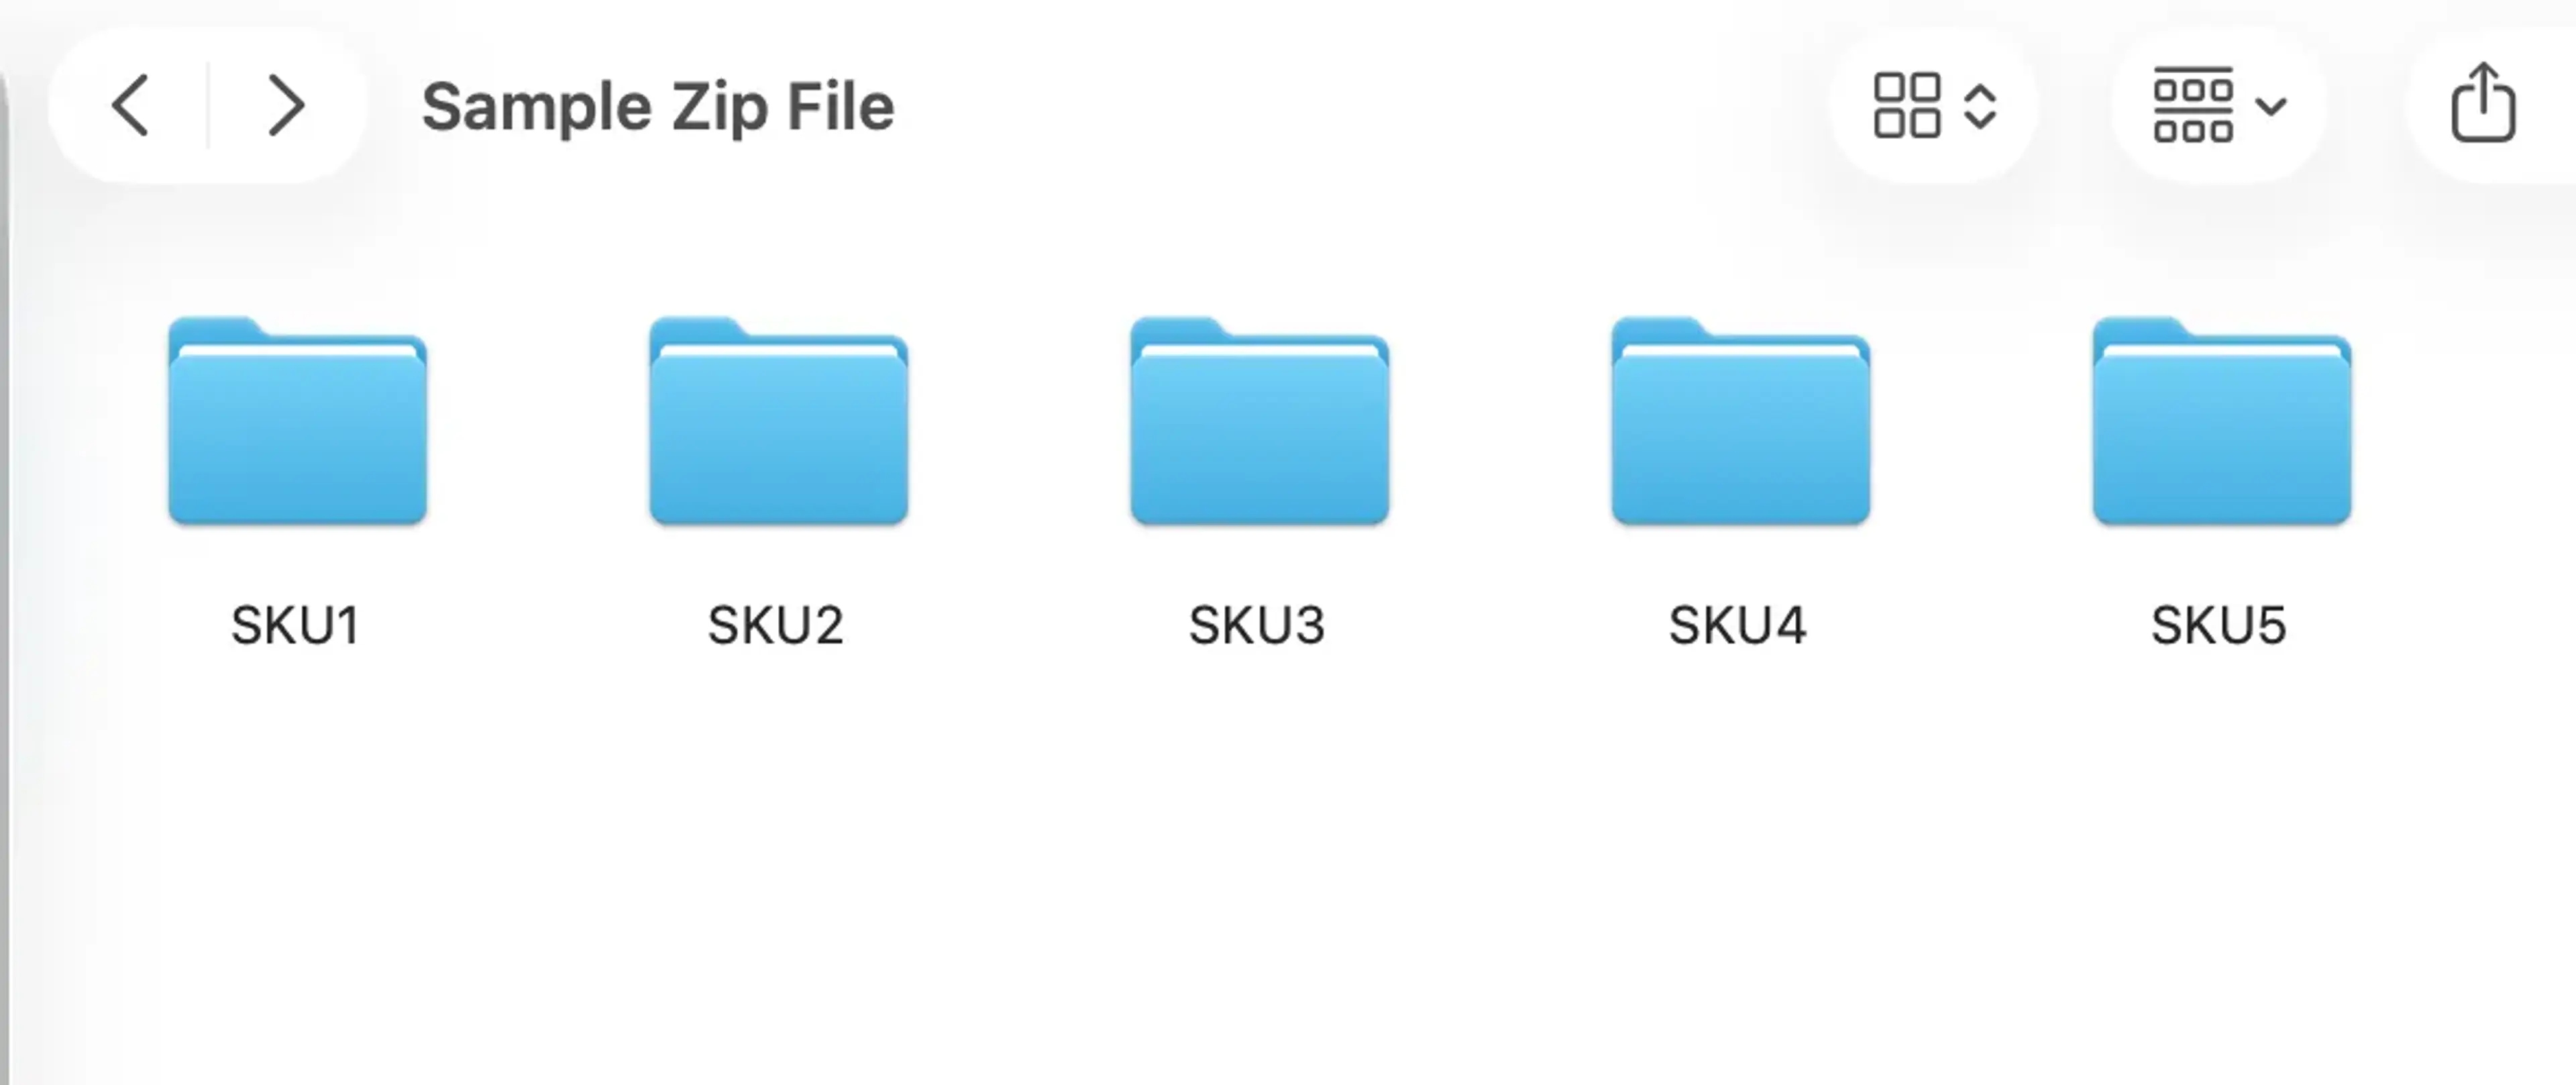
Inside of each of the SKU folders, you can add all the images including garment images, pairing garment images, accessories and also try-on reference images all in one place.
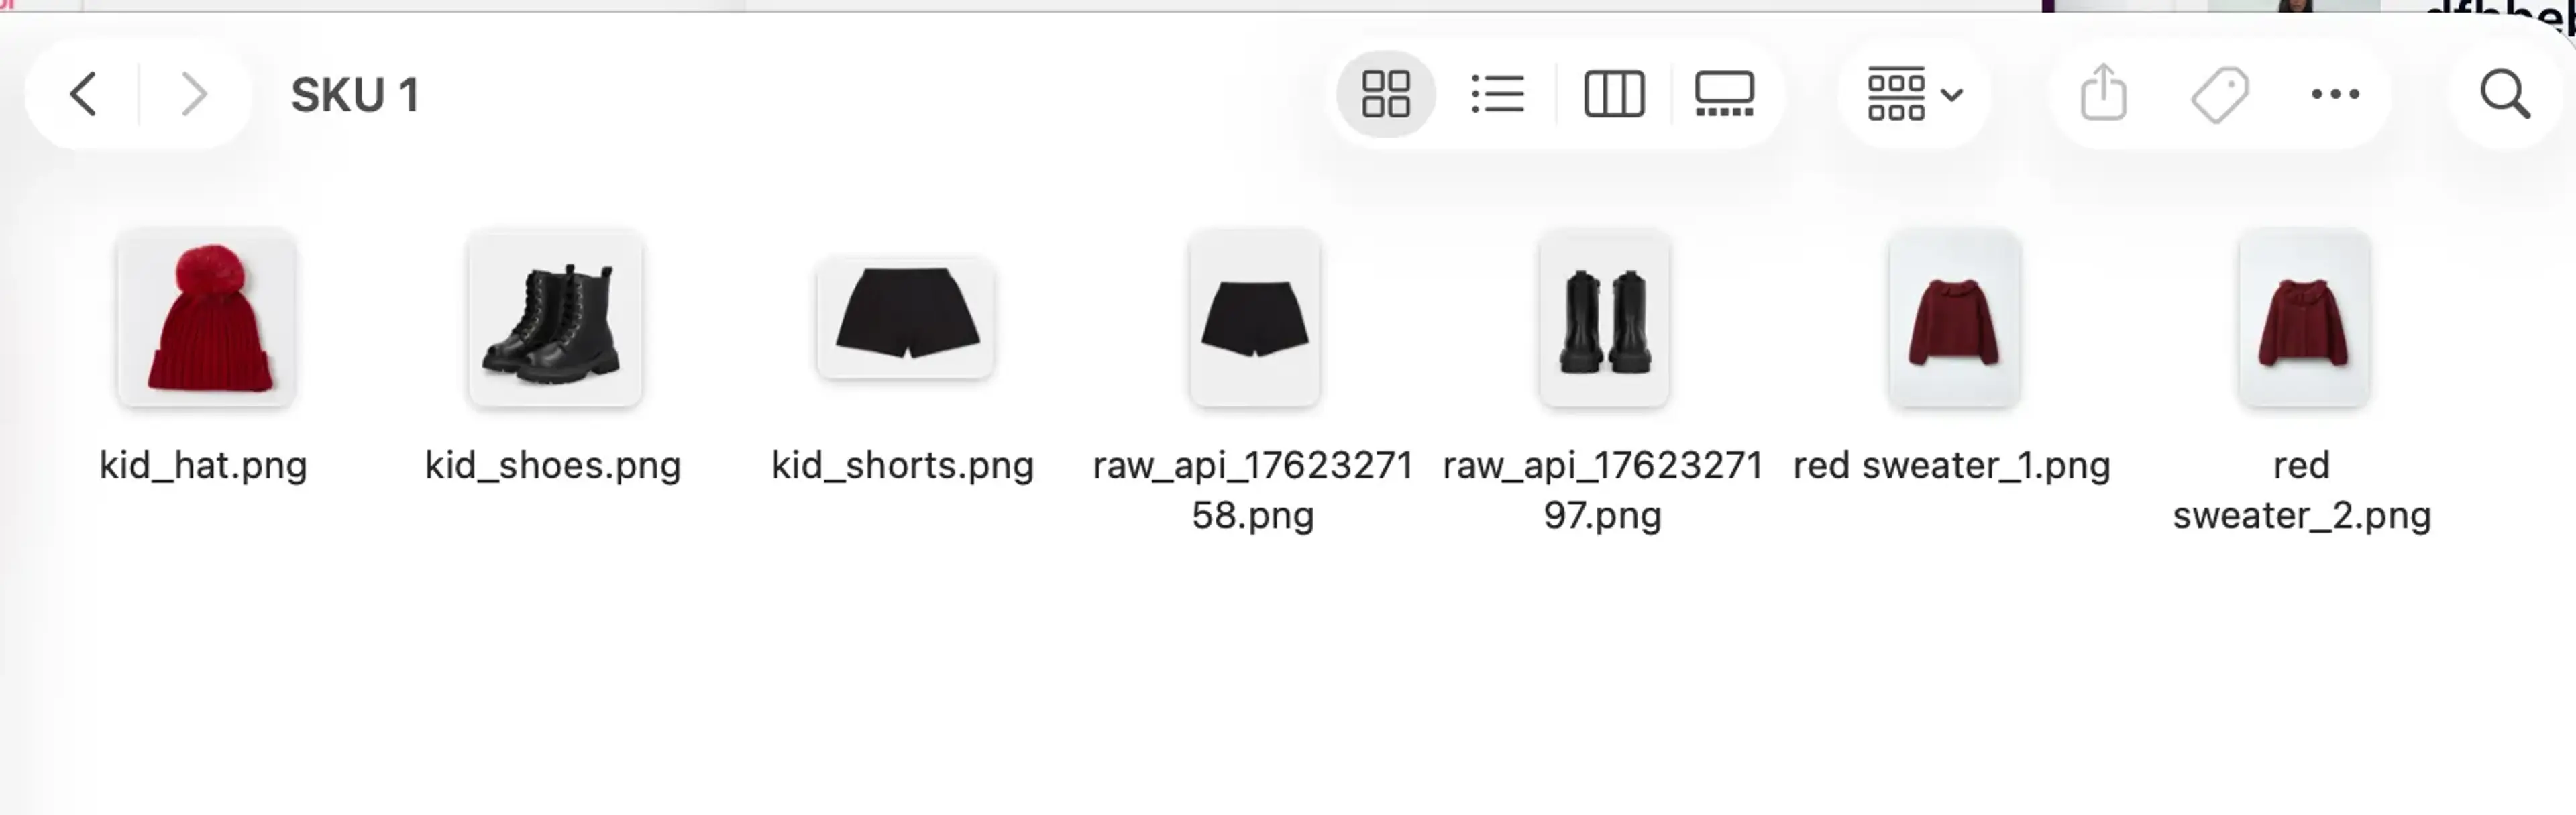
No naming convention is required for the image files, it can be any names you use in your system.
Step 4: Zip your folder
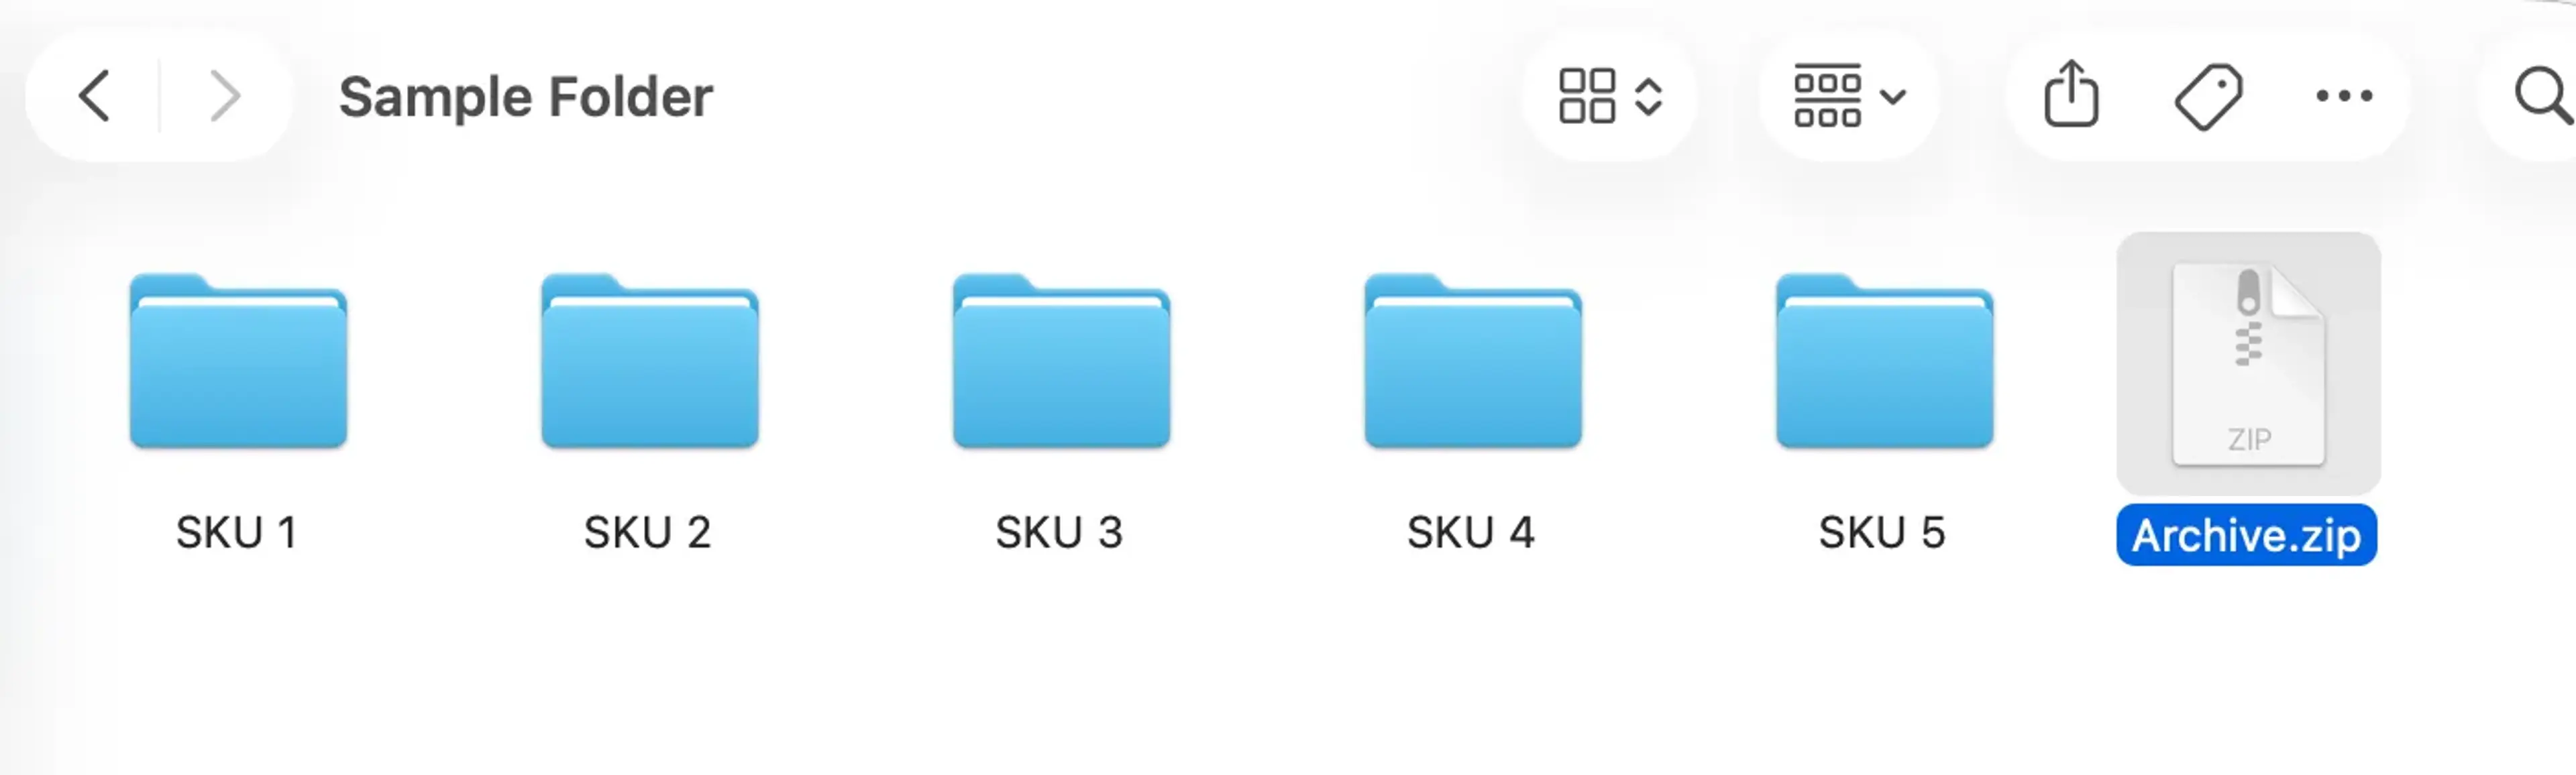
Once you are done with your garment folders, select them all and compress them into zip file.
Important: Do not create and zip a parent folder for the SKU folders, it will create unnecessary layers of the folder structure and fail the process. Your zip file should be in the same folder as the SKU folders.
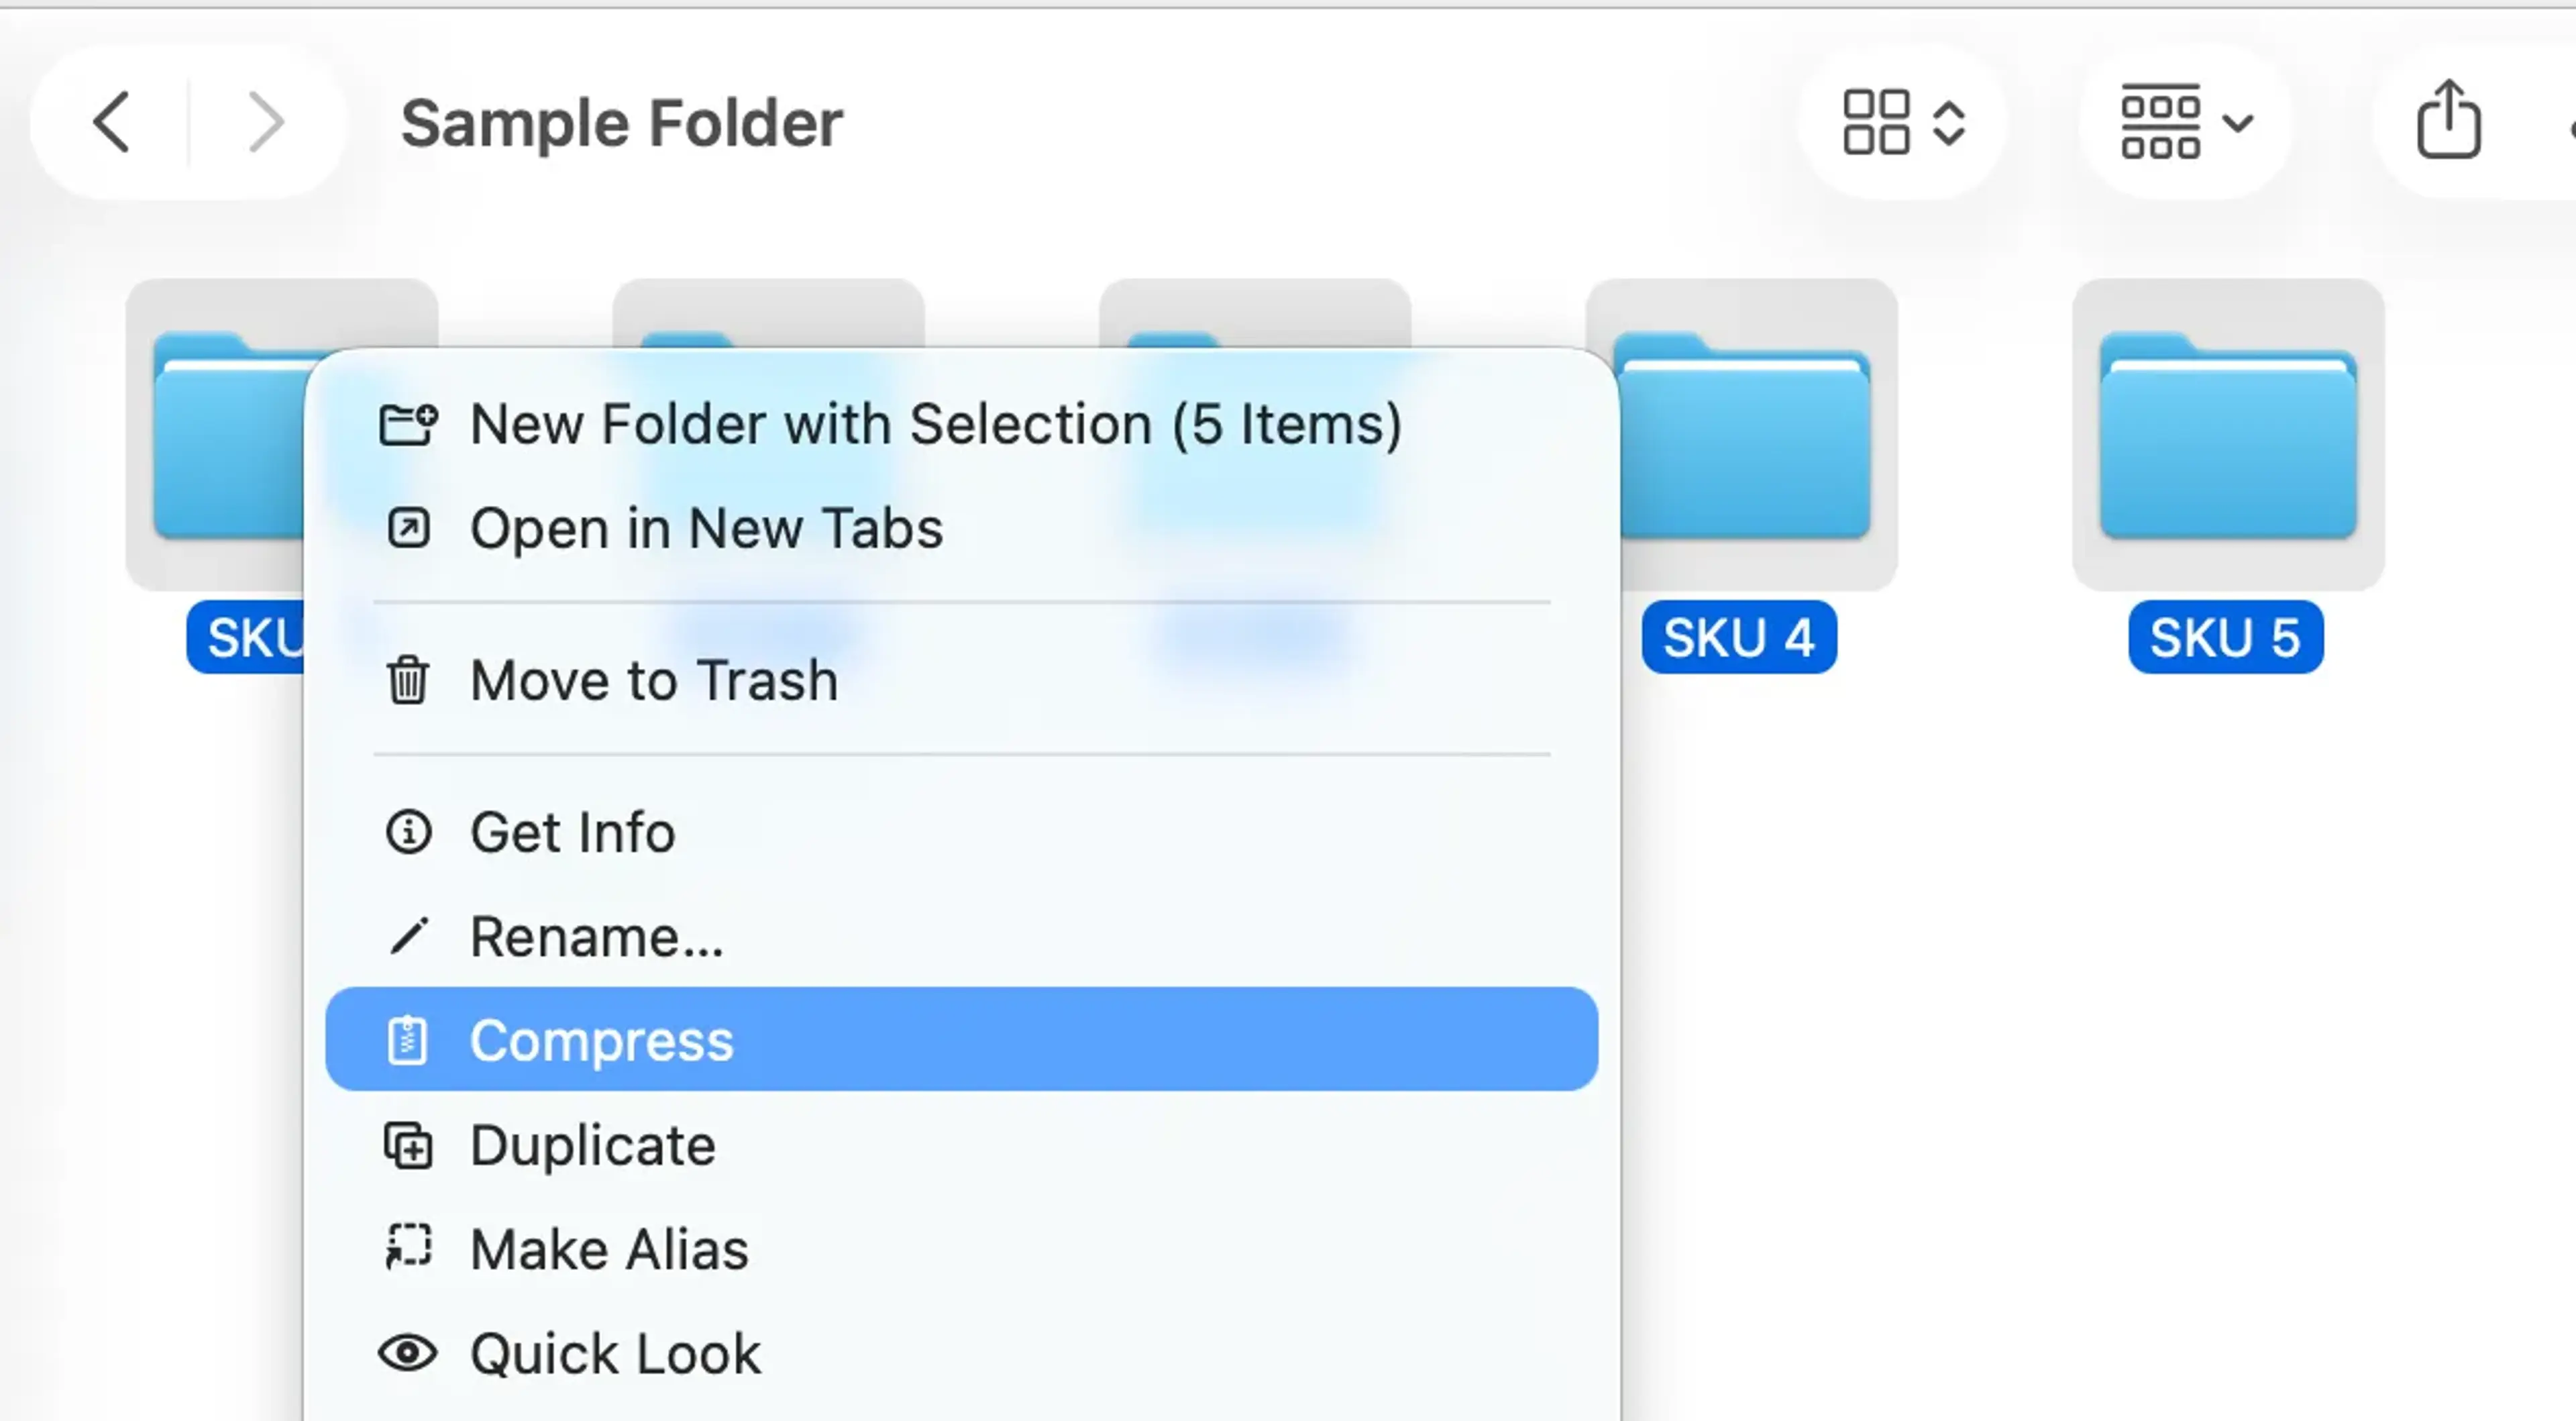
You can rename it to whatever naming convention you like, or not change it at all.
Step 5: Upload zip file to project
Once your zip file is ready, go back to the project and upload the zip file. You can upload multiple zip files in a project. Click the next button to upload the files.
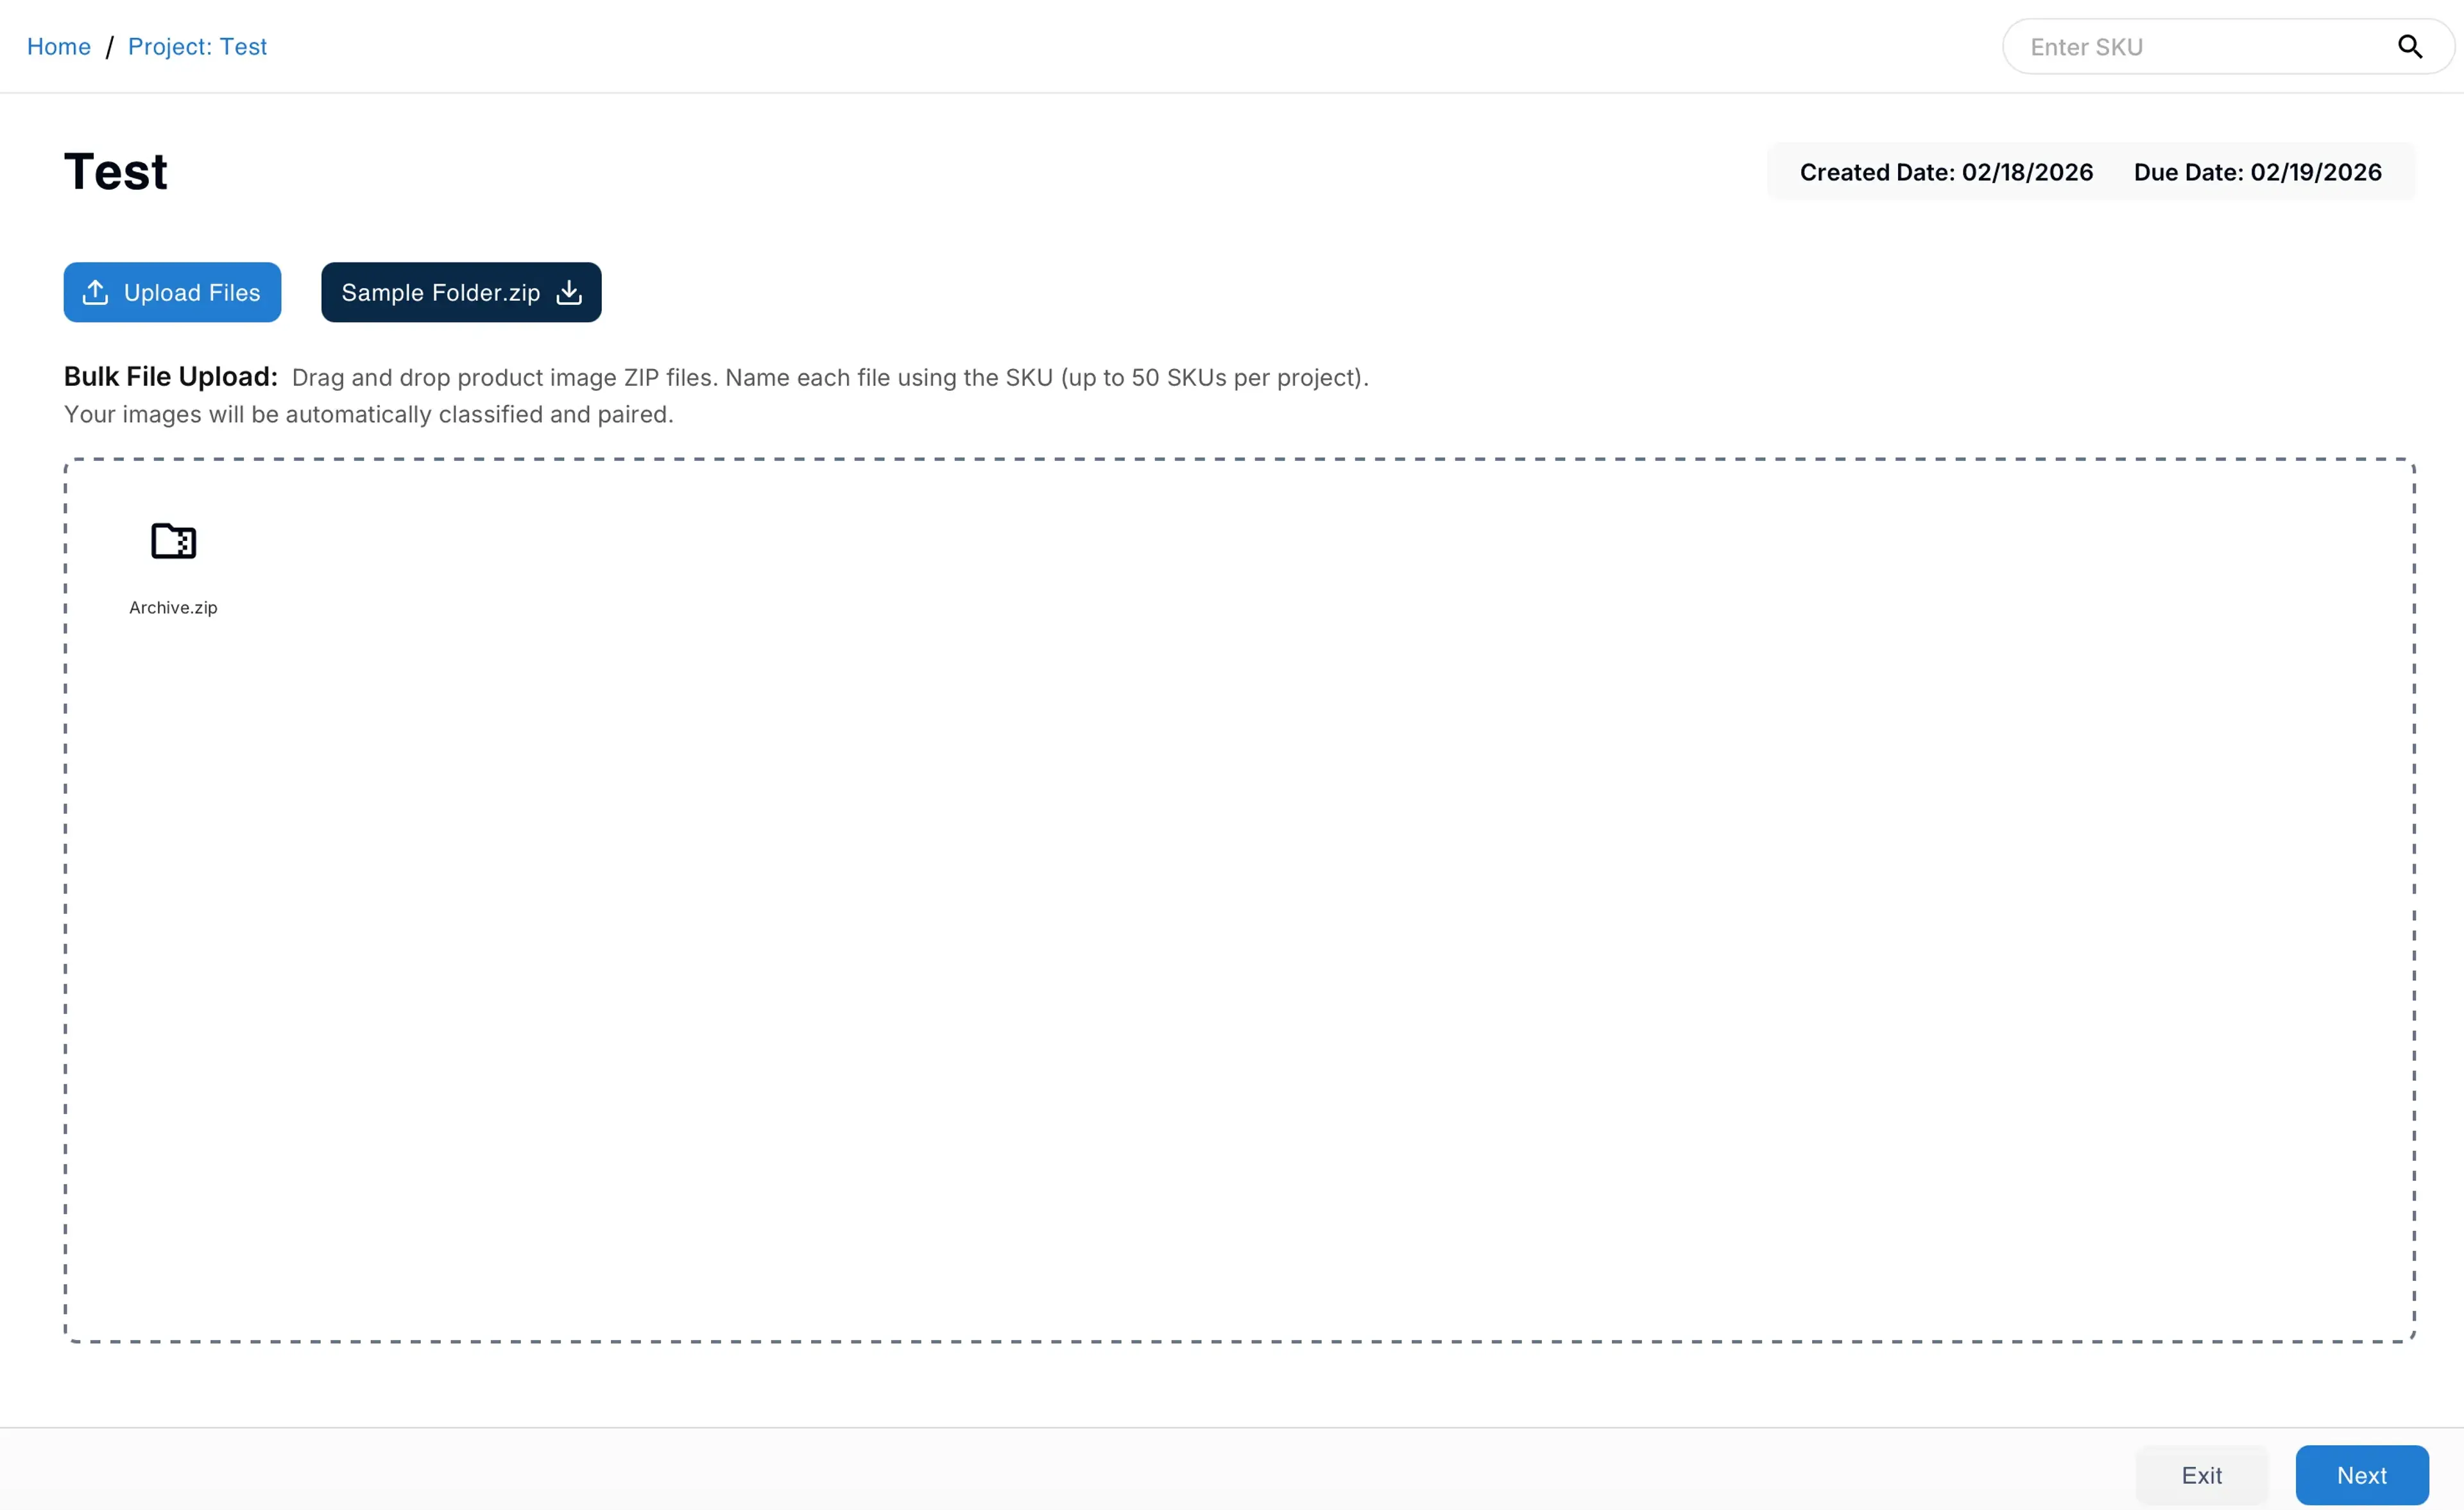
It takes a few minutes to upload the images and recognize the images with the correct labels.

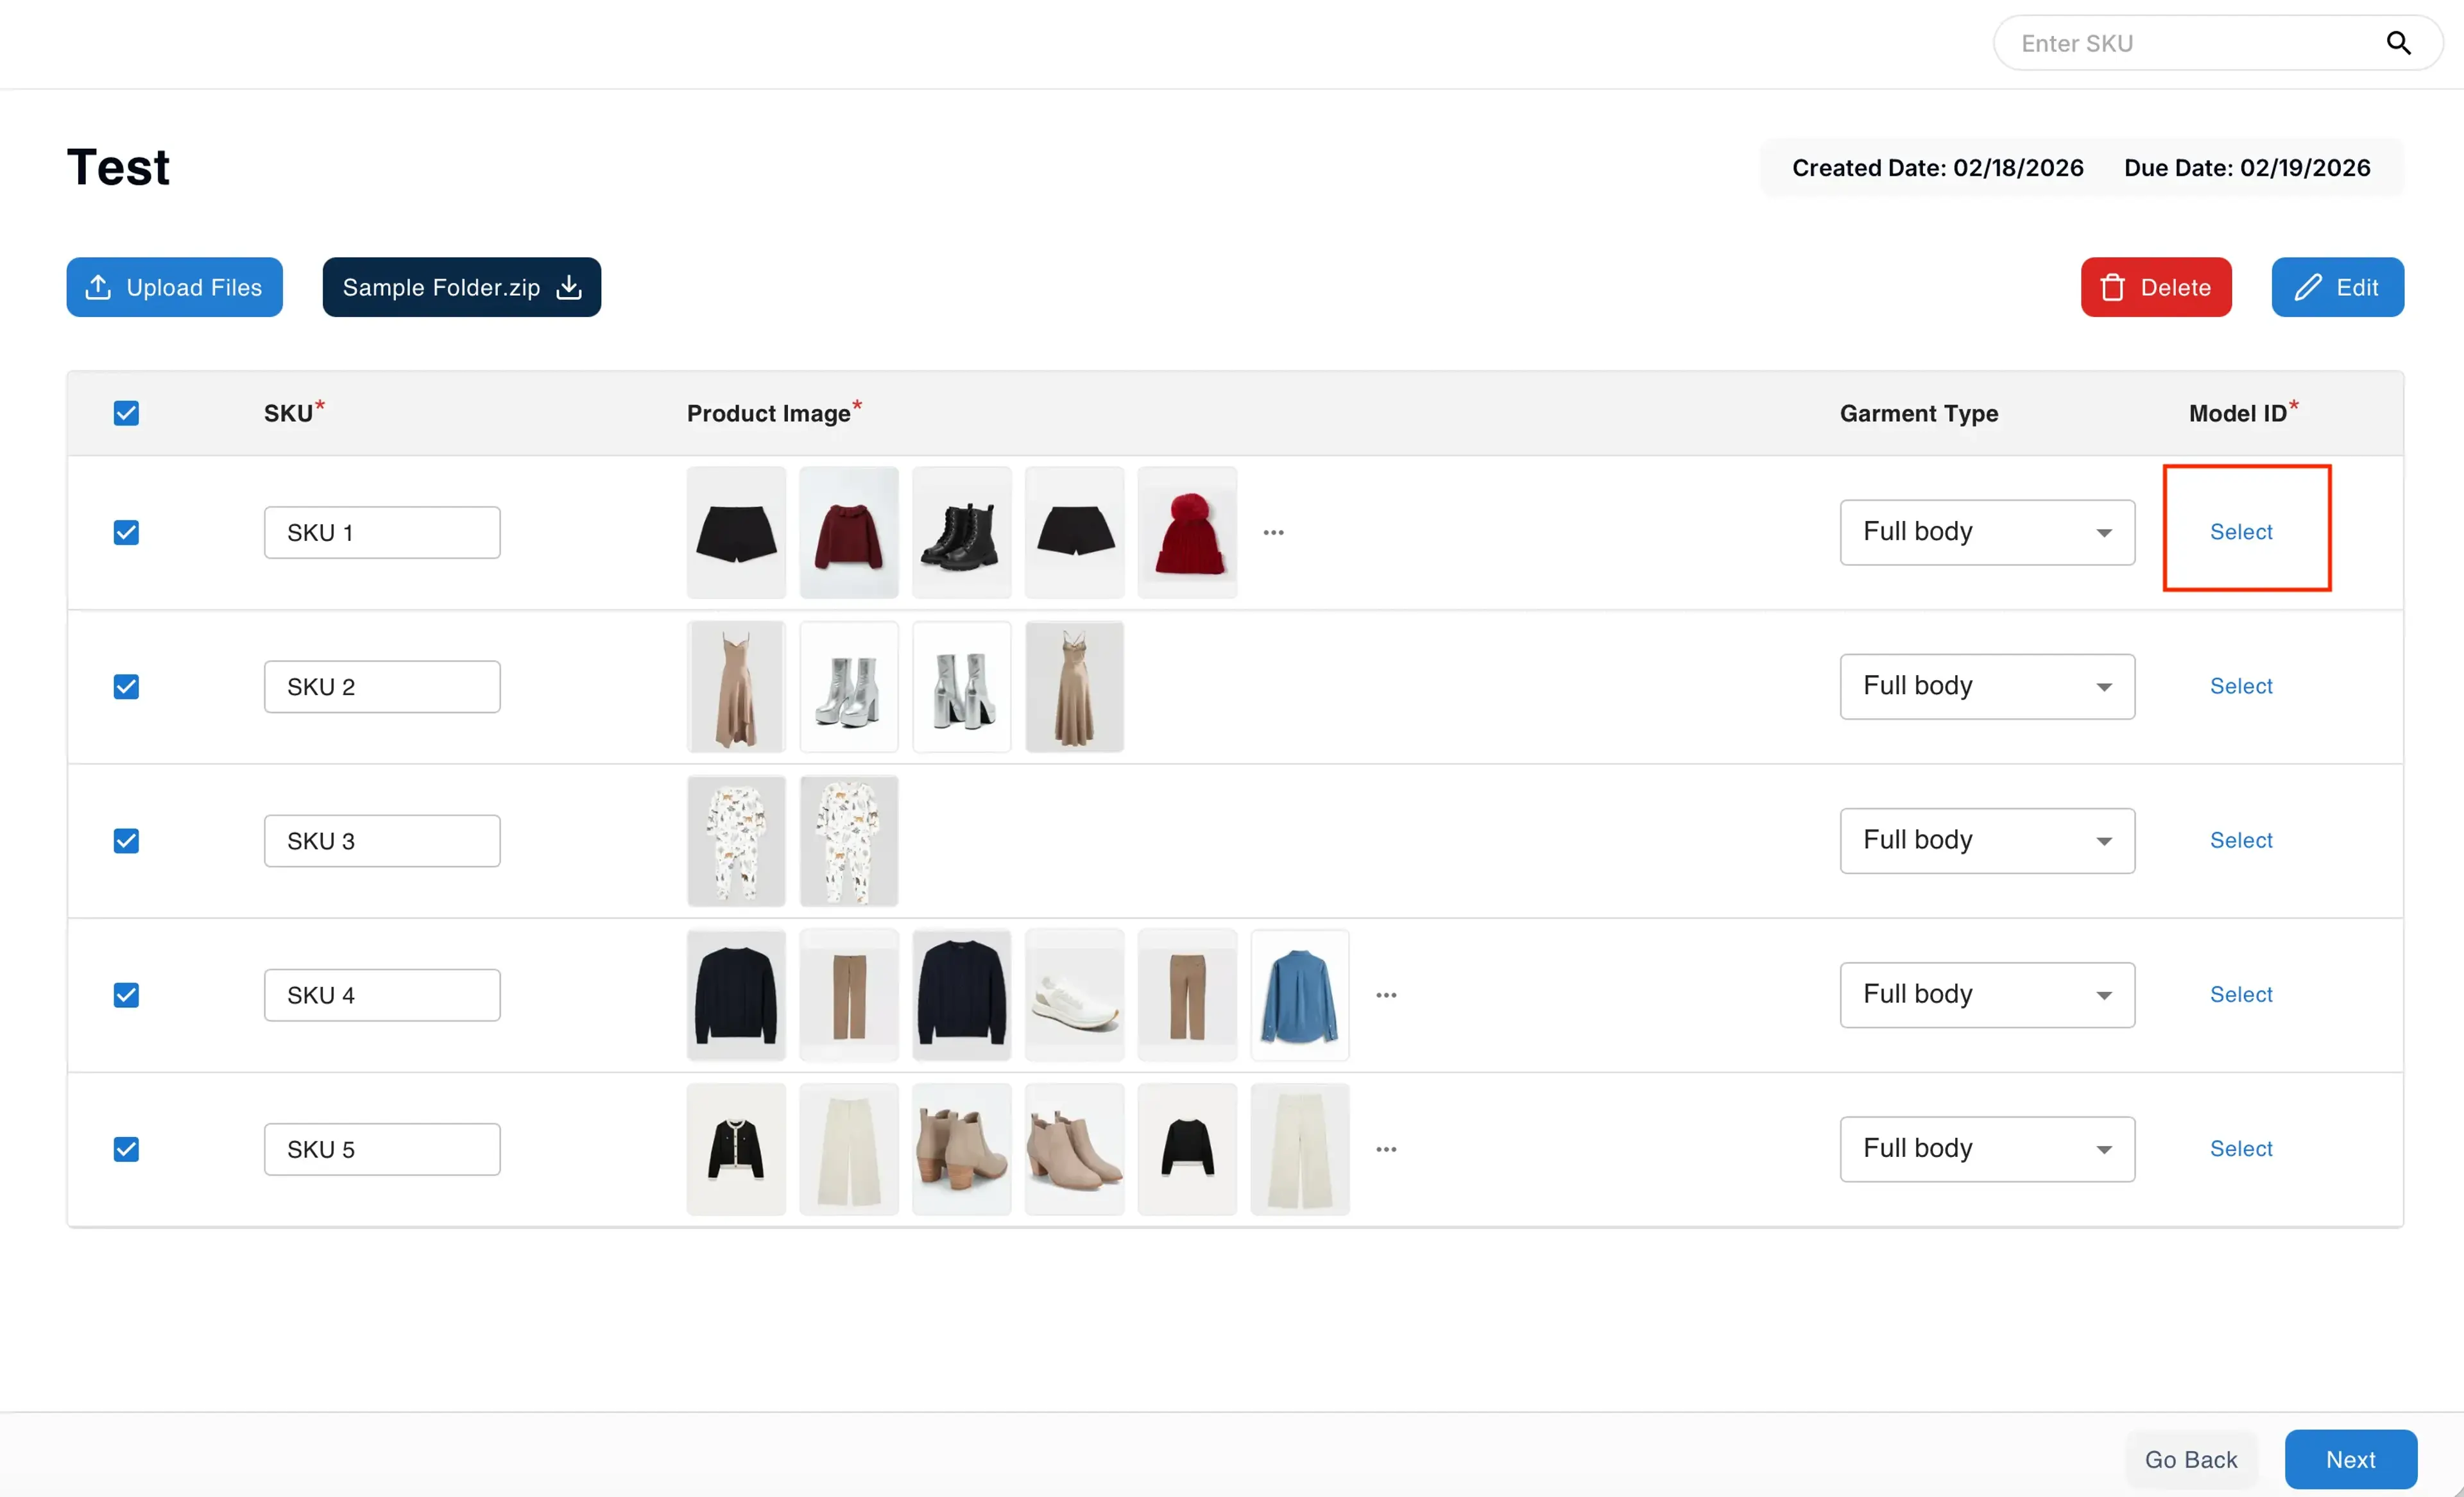
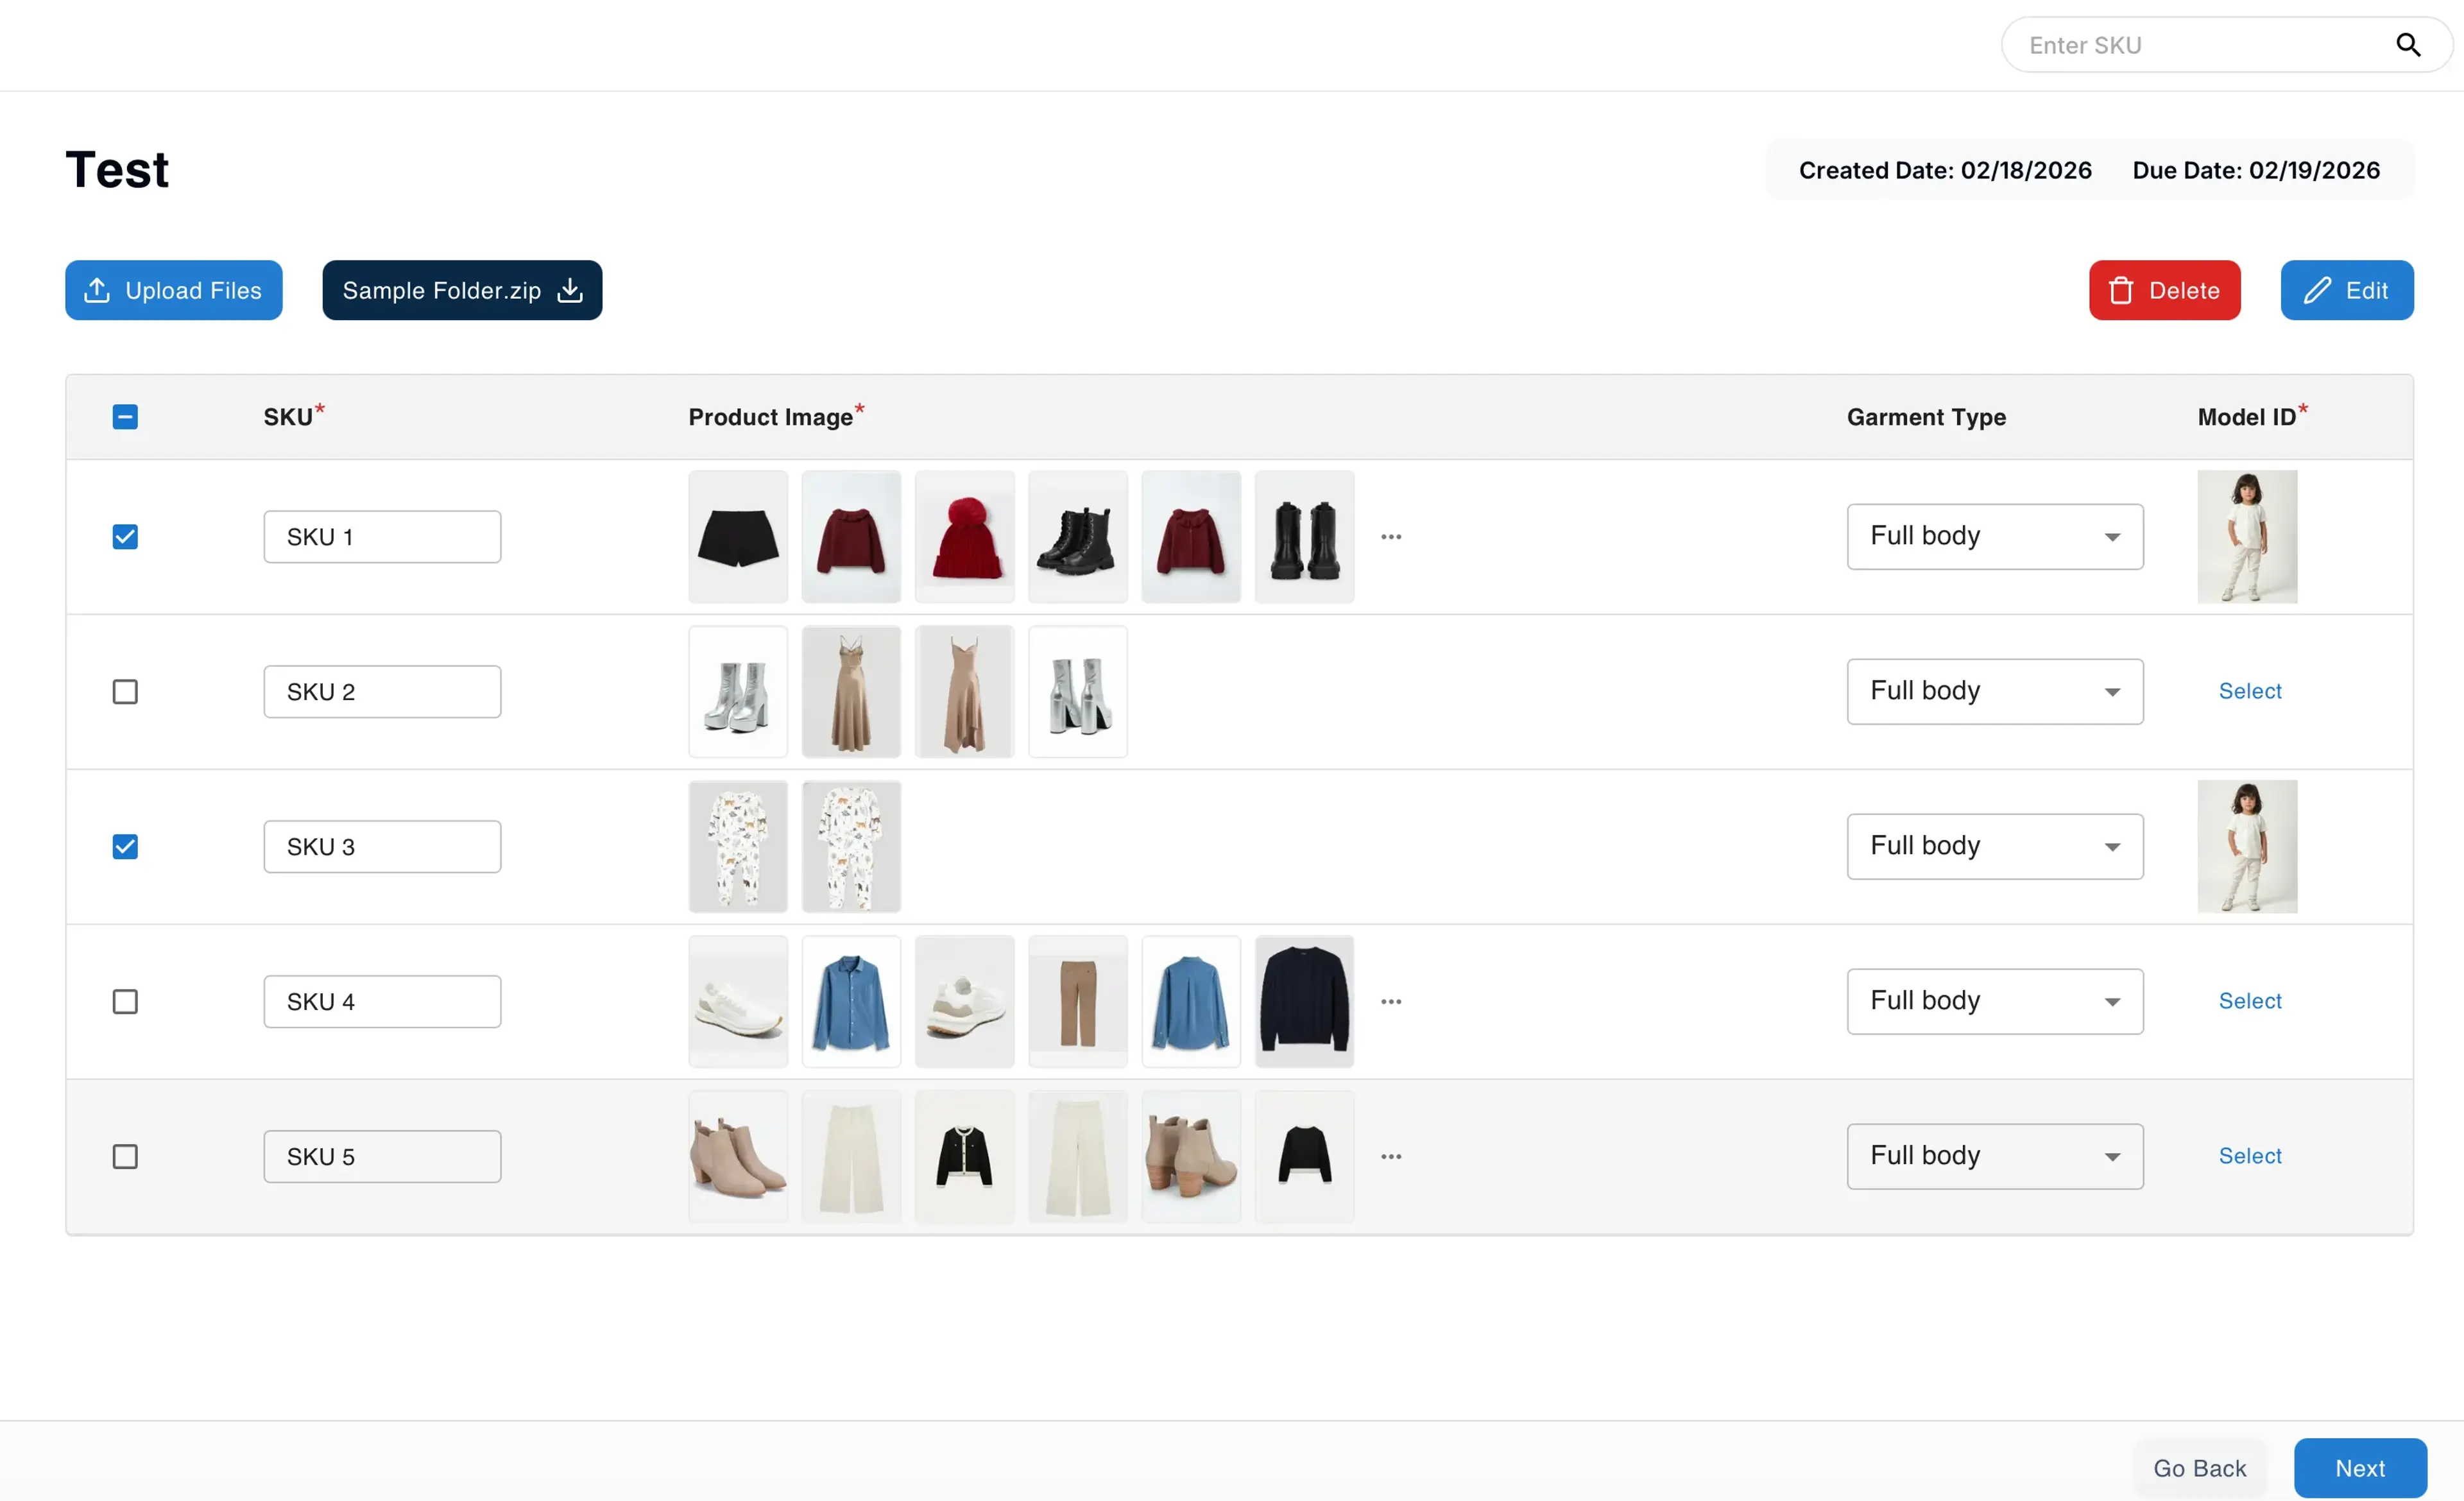
Step 6: Select Model ID
After upload, the system will automatically recognize the images and create SKU information. All you need to do in this step is to select the model ID to pair up with your SKUs.
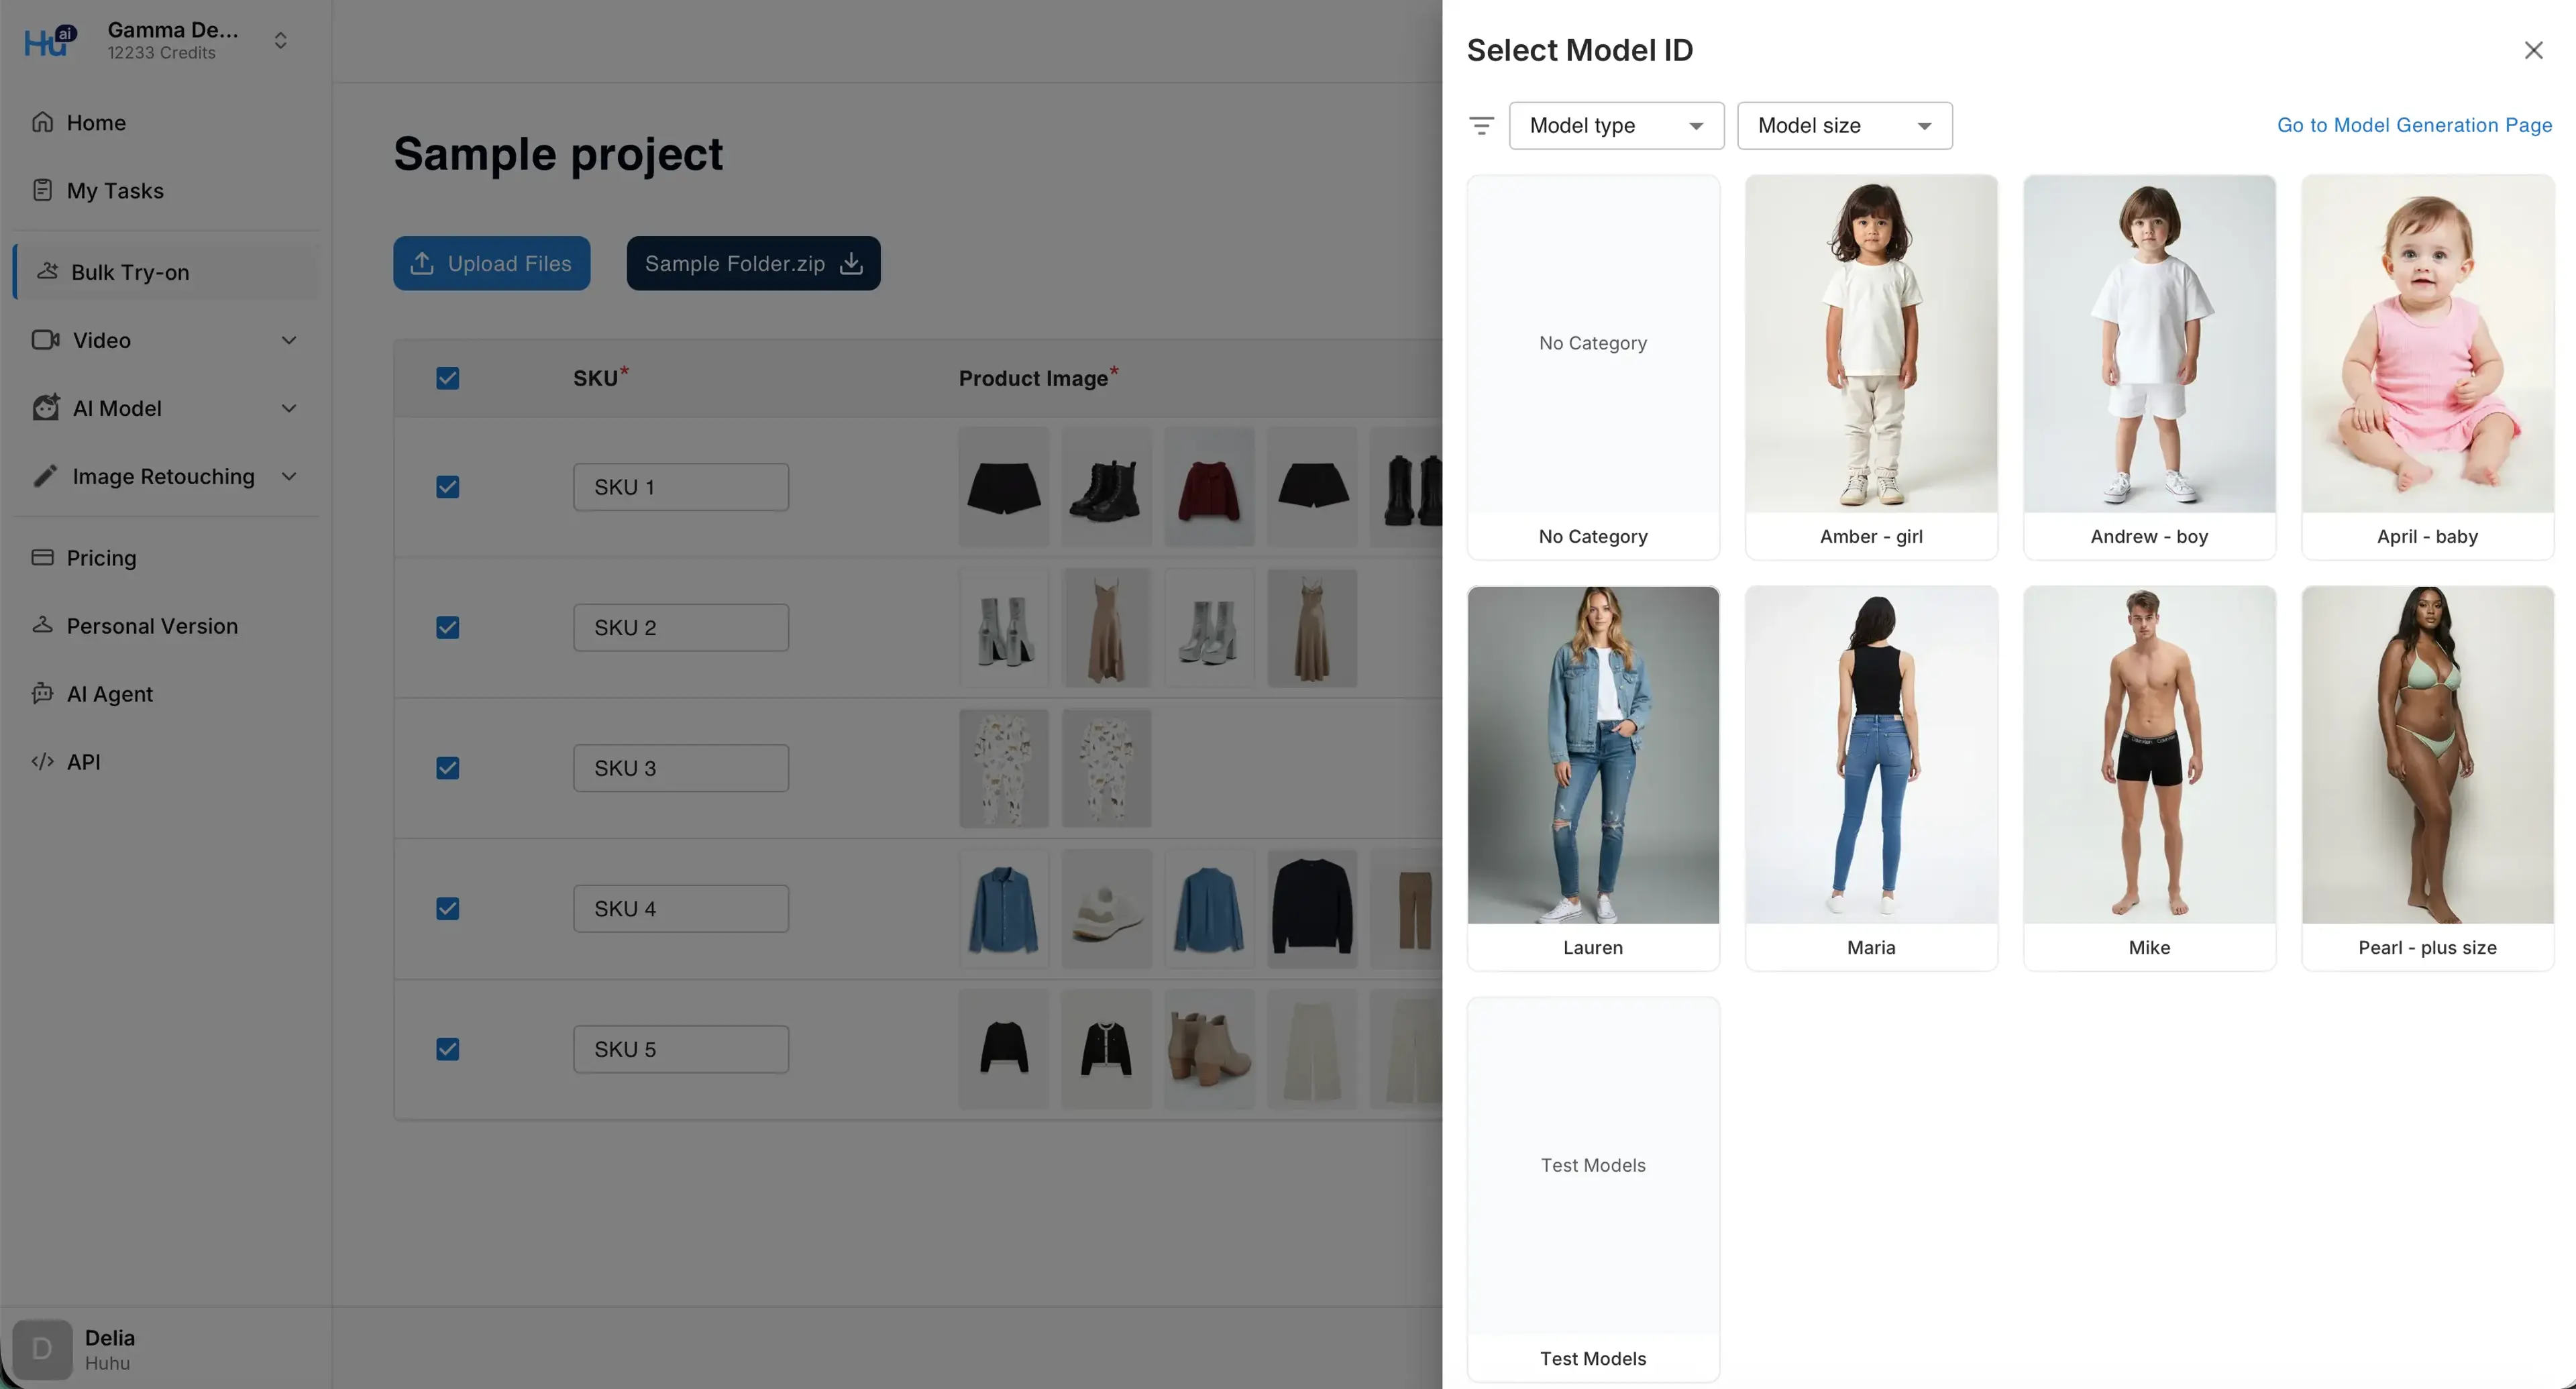
Pro Tip: Bulk Edit Model IDs
You can bulk edit product requirements by selecting multiple SKU rows at a time and click the Edit button, and edit all selected SKUs at the same time.
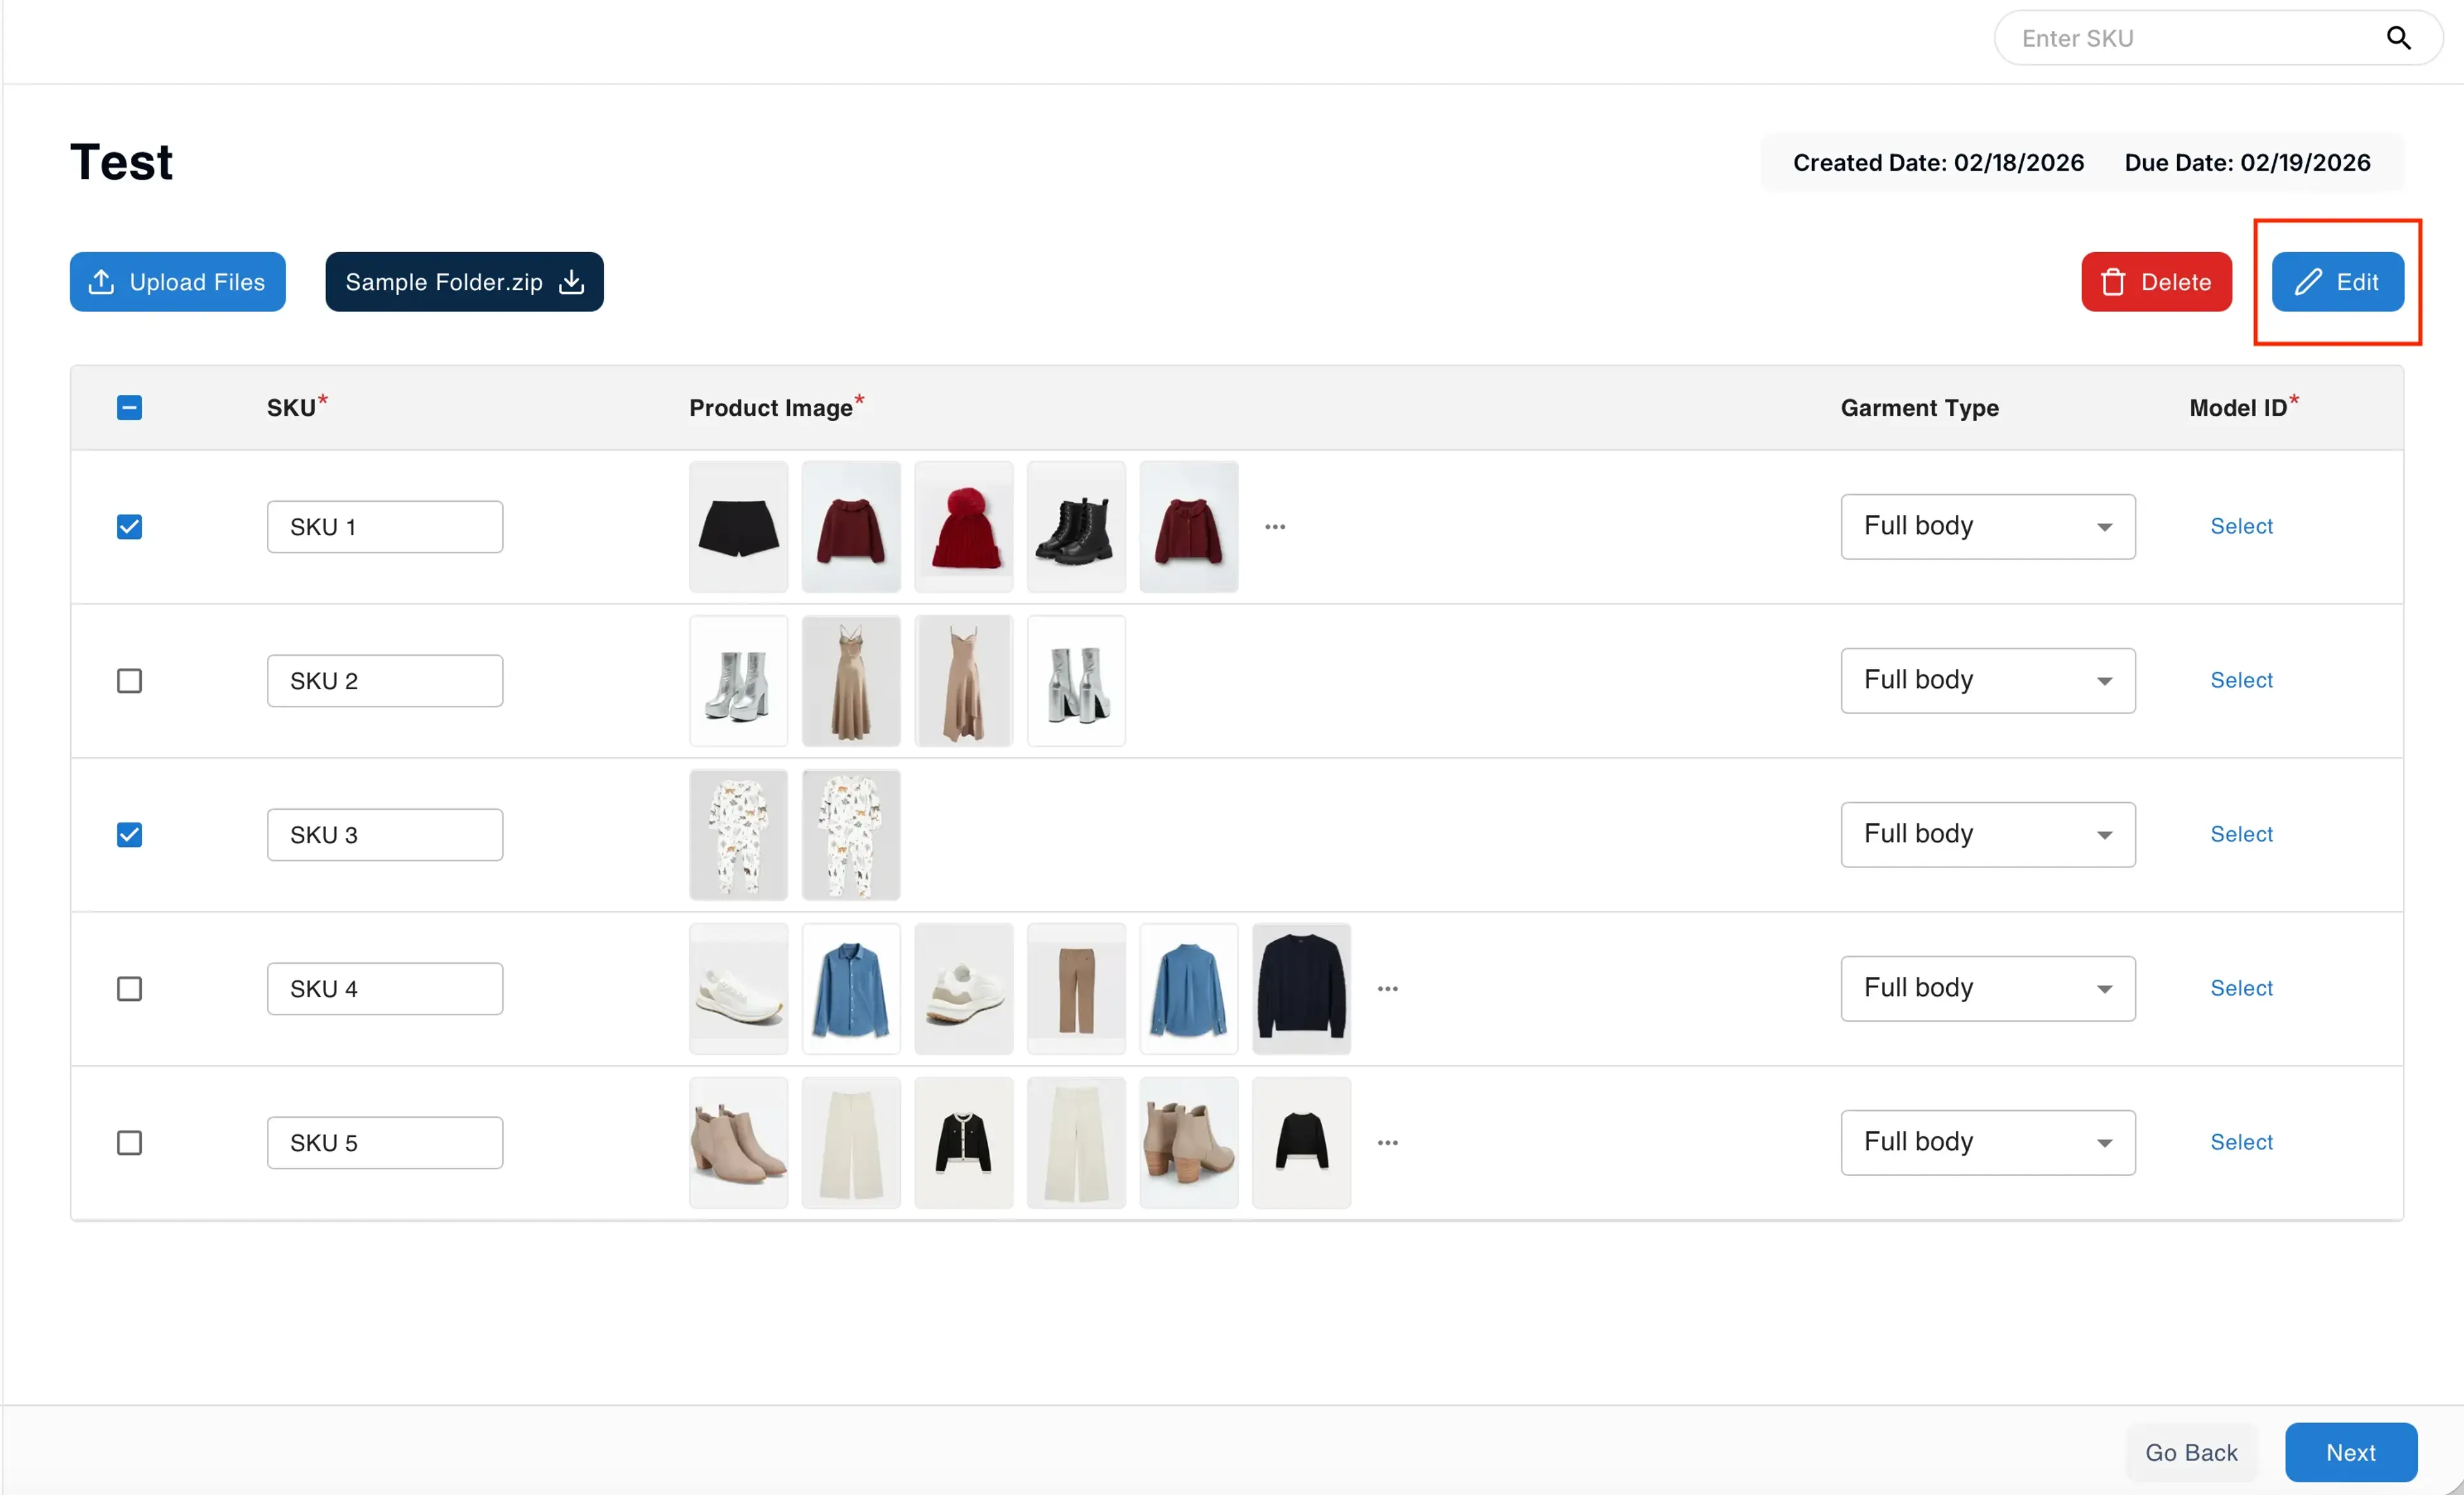
Uncheck the Garment type that you don’t need to update, only keep the model ID so you can select the model ID.
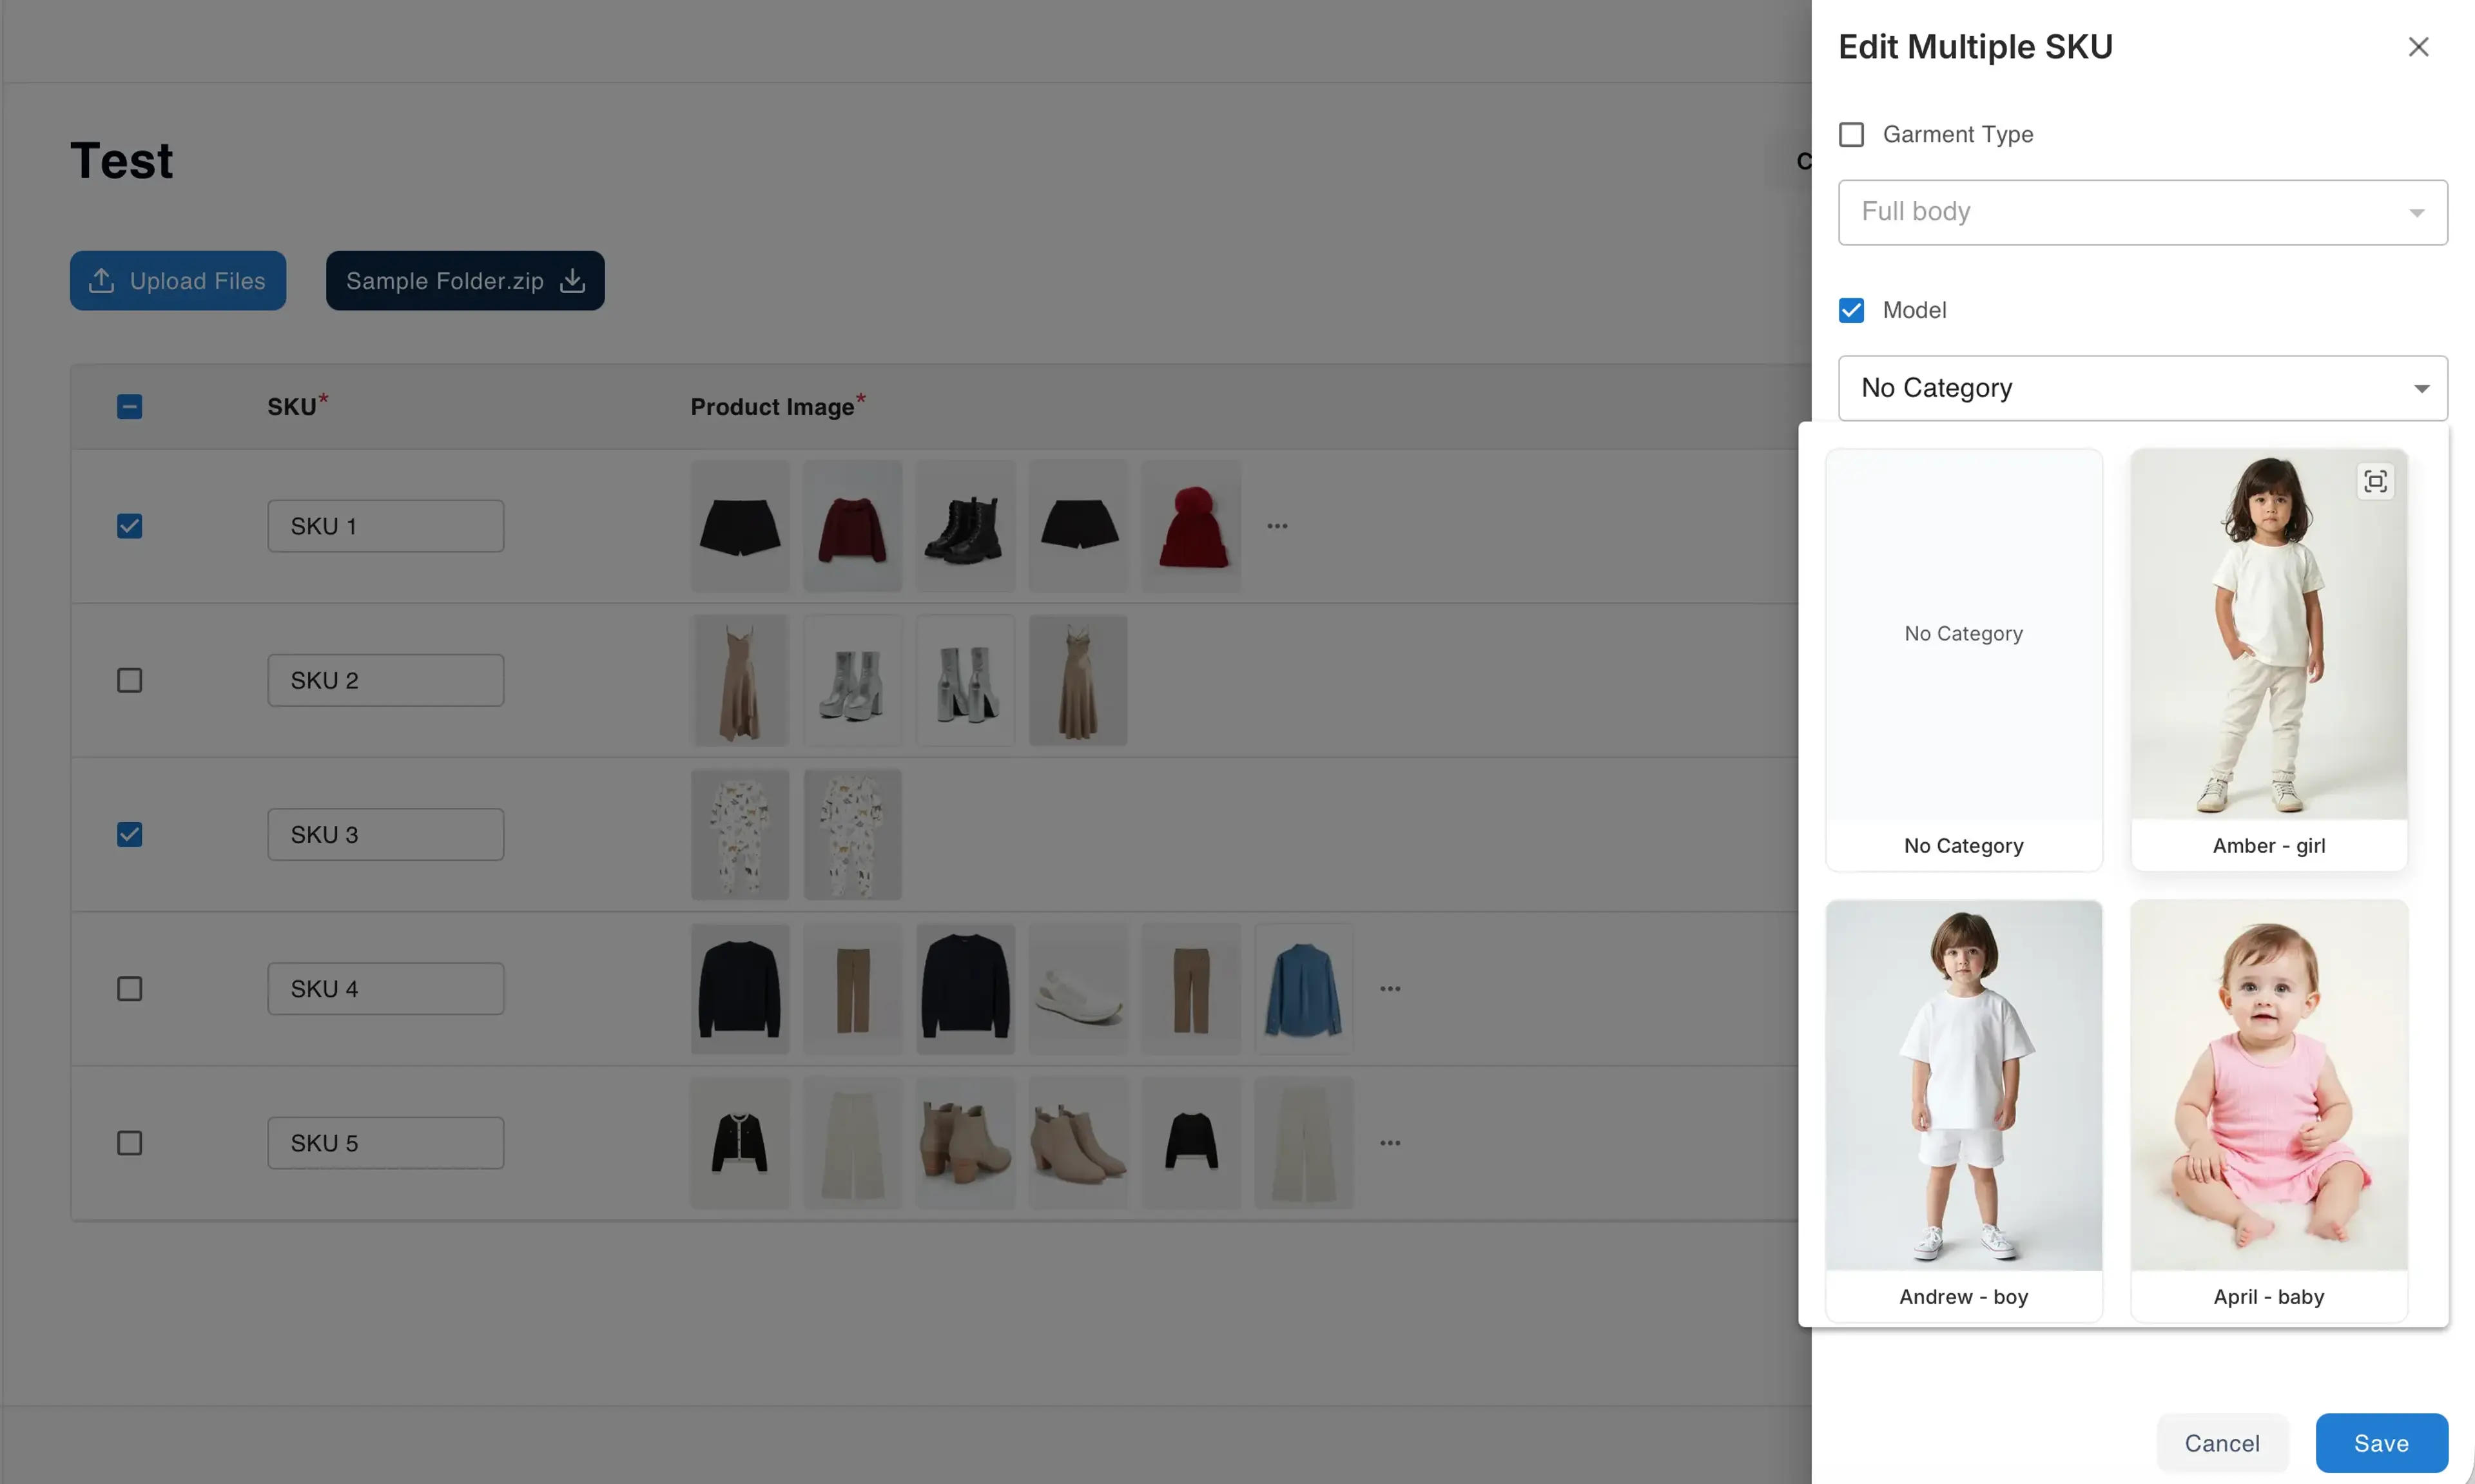
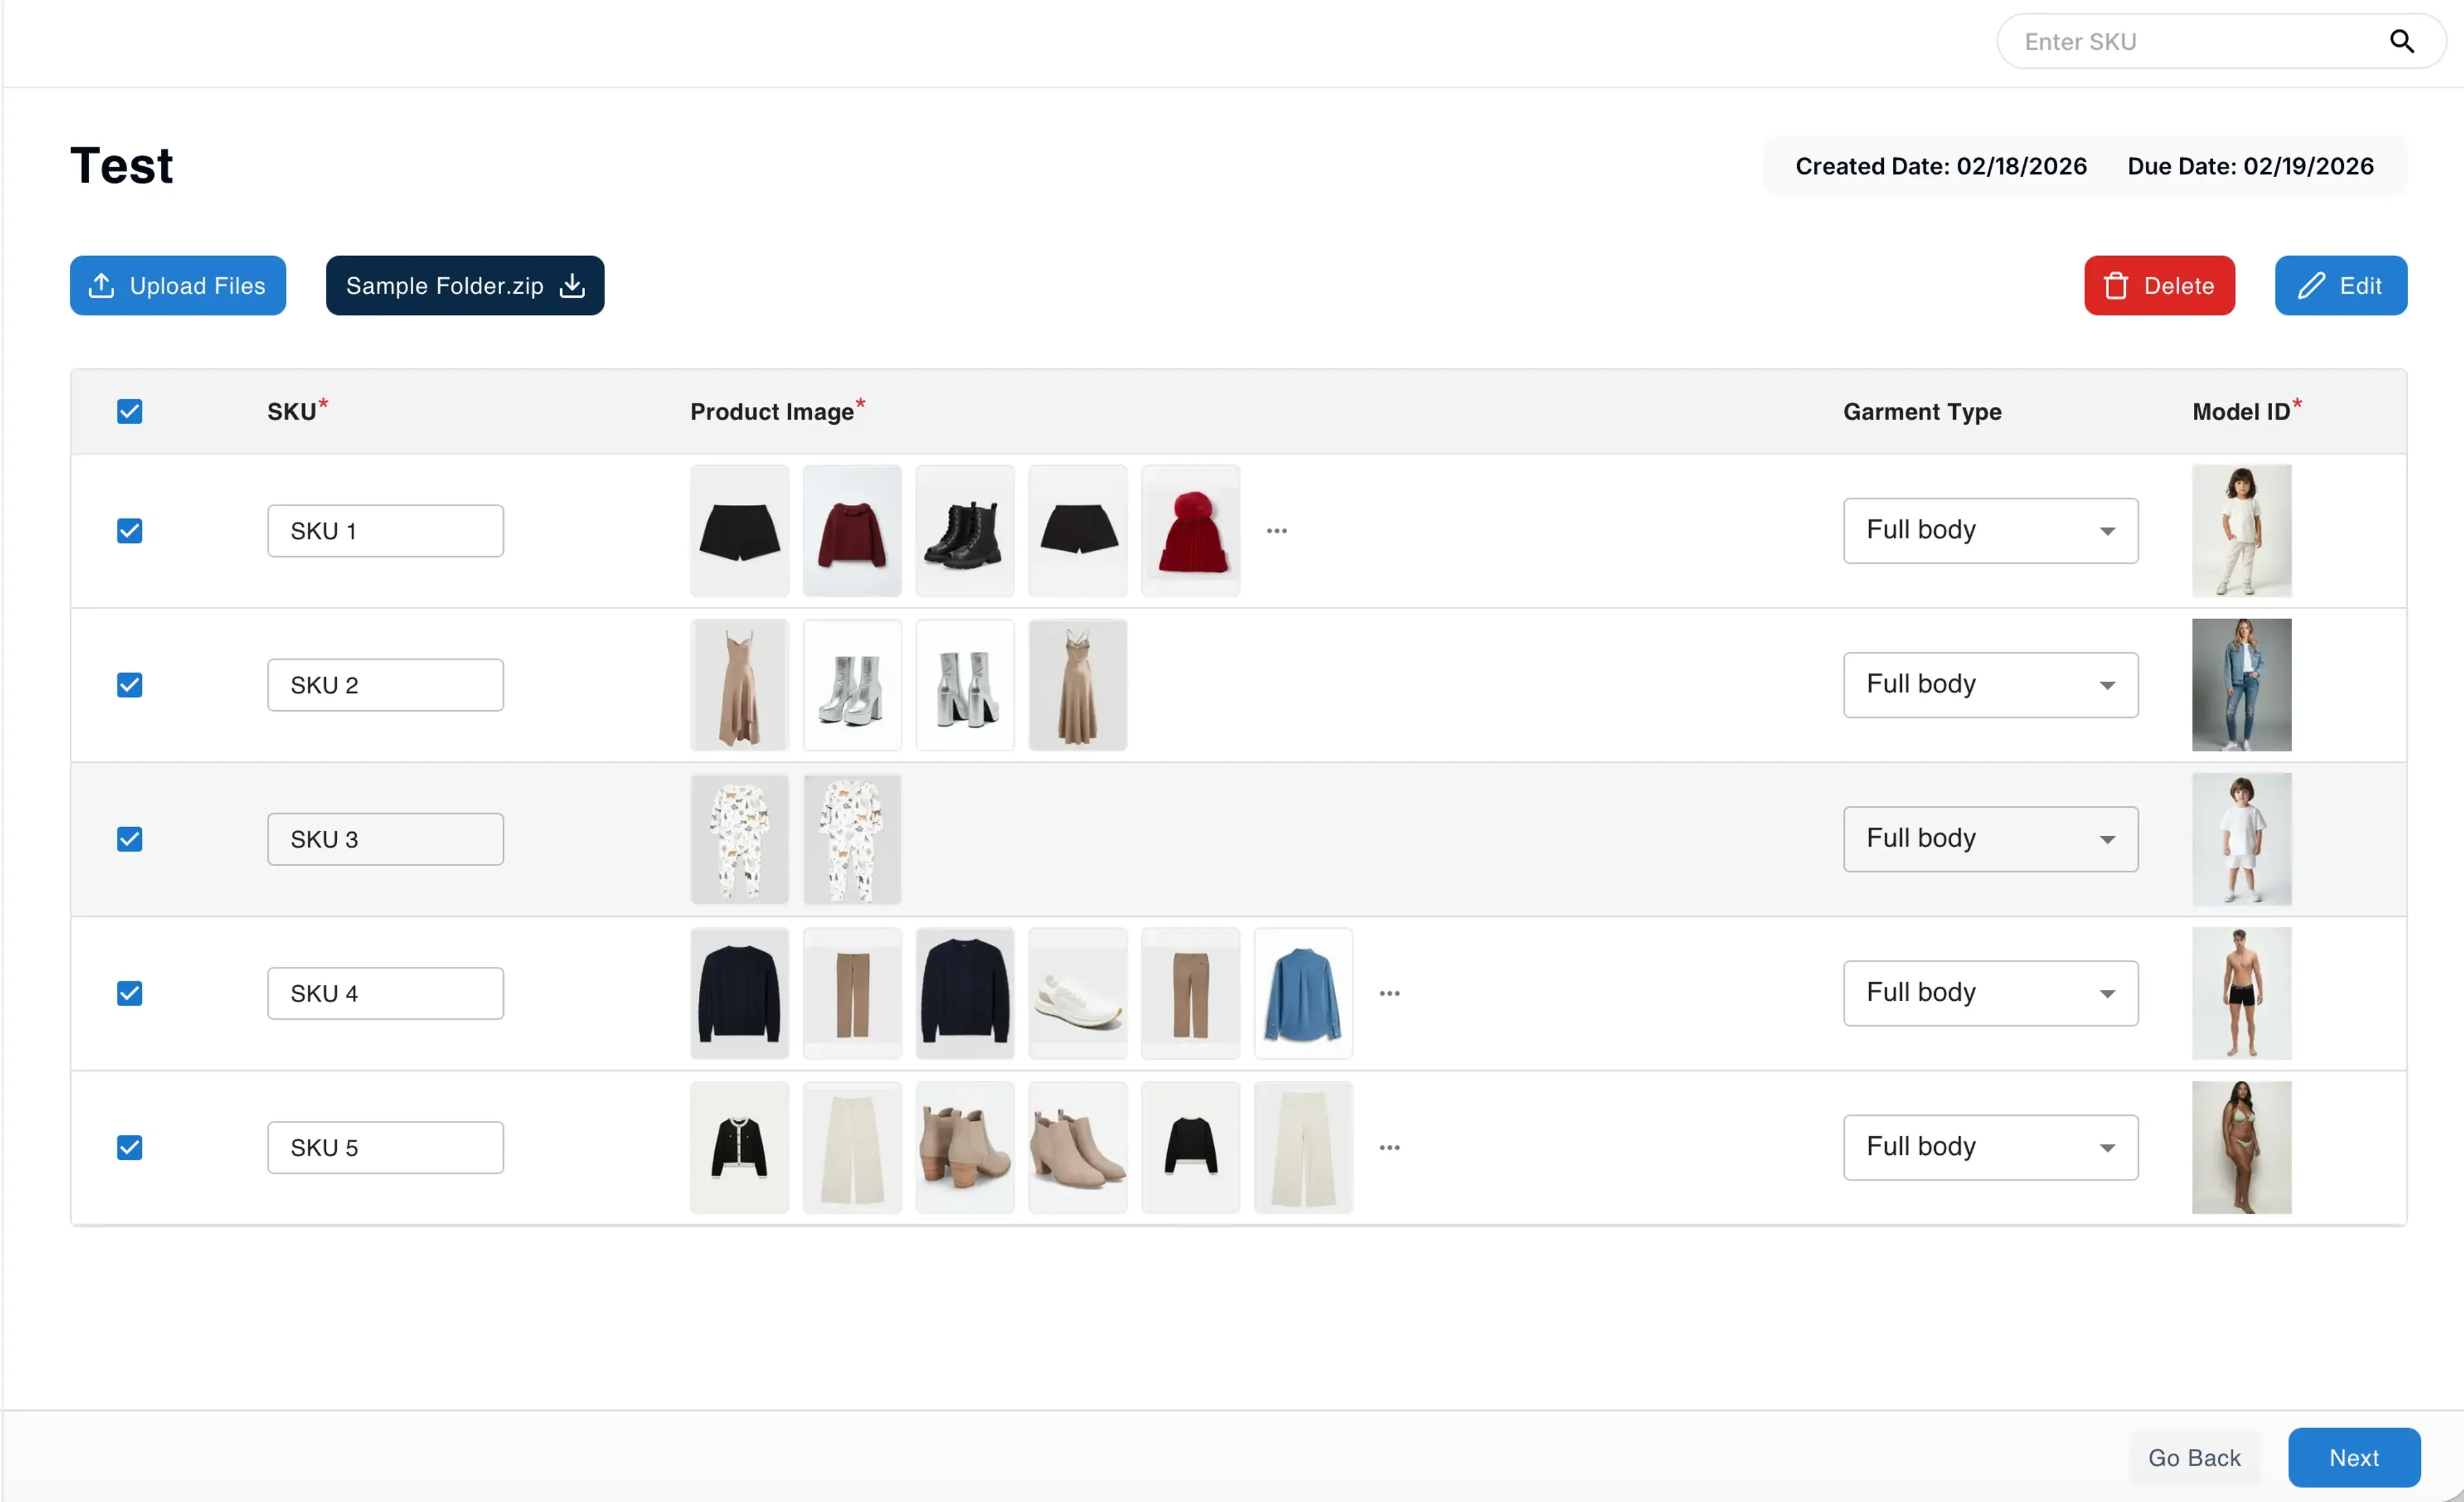
Click the save button and you’ll see the SKUs you selected have the same model ID selected.
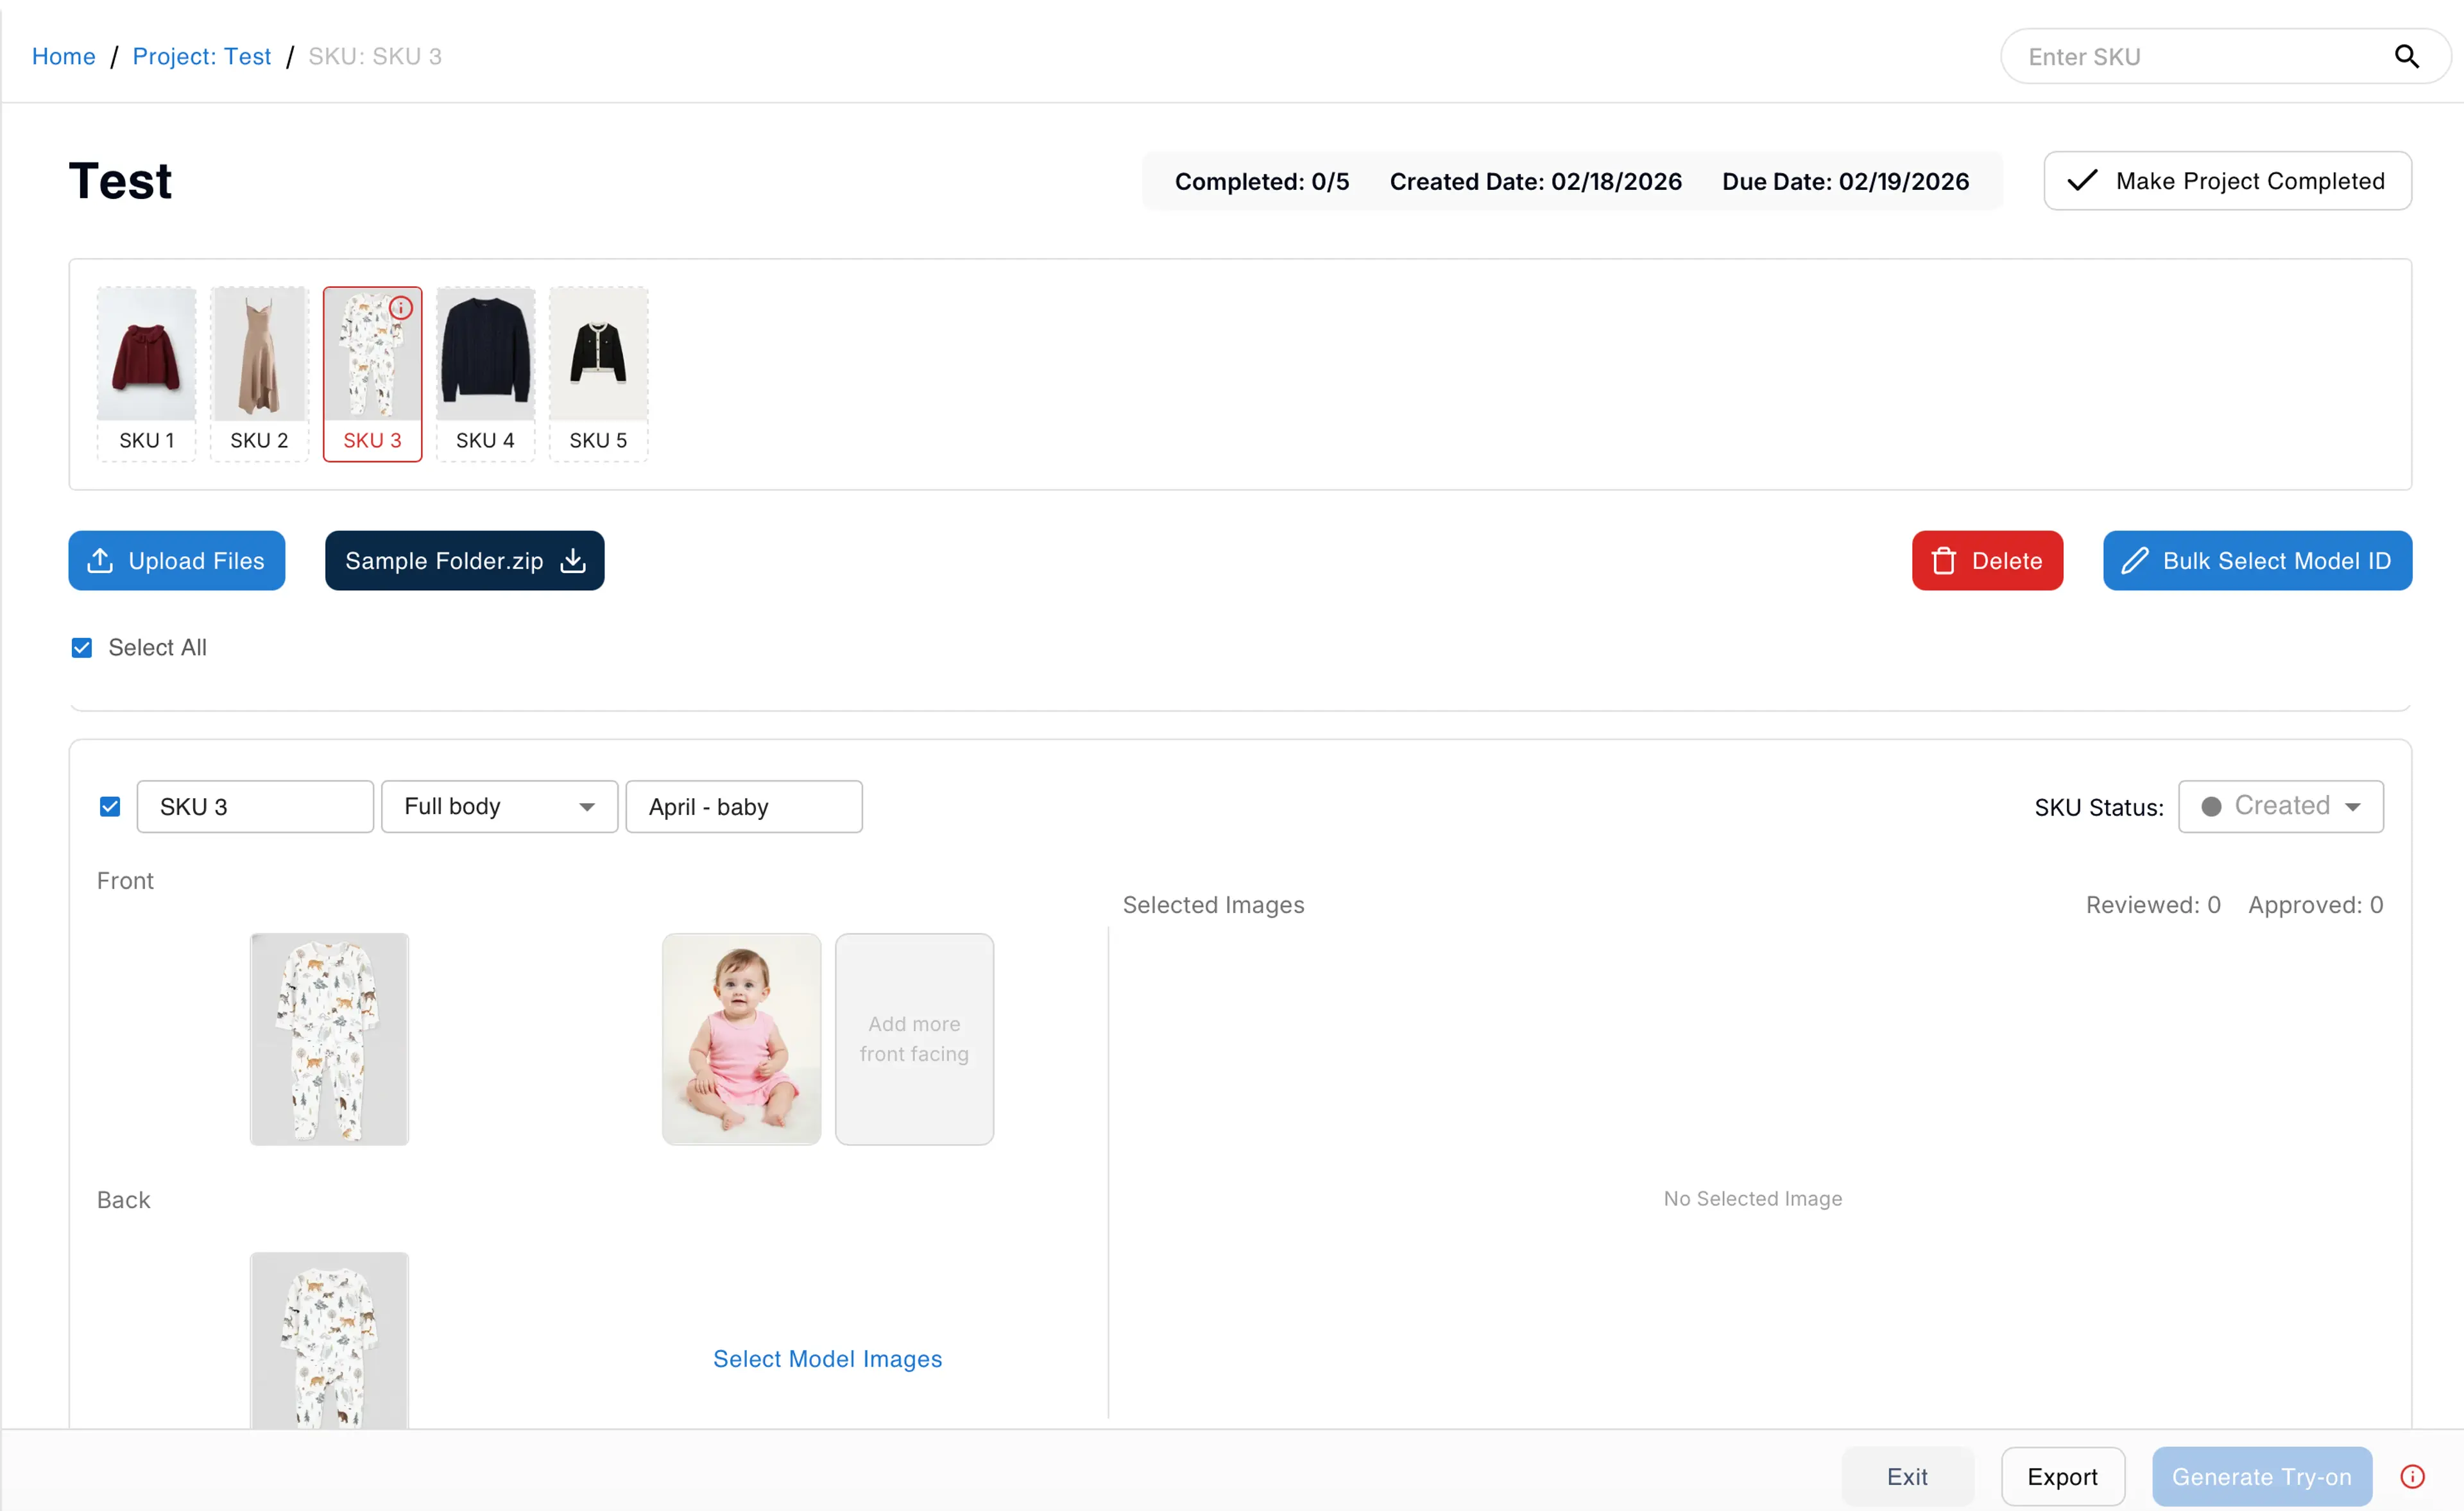
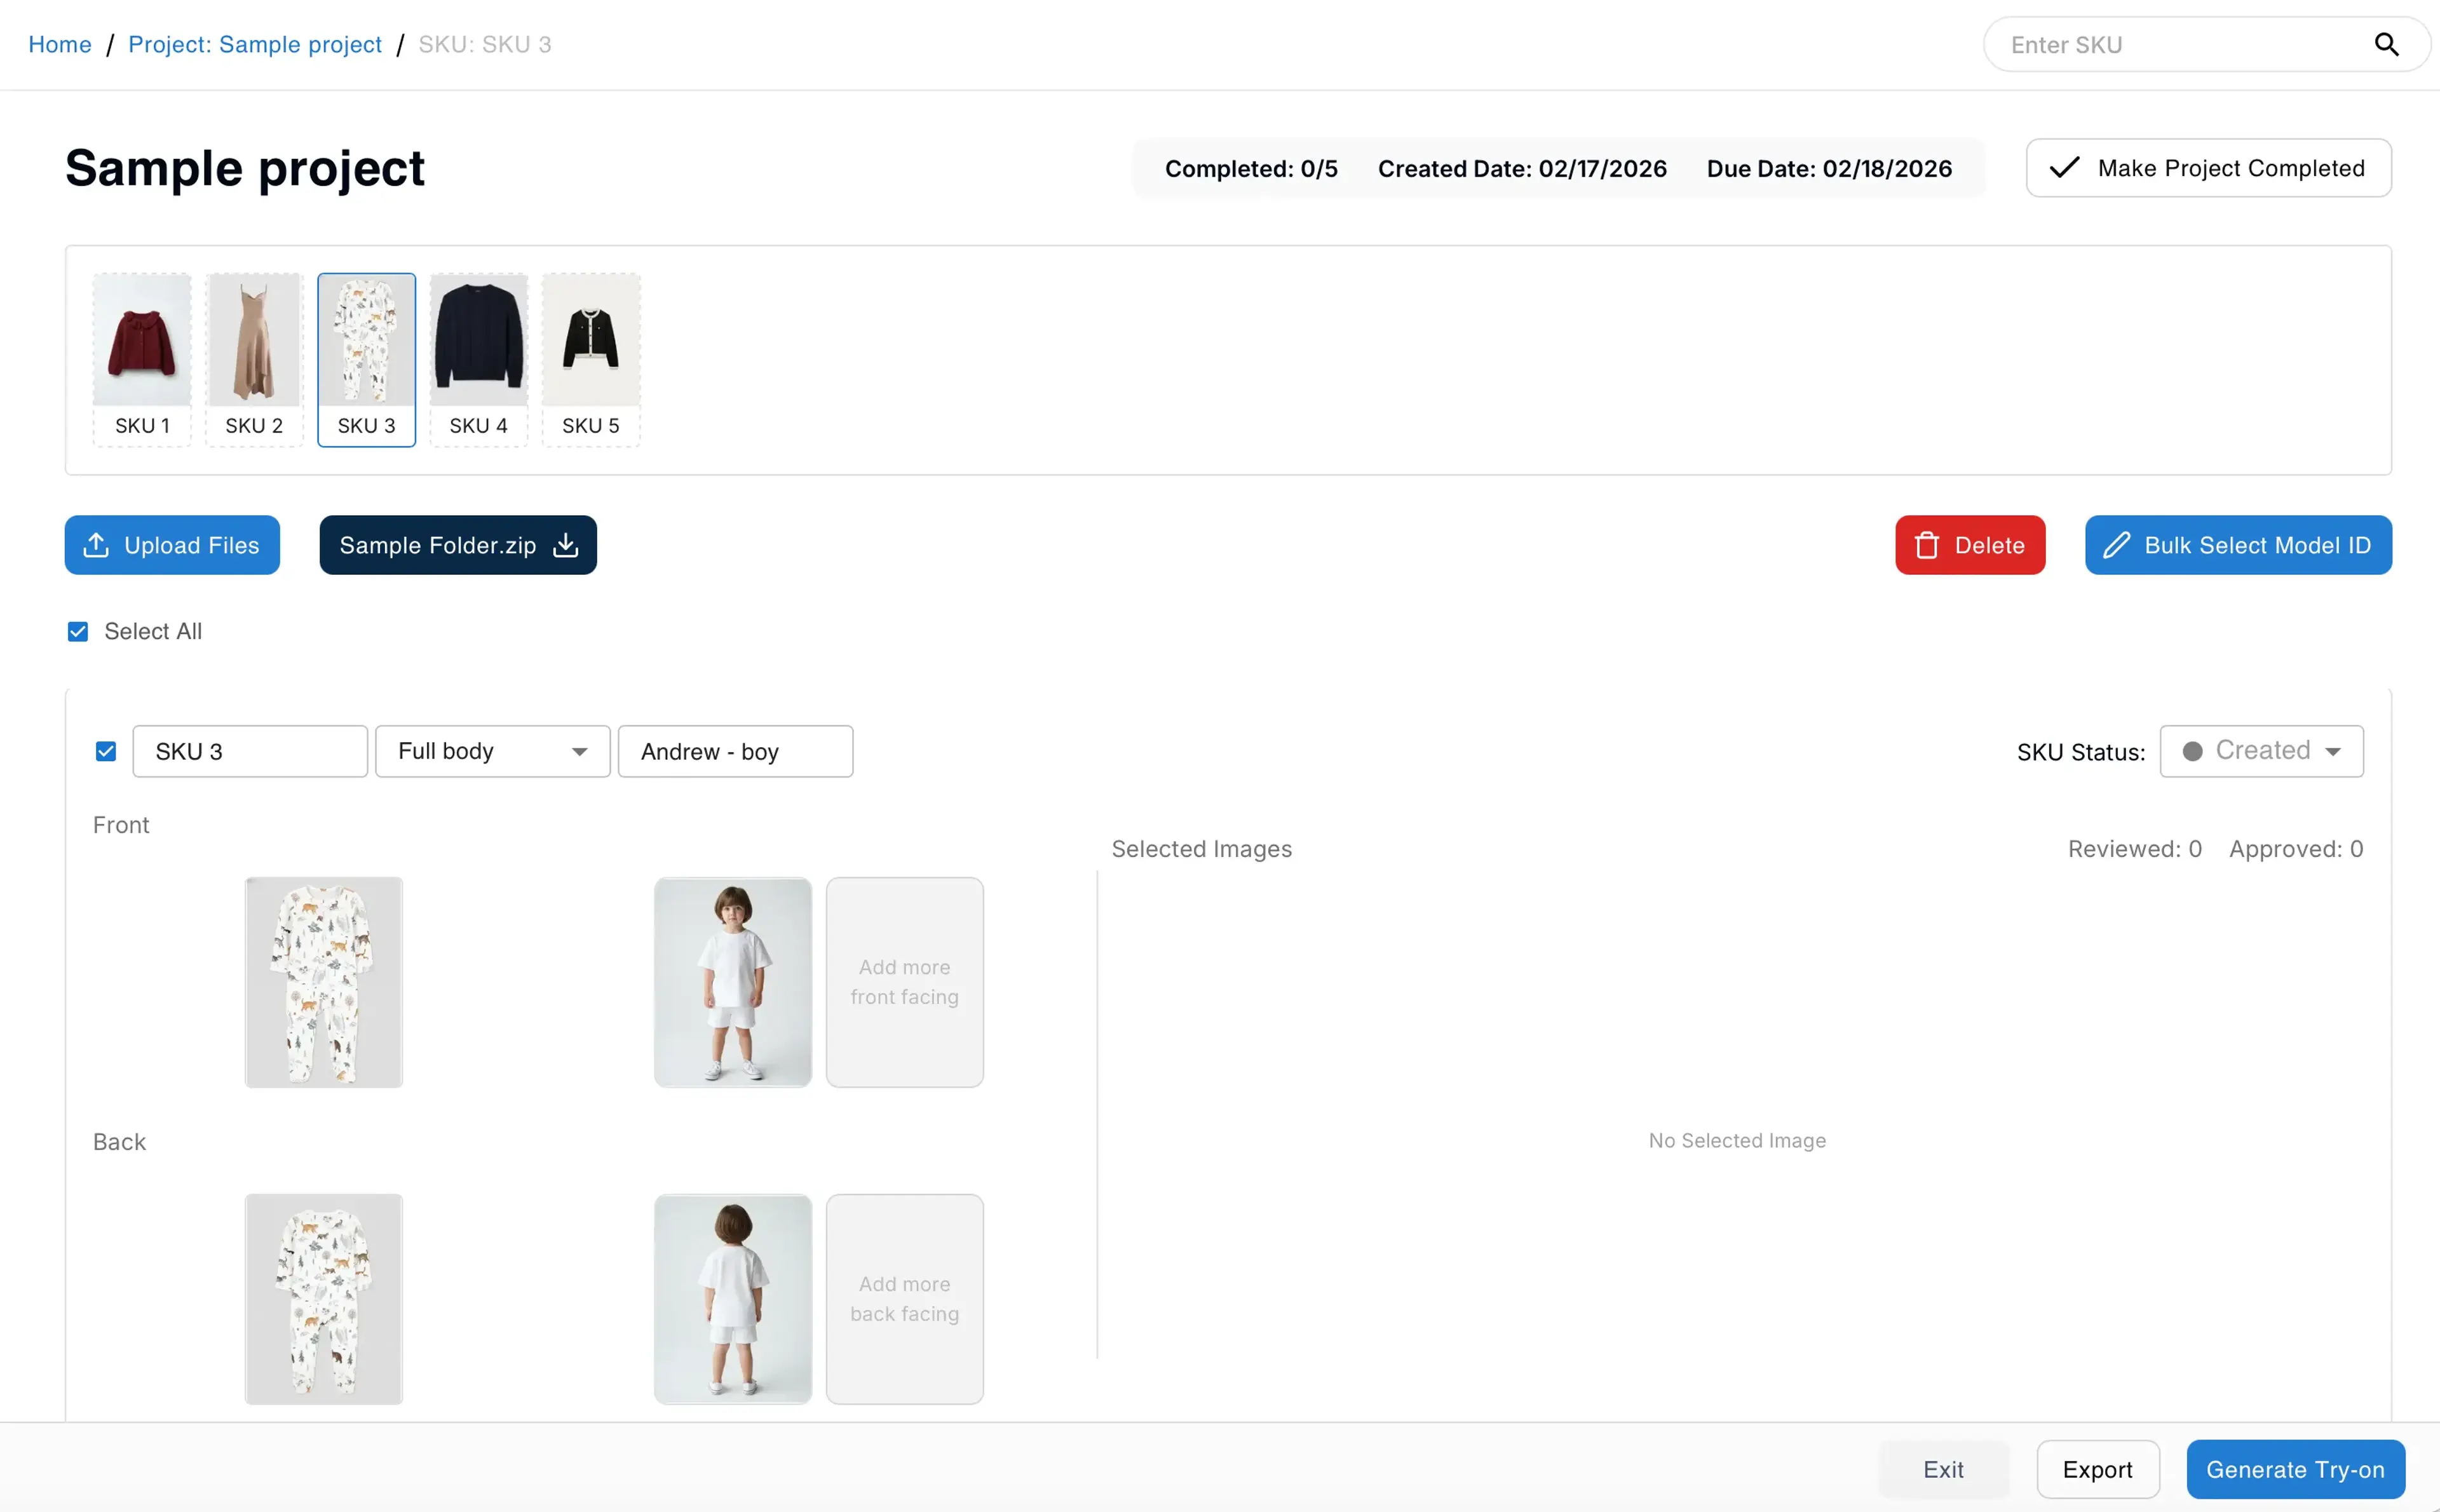
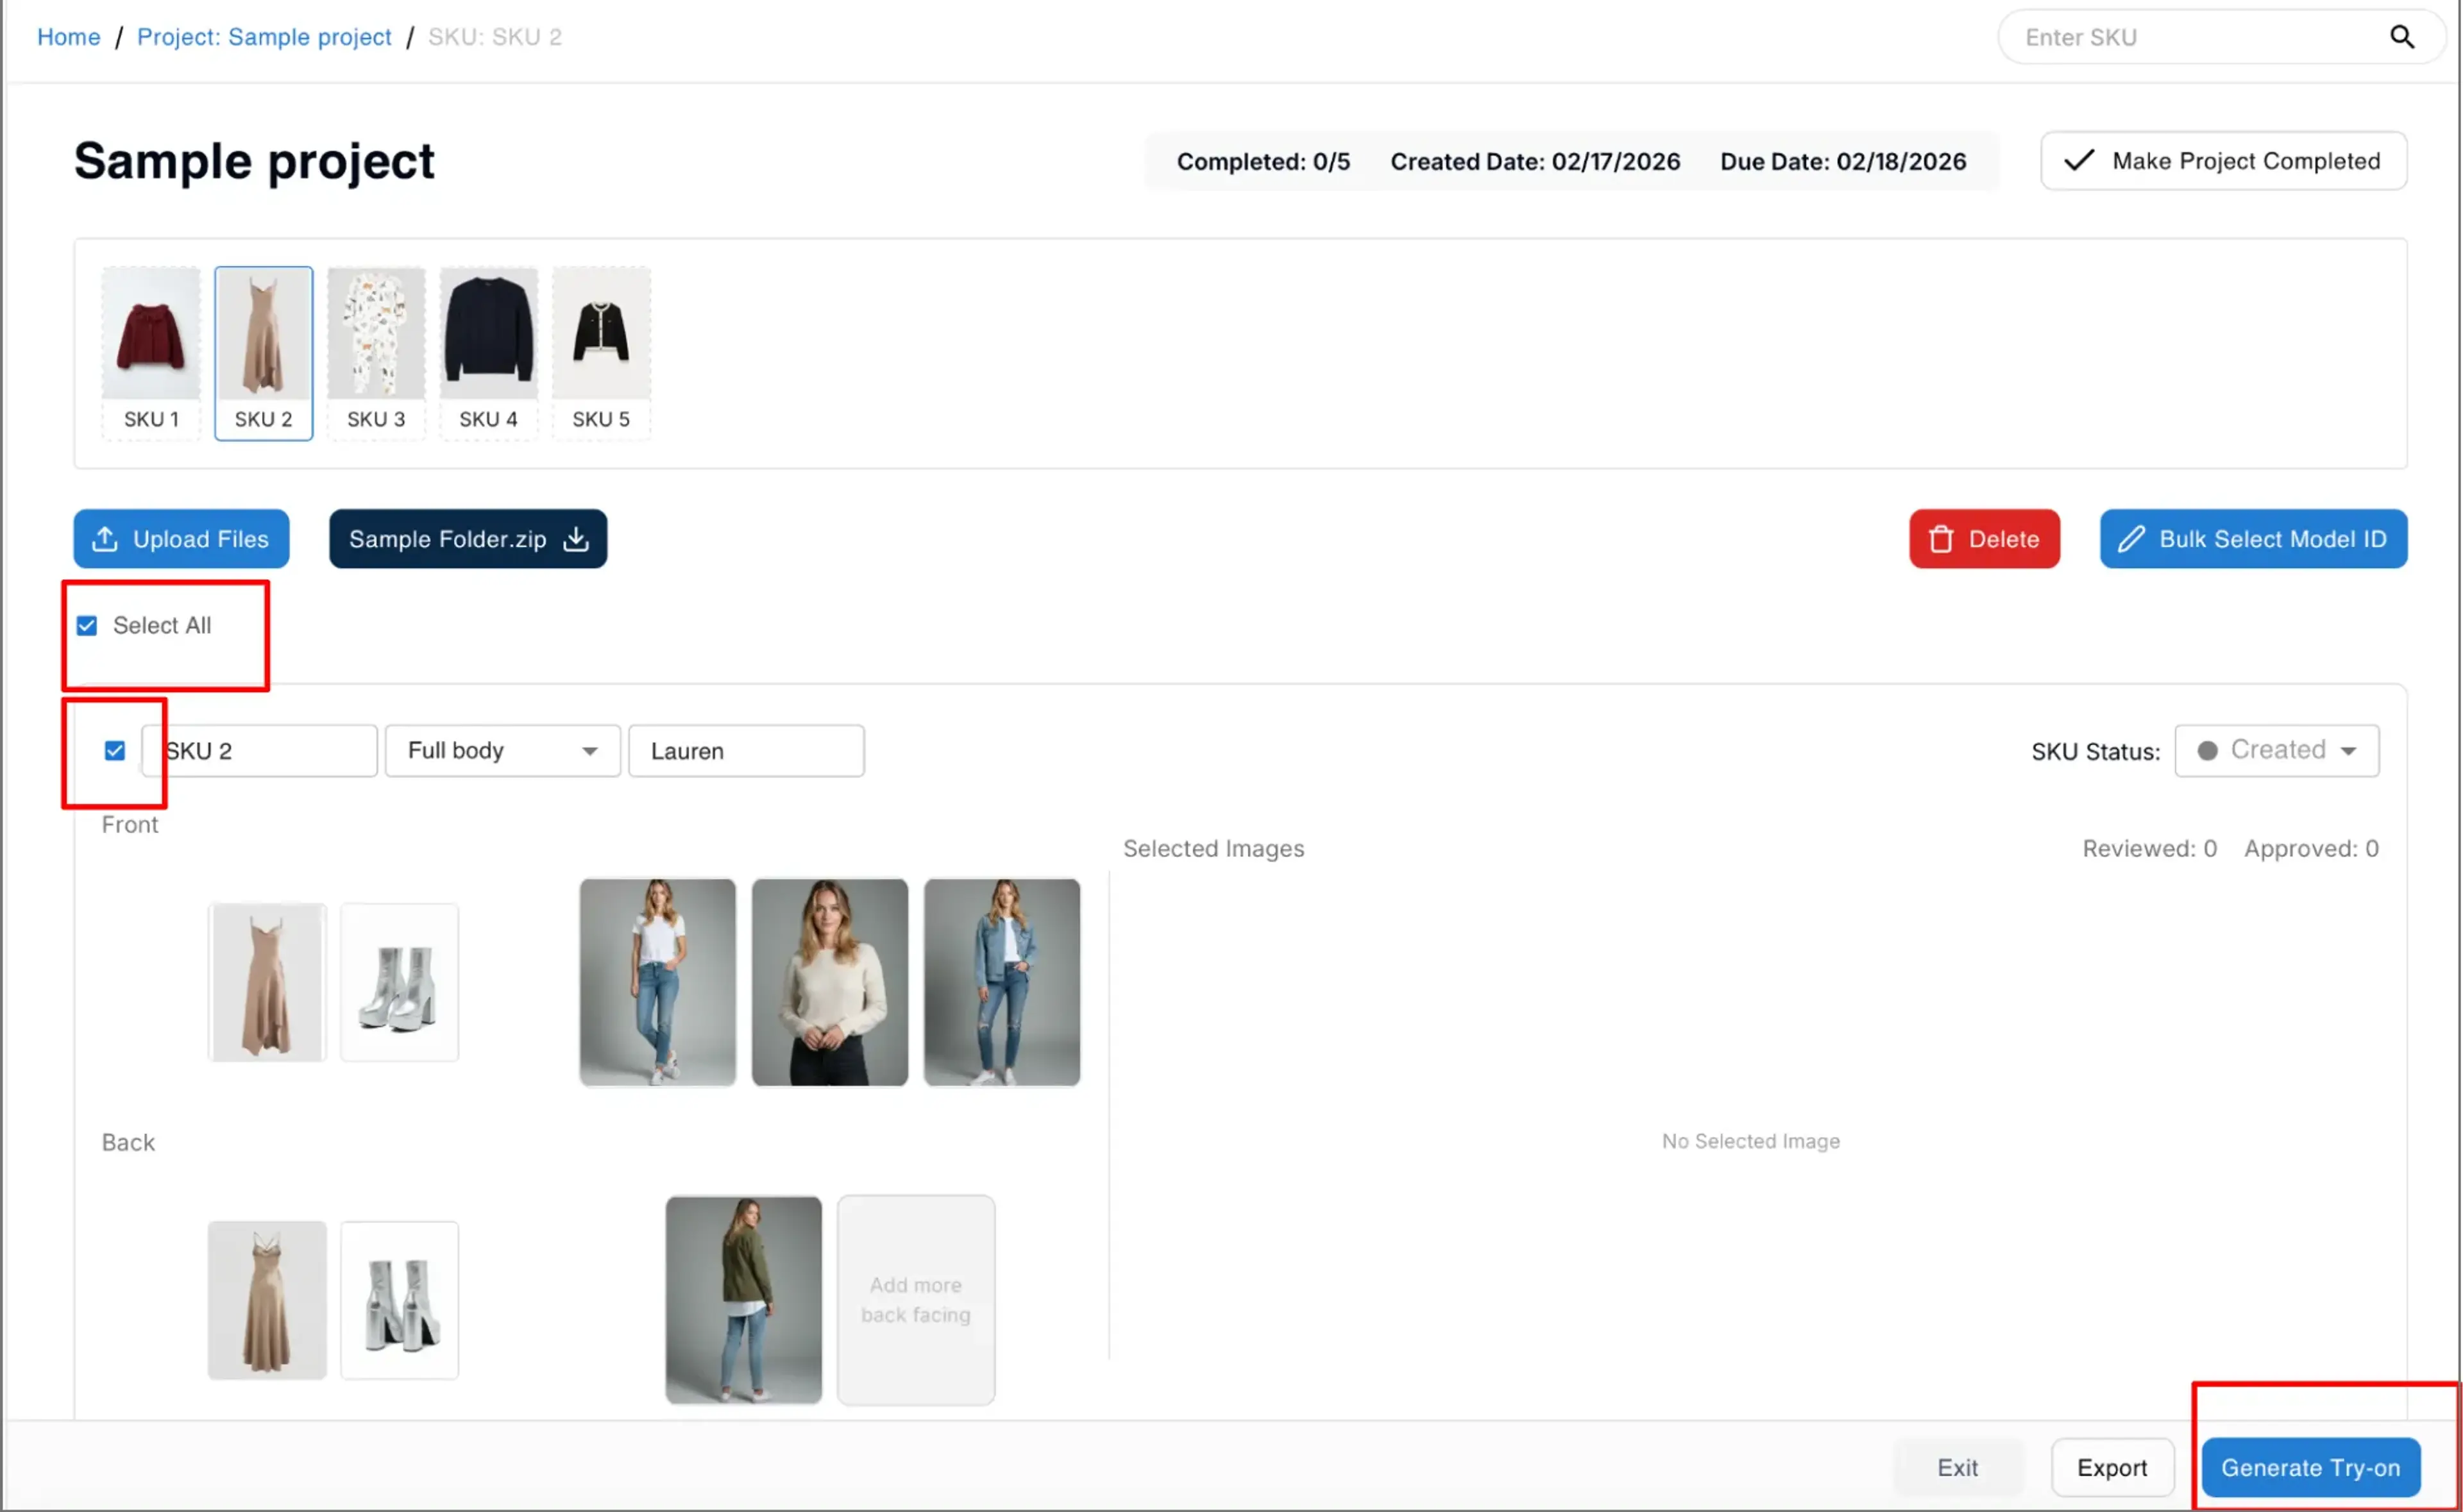
Step 7: Confirm garment pairing
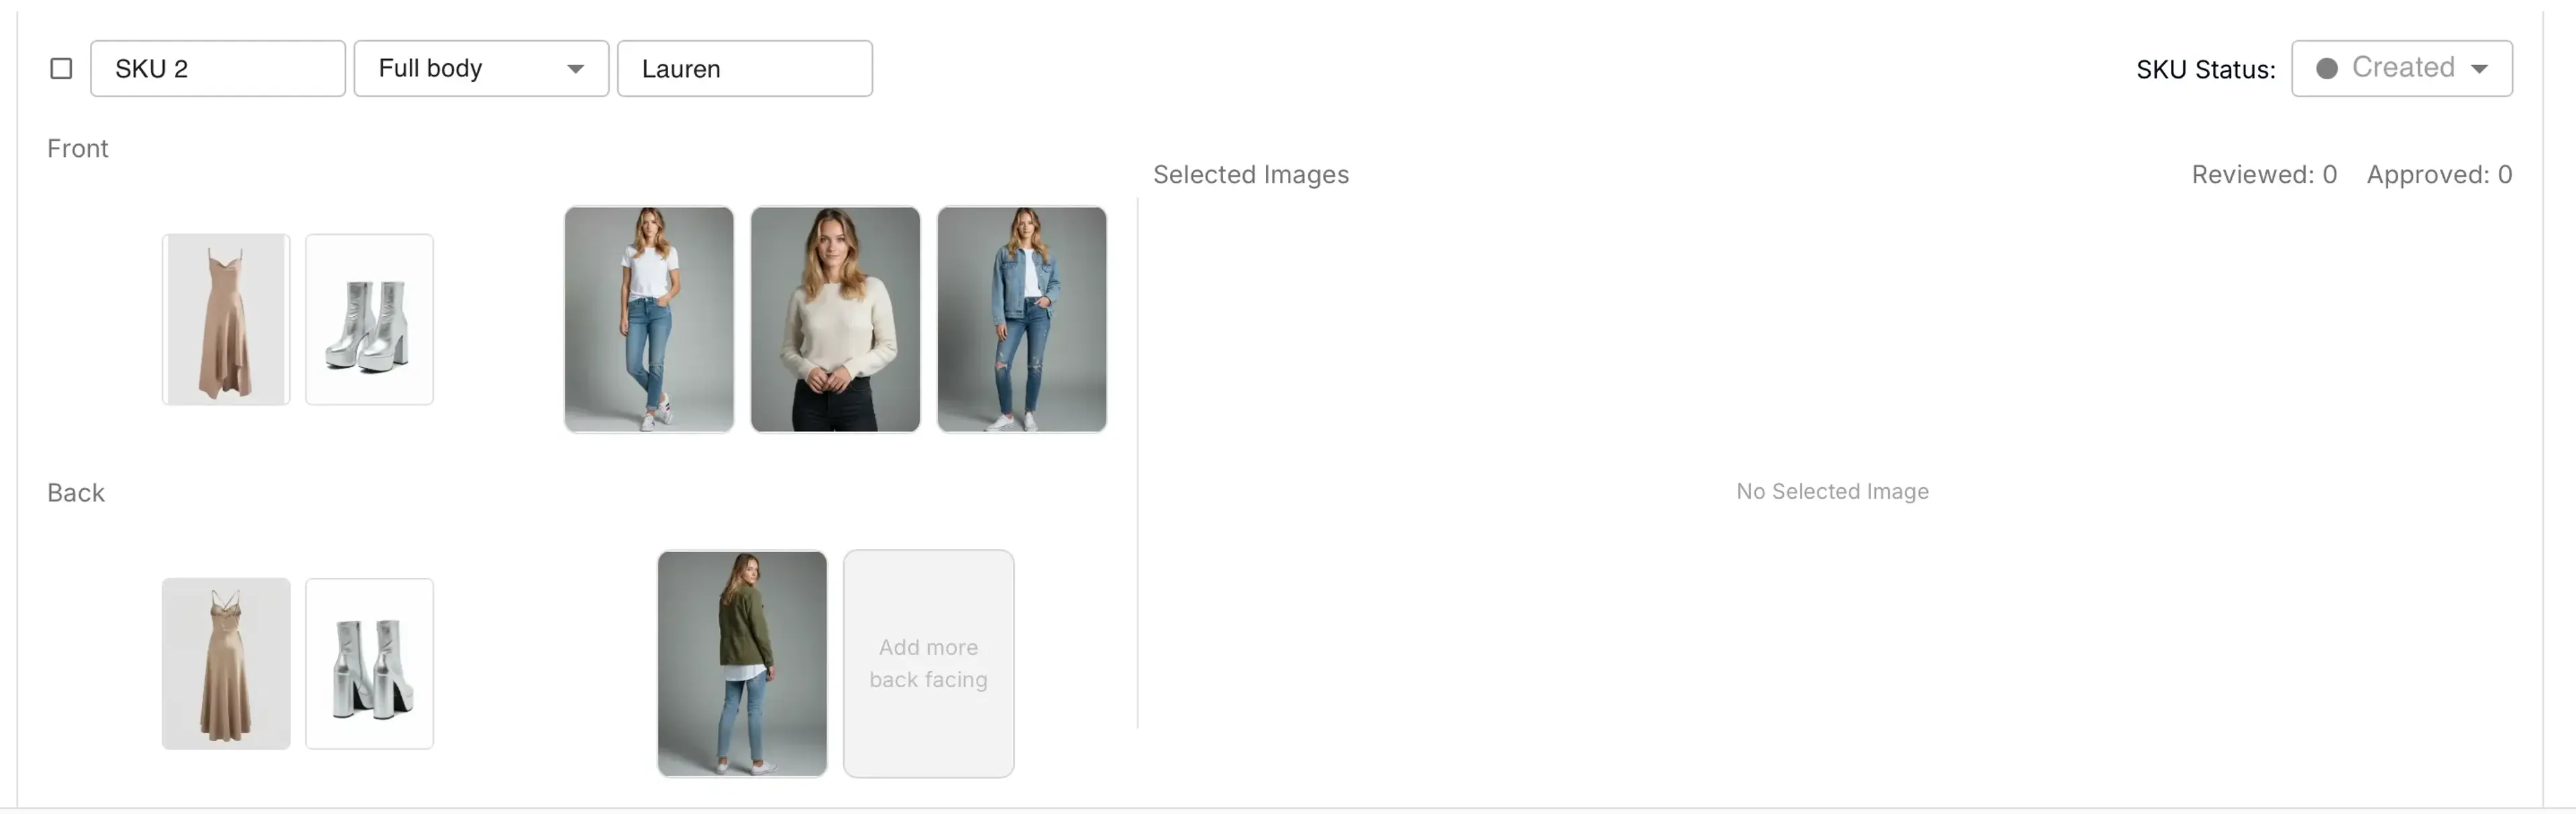
Pair Garments: After the SKU is successfully created, you will need to confirm the pairing of the garment images, such as top–bottom pairing, front and back views, and accessory matching.
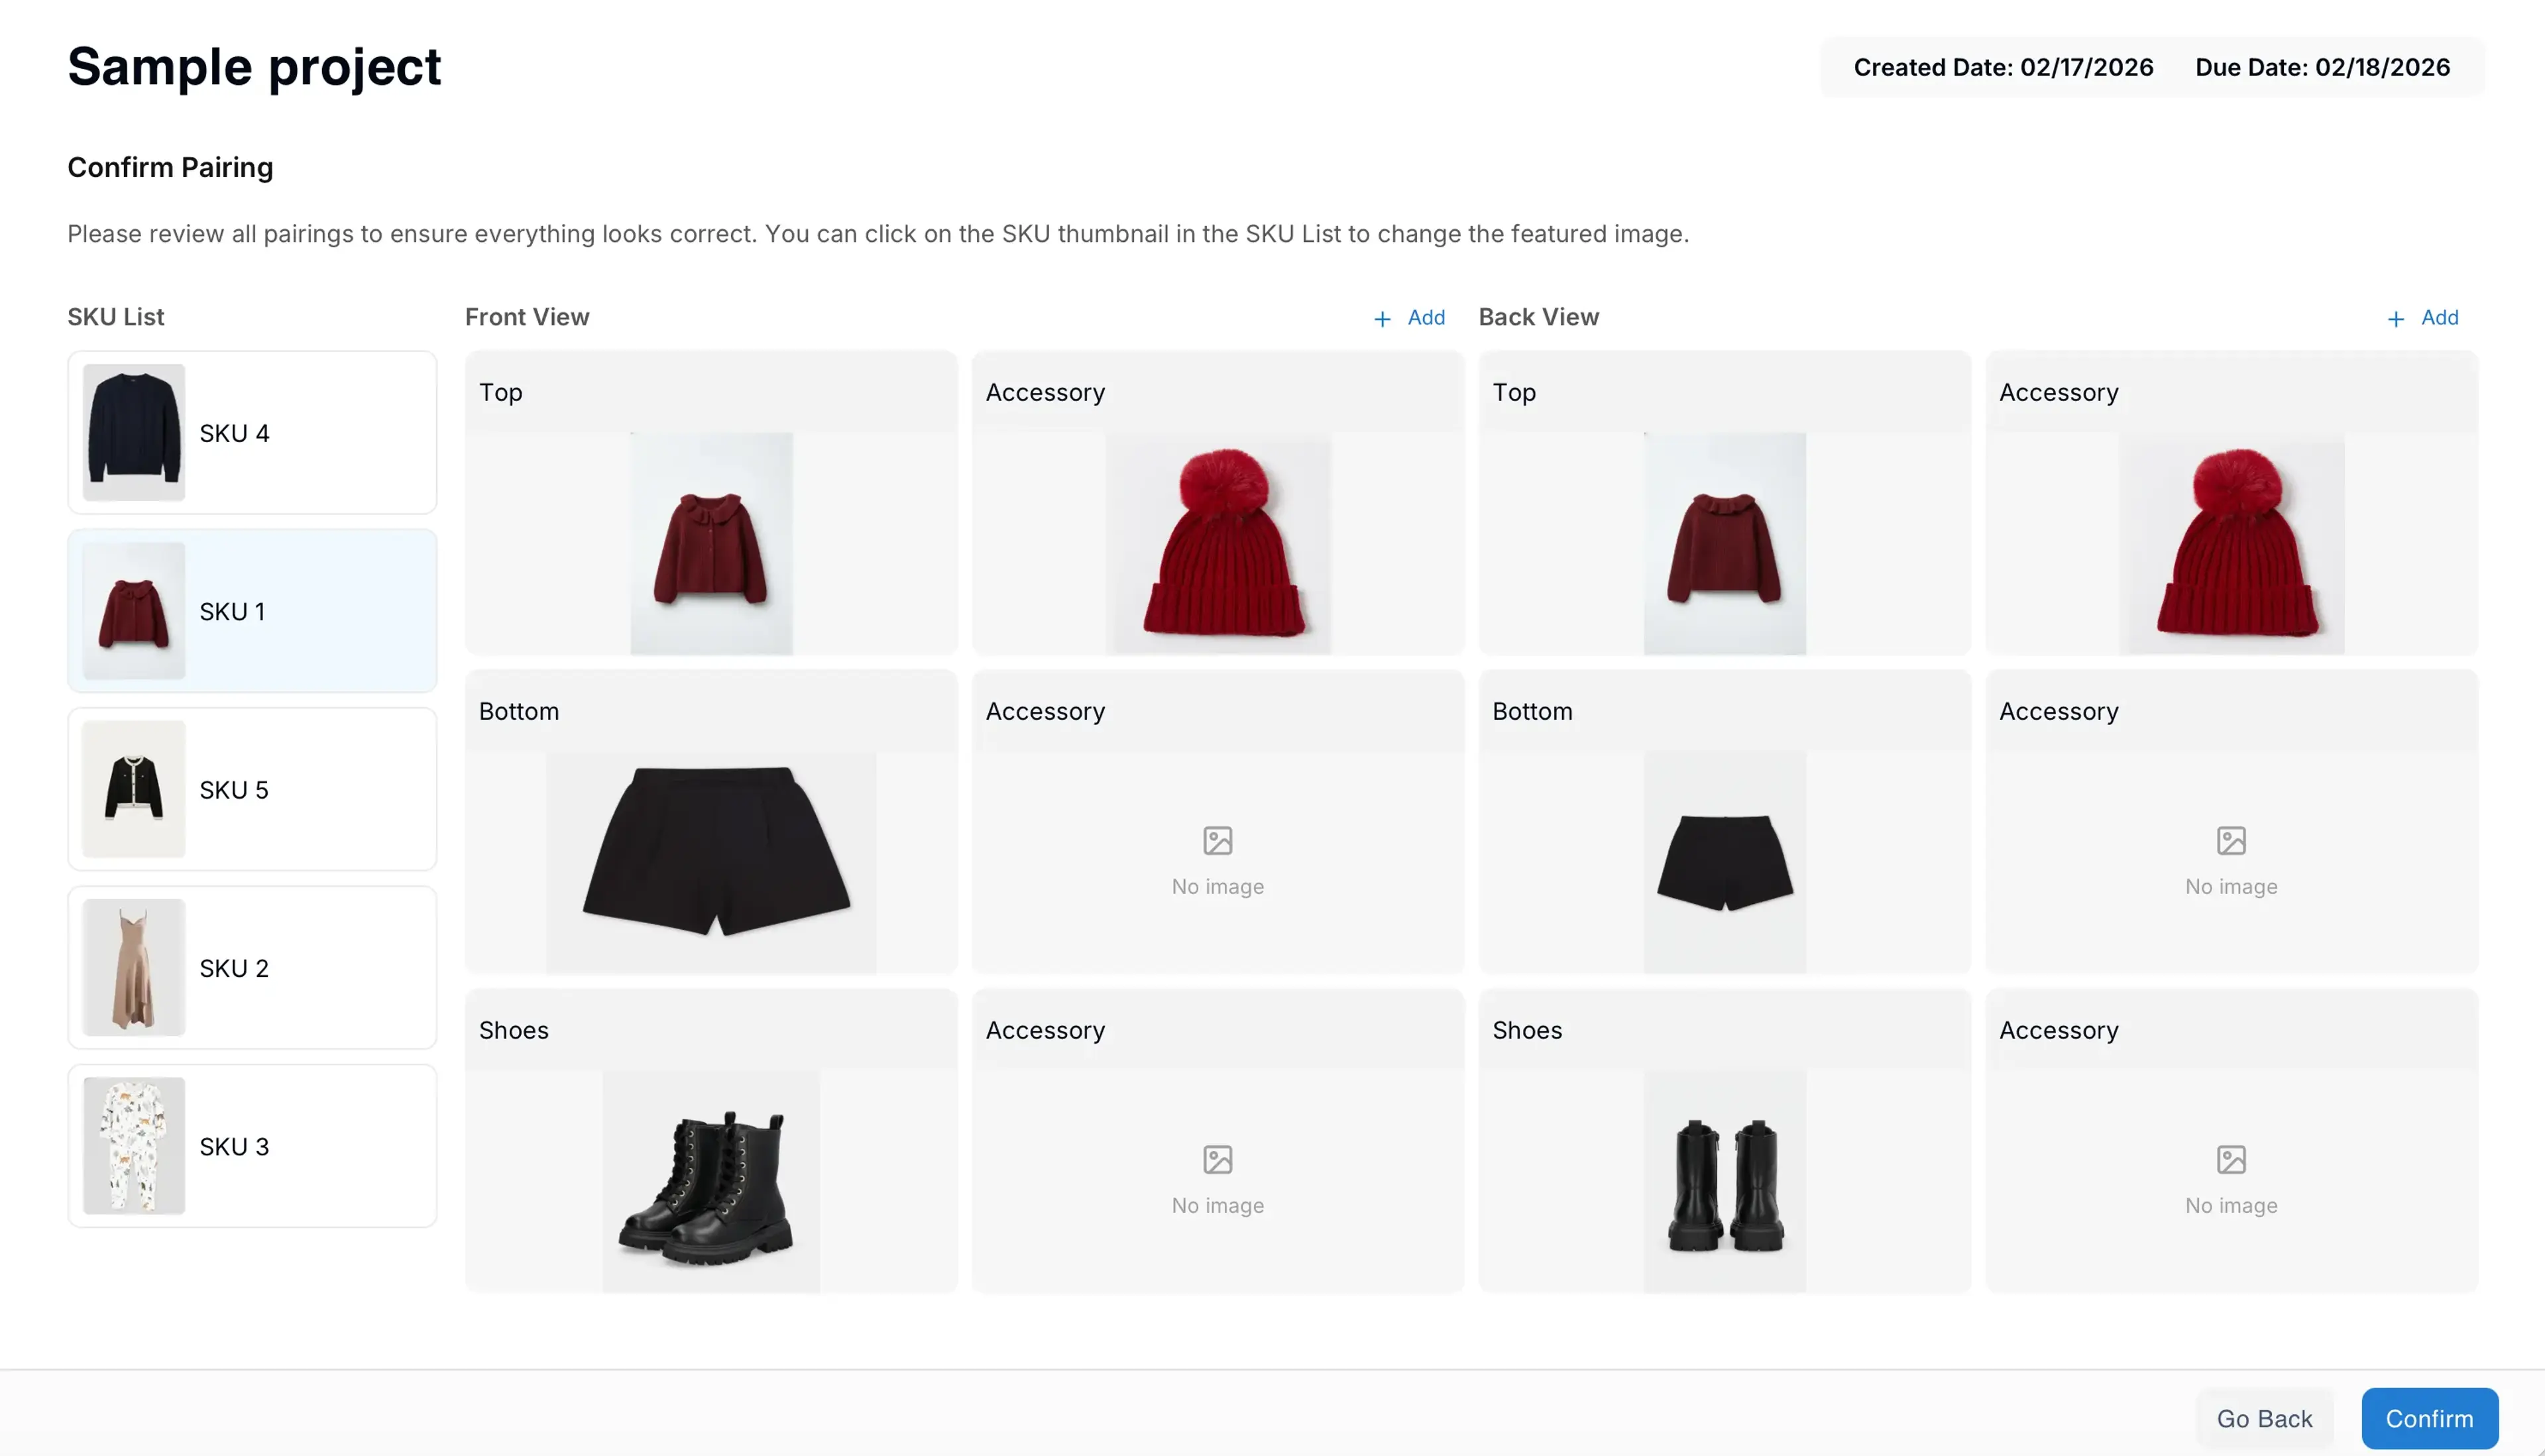
Replace, add or remove garments: You can replace the garment images by clicking on the thumbnails, or add/remove images as needed. You can choose to add images from the current project, or from your local computer.
SKU Thumbnails: You can also click the Garment thumbnail on the left to replace the cover image for the current SKU.
Step 8: Review Task Settings
Click the confirm button to create the SKU tasks. You will be brought to the Project Overview page.
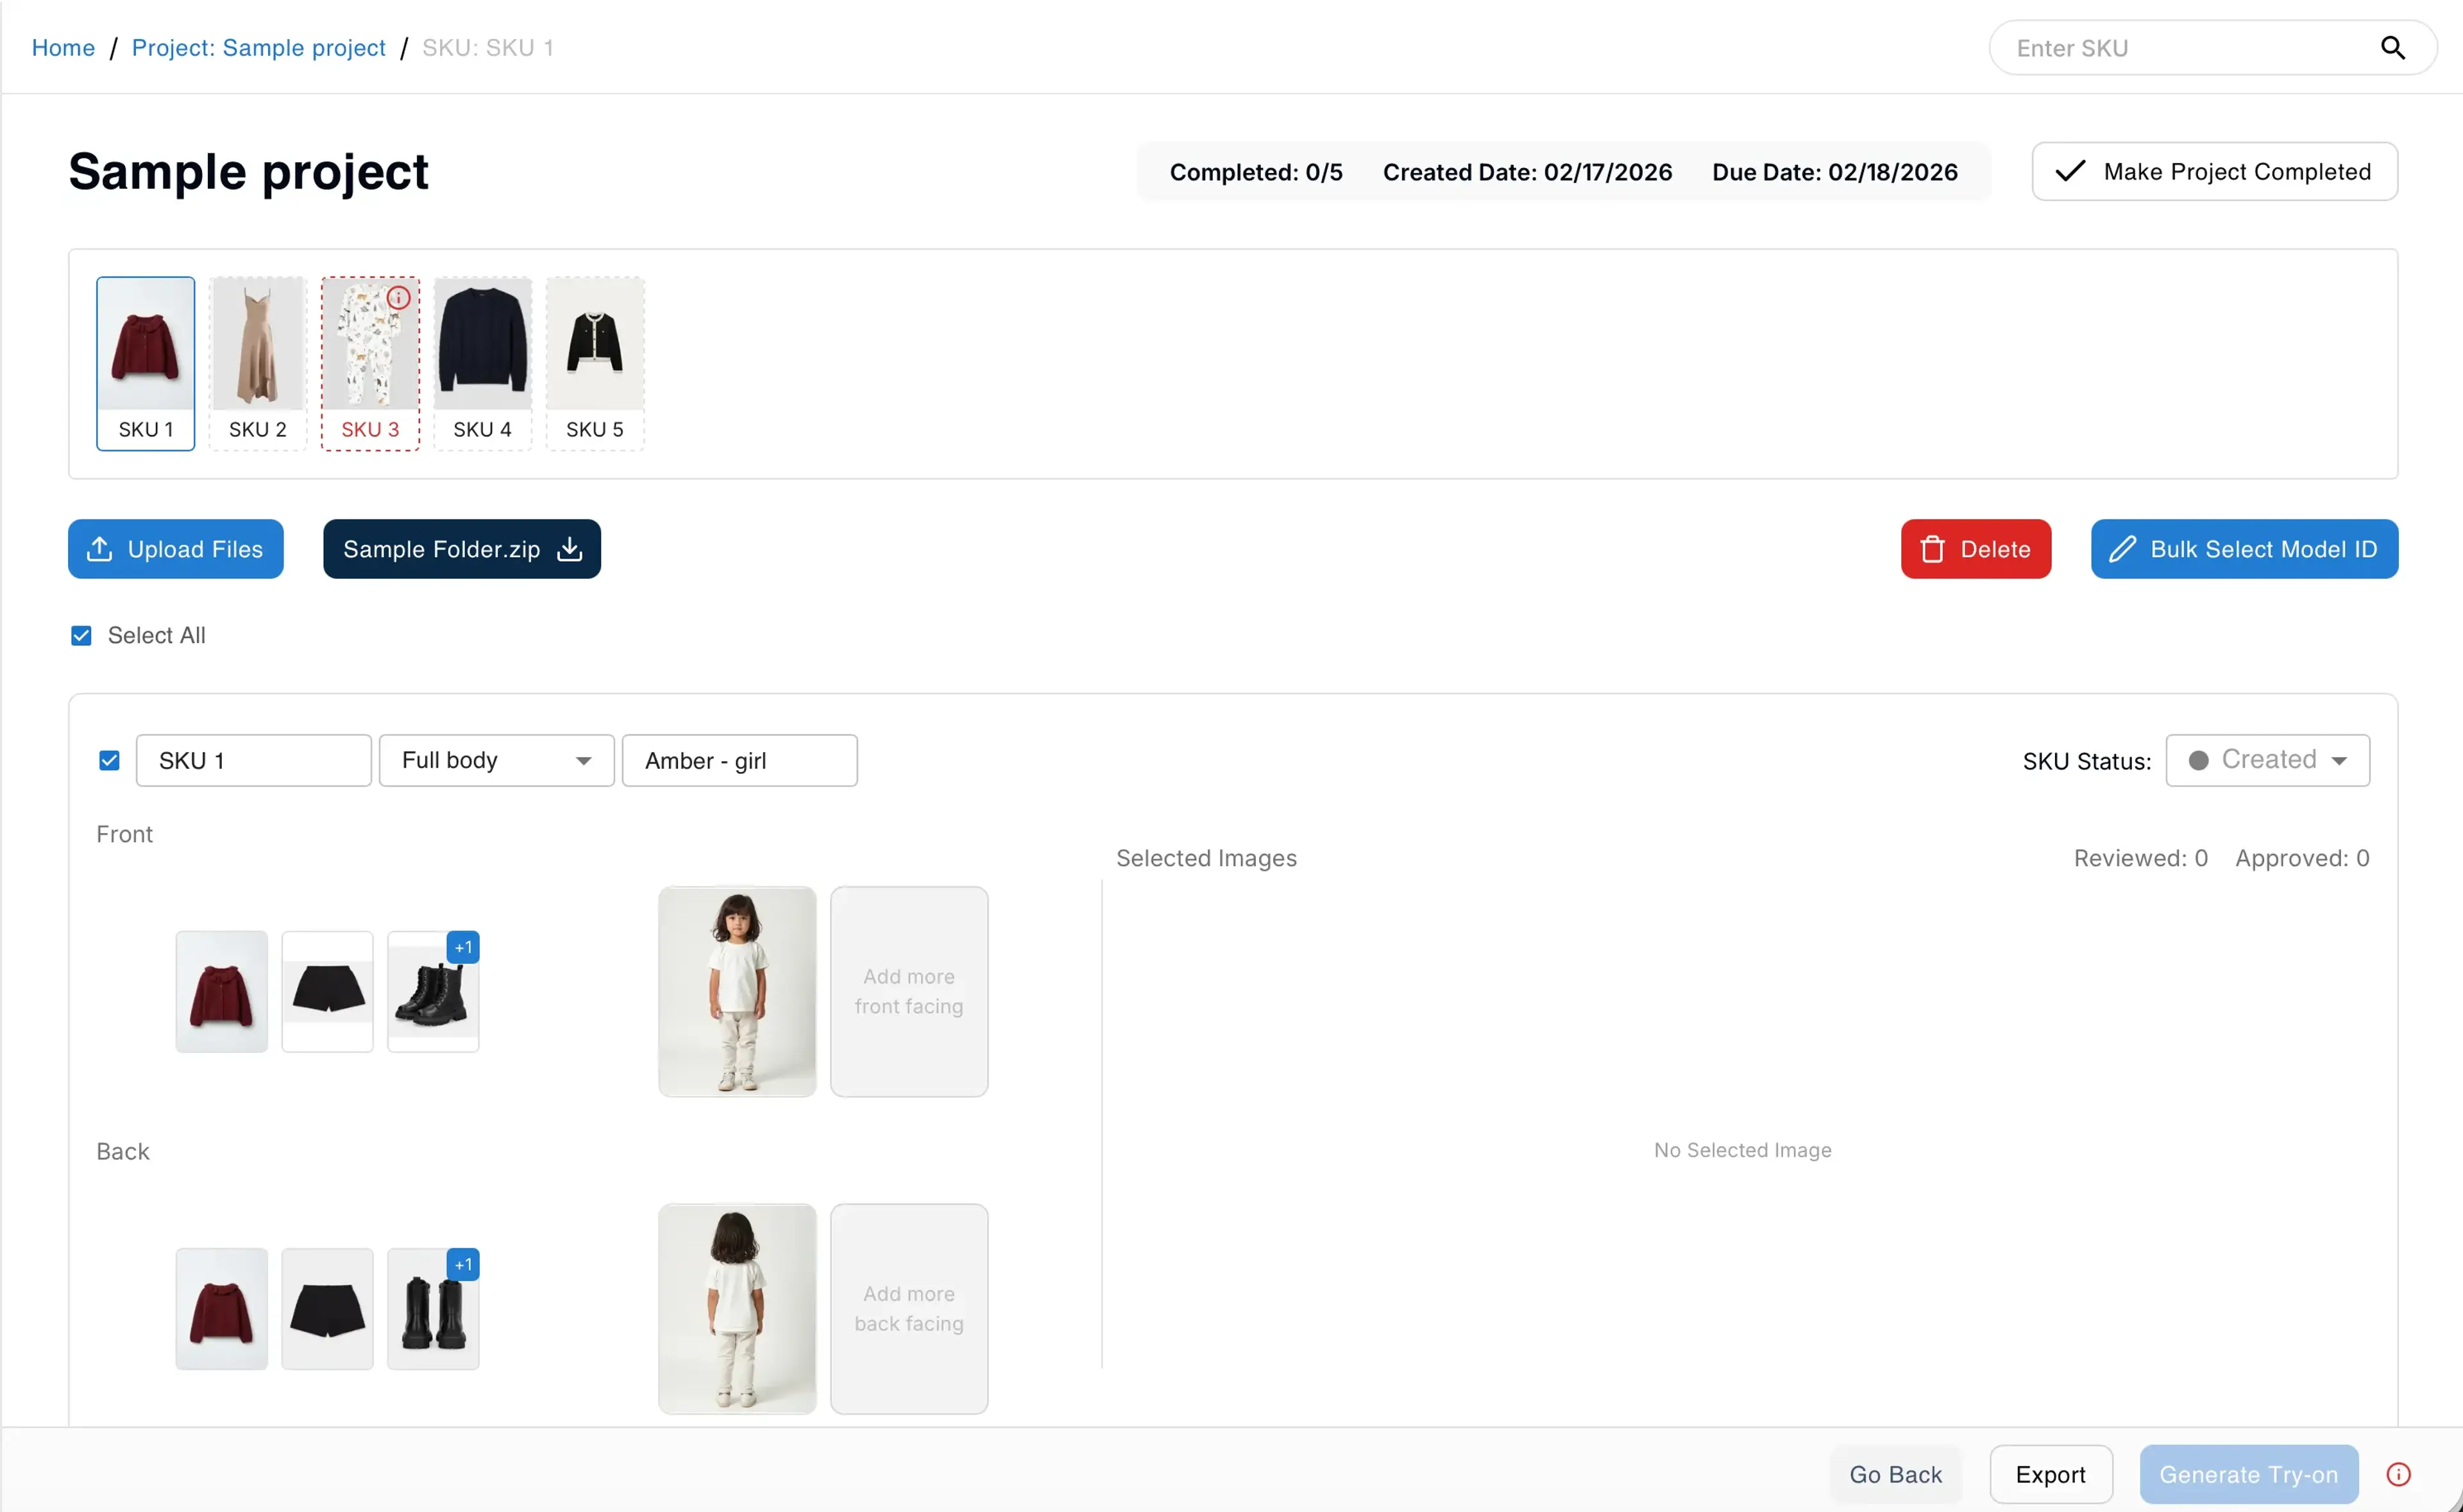
Each SKU will by default create 2 tasks each, one front and one back. Your garment images are automatically categorized into the front and back tasks. You can click the garment images to add/remove the garments needed for your try-on tasks.
The model images are automatically mapped to the front and back tasks based on your model ID selection. You can click the model image to switch or add more model images to pair up with your SKU.
You’ll see a warning on your SKU image when some of your SKUs are missing model images. Click the SKU image with the warning to quickly locate the problematic SKU. You can switch to a different model ID or select/create more model images for the model ID you need.
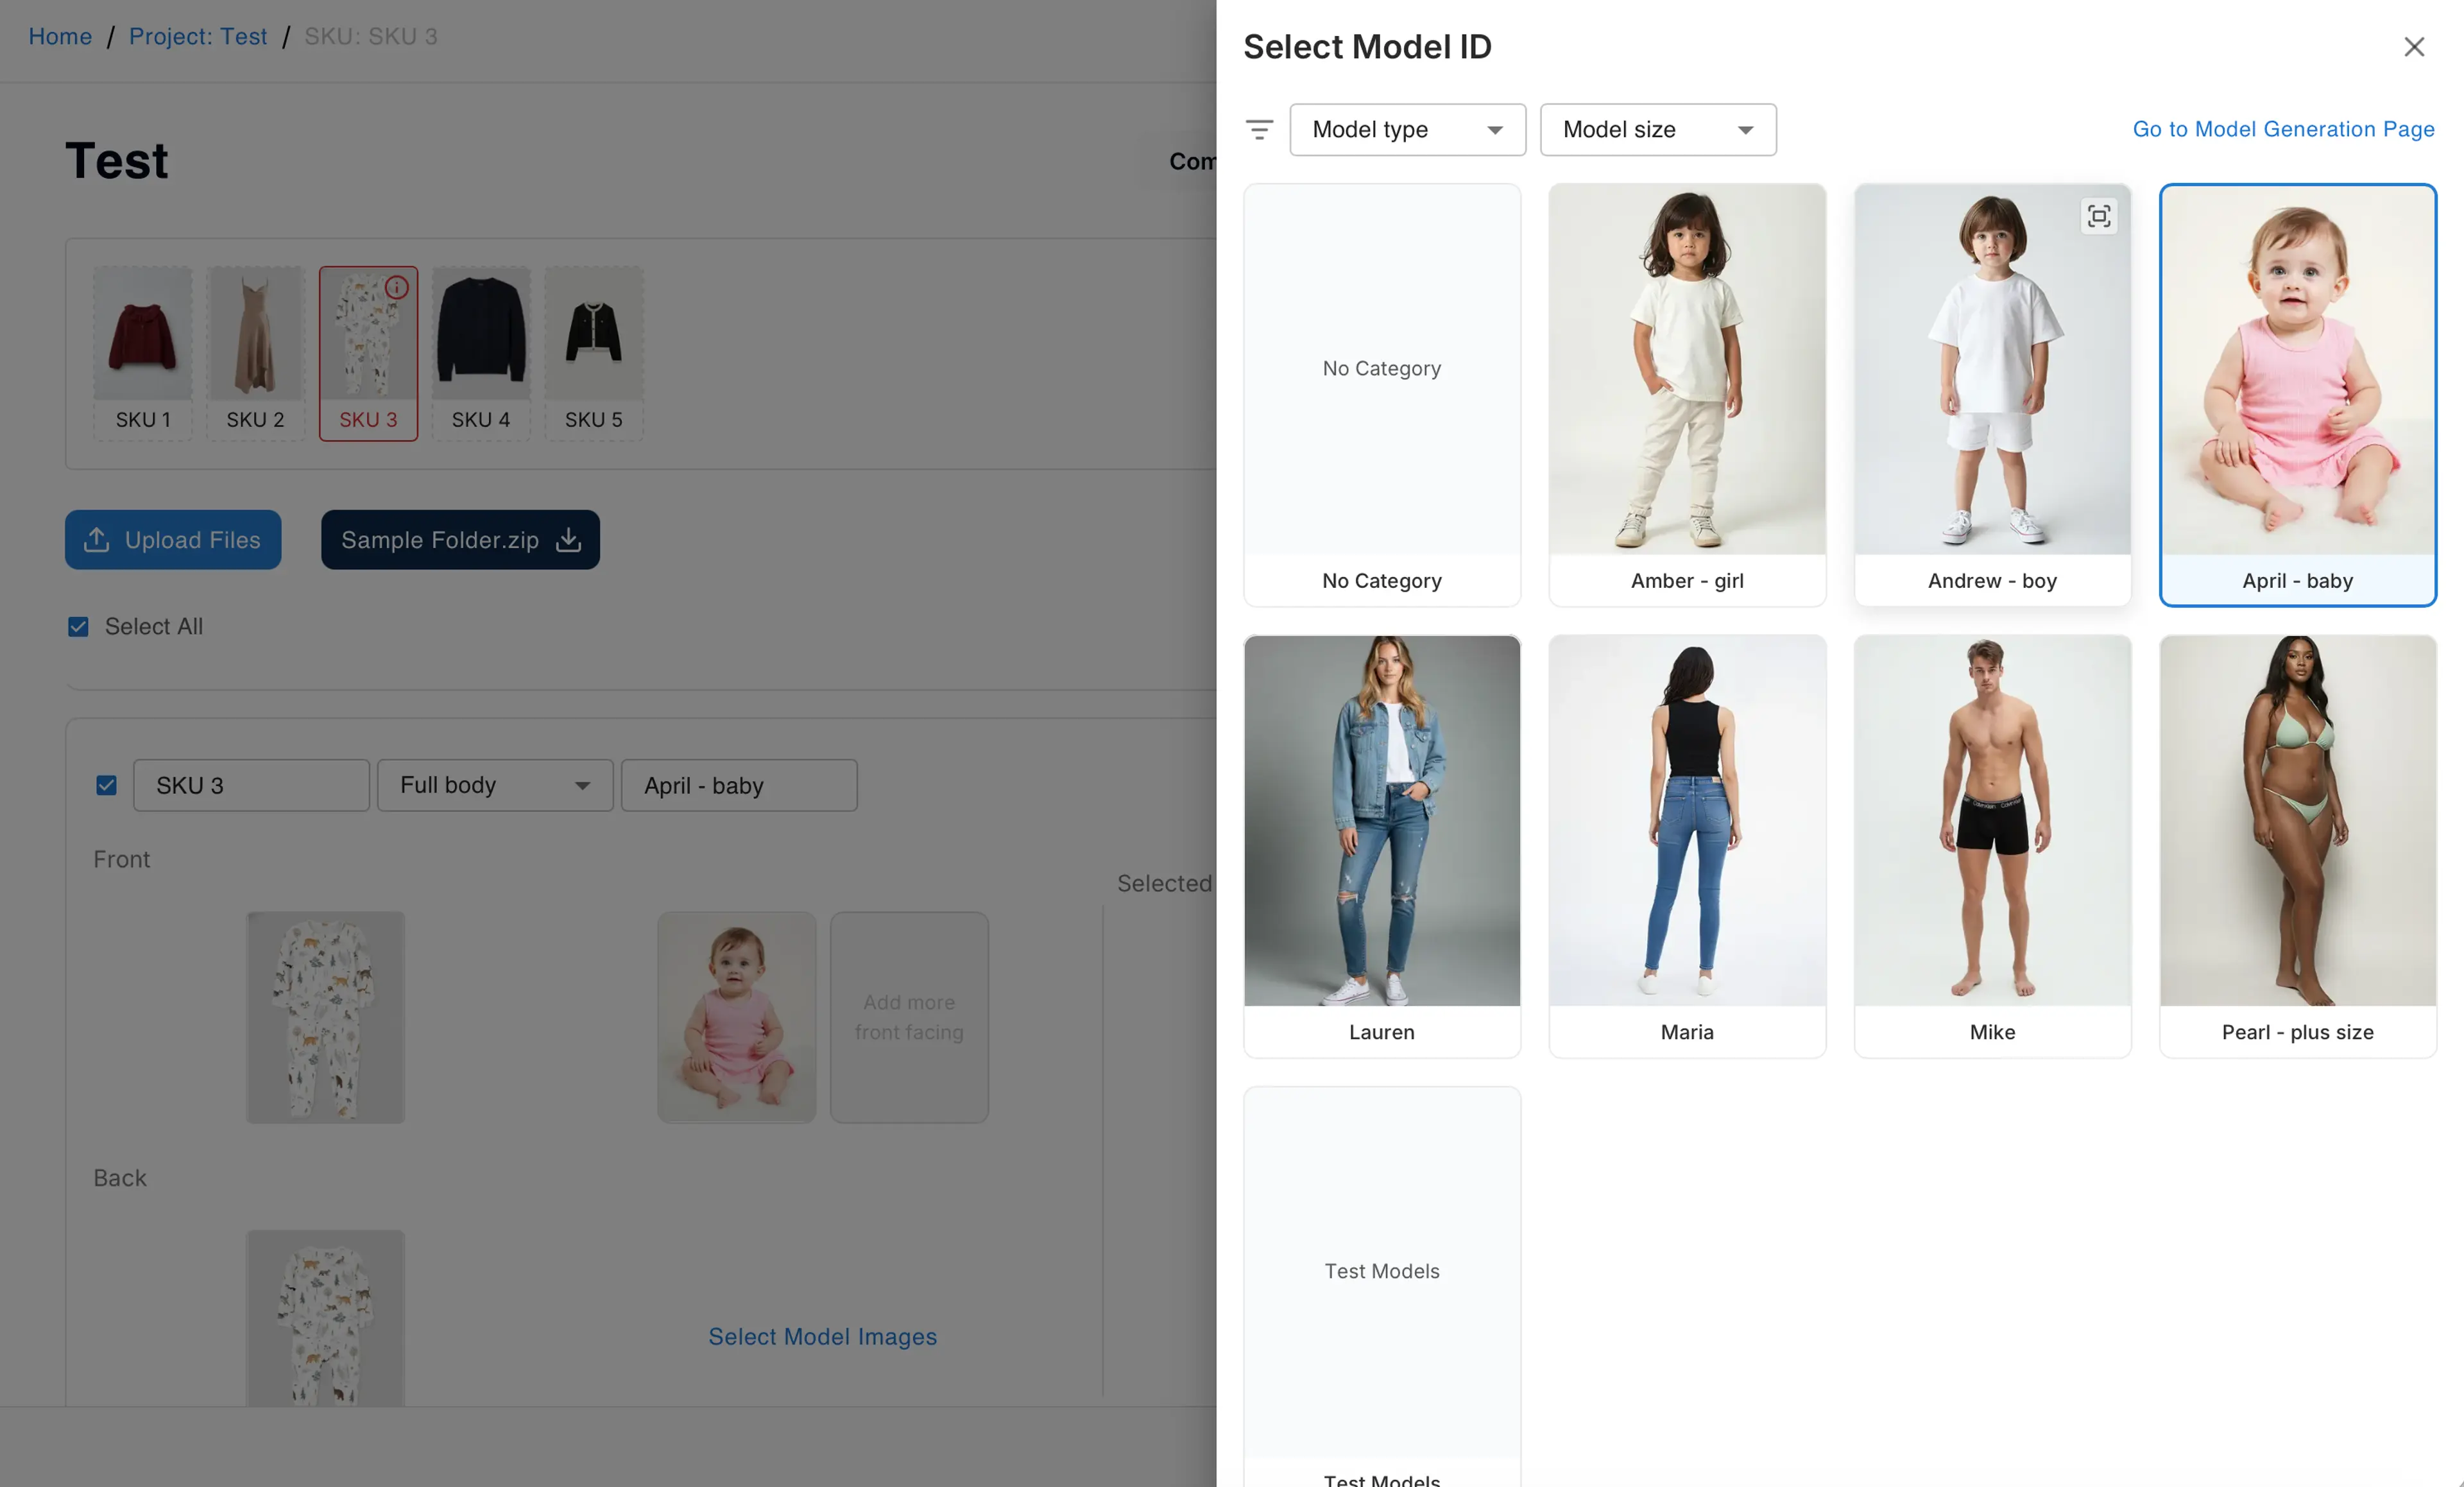
Change the model ID to a different model ID.
Step 9: Generate try-on images
When all missing pairings are fixed, you can check all the tasks you’d like to generate and click the Generate try-on button to start the generation.
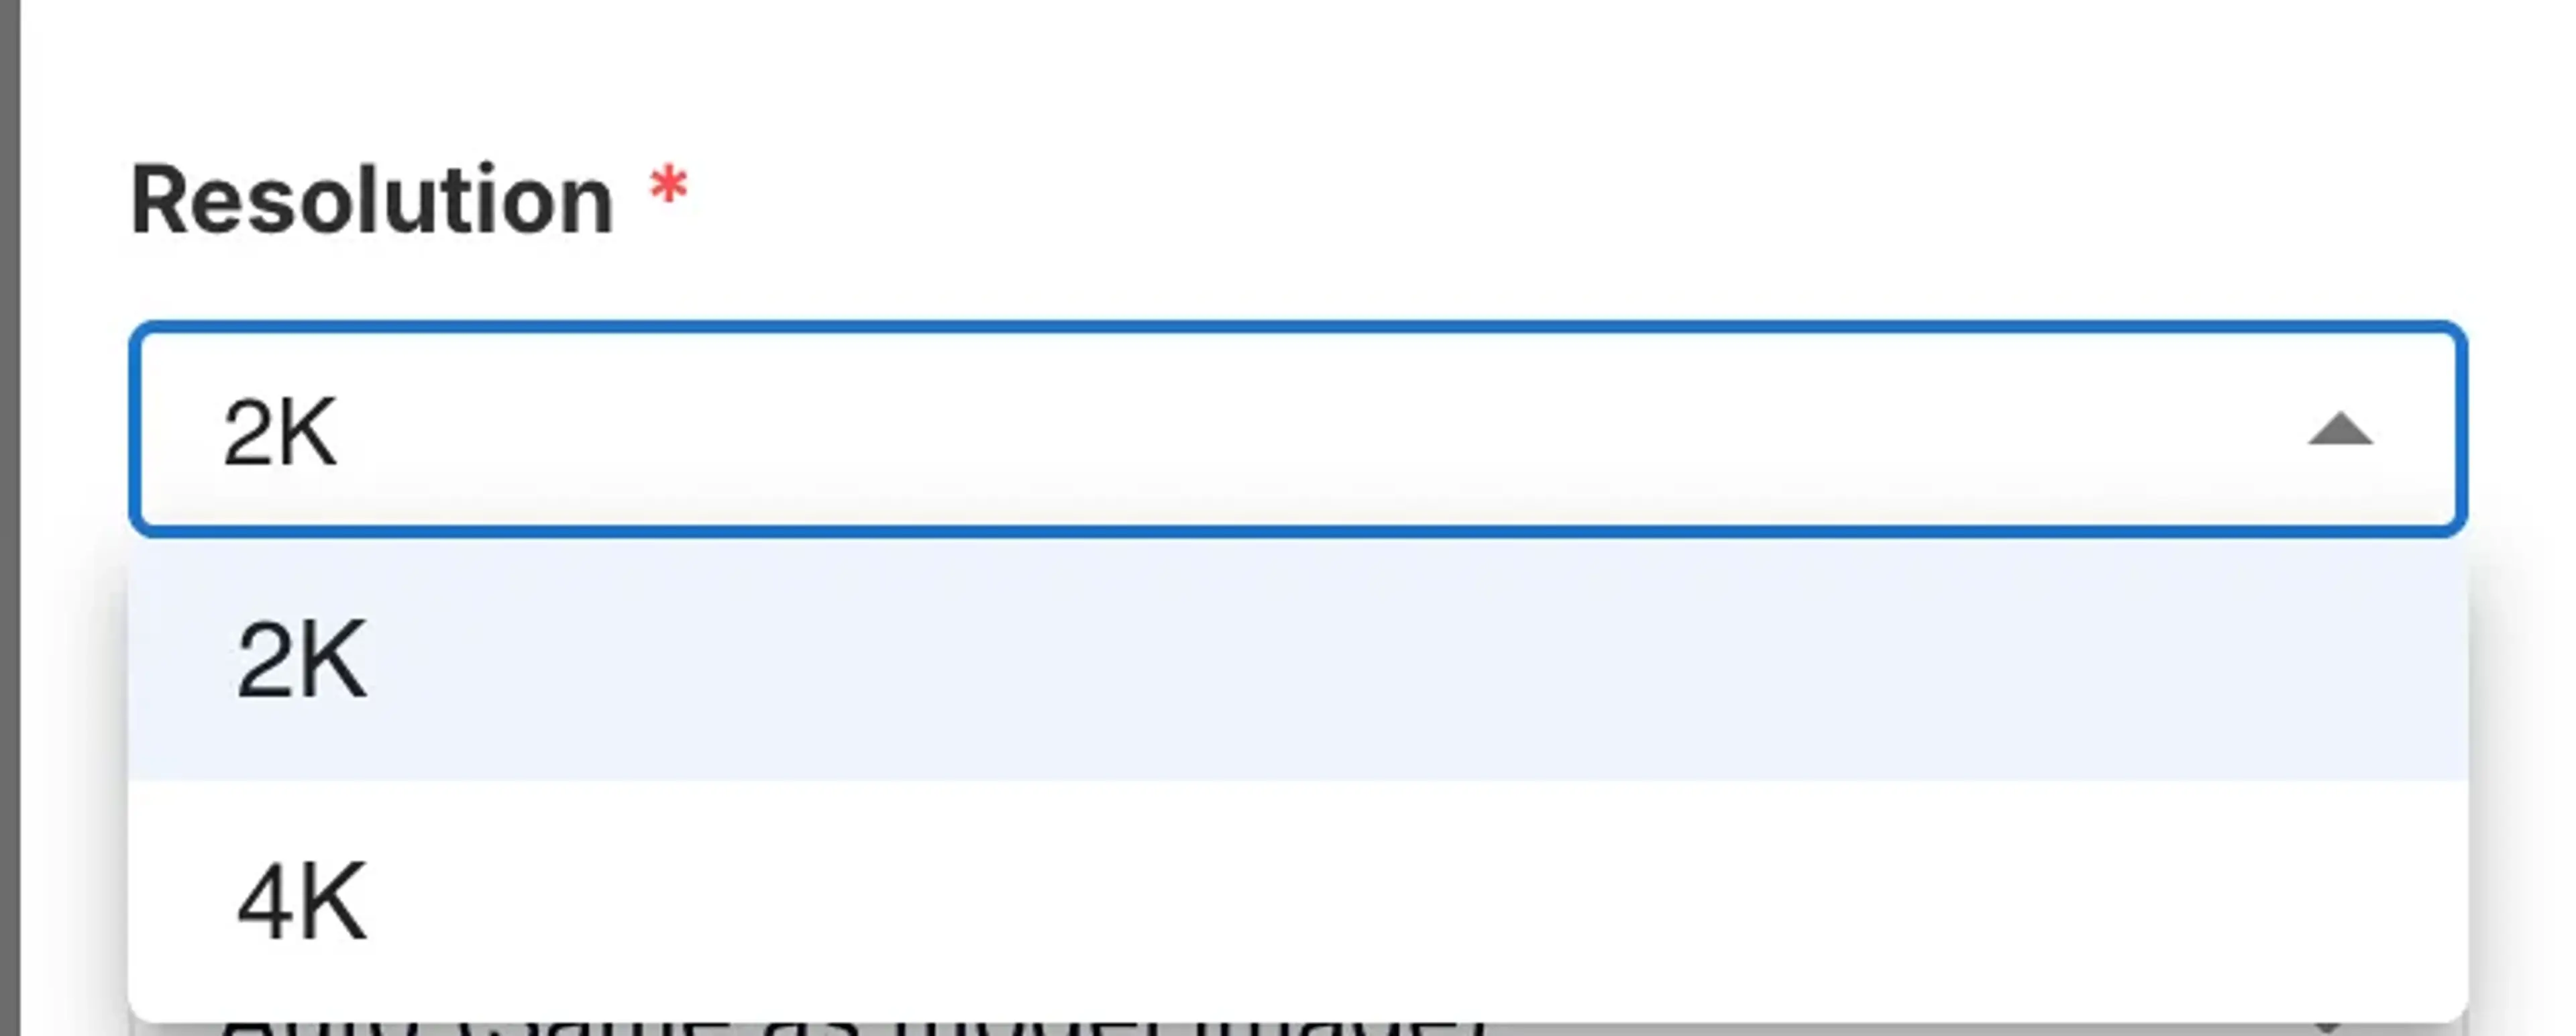
A generation setting drawer will appear from the right. You can choose the resolution and aspect ratio based on your need.
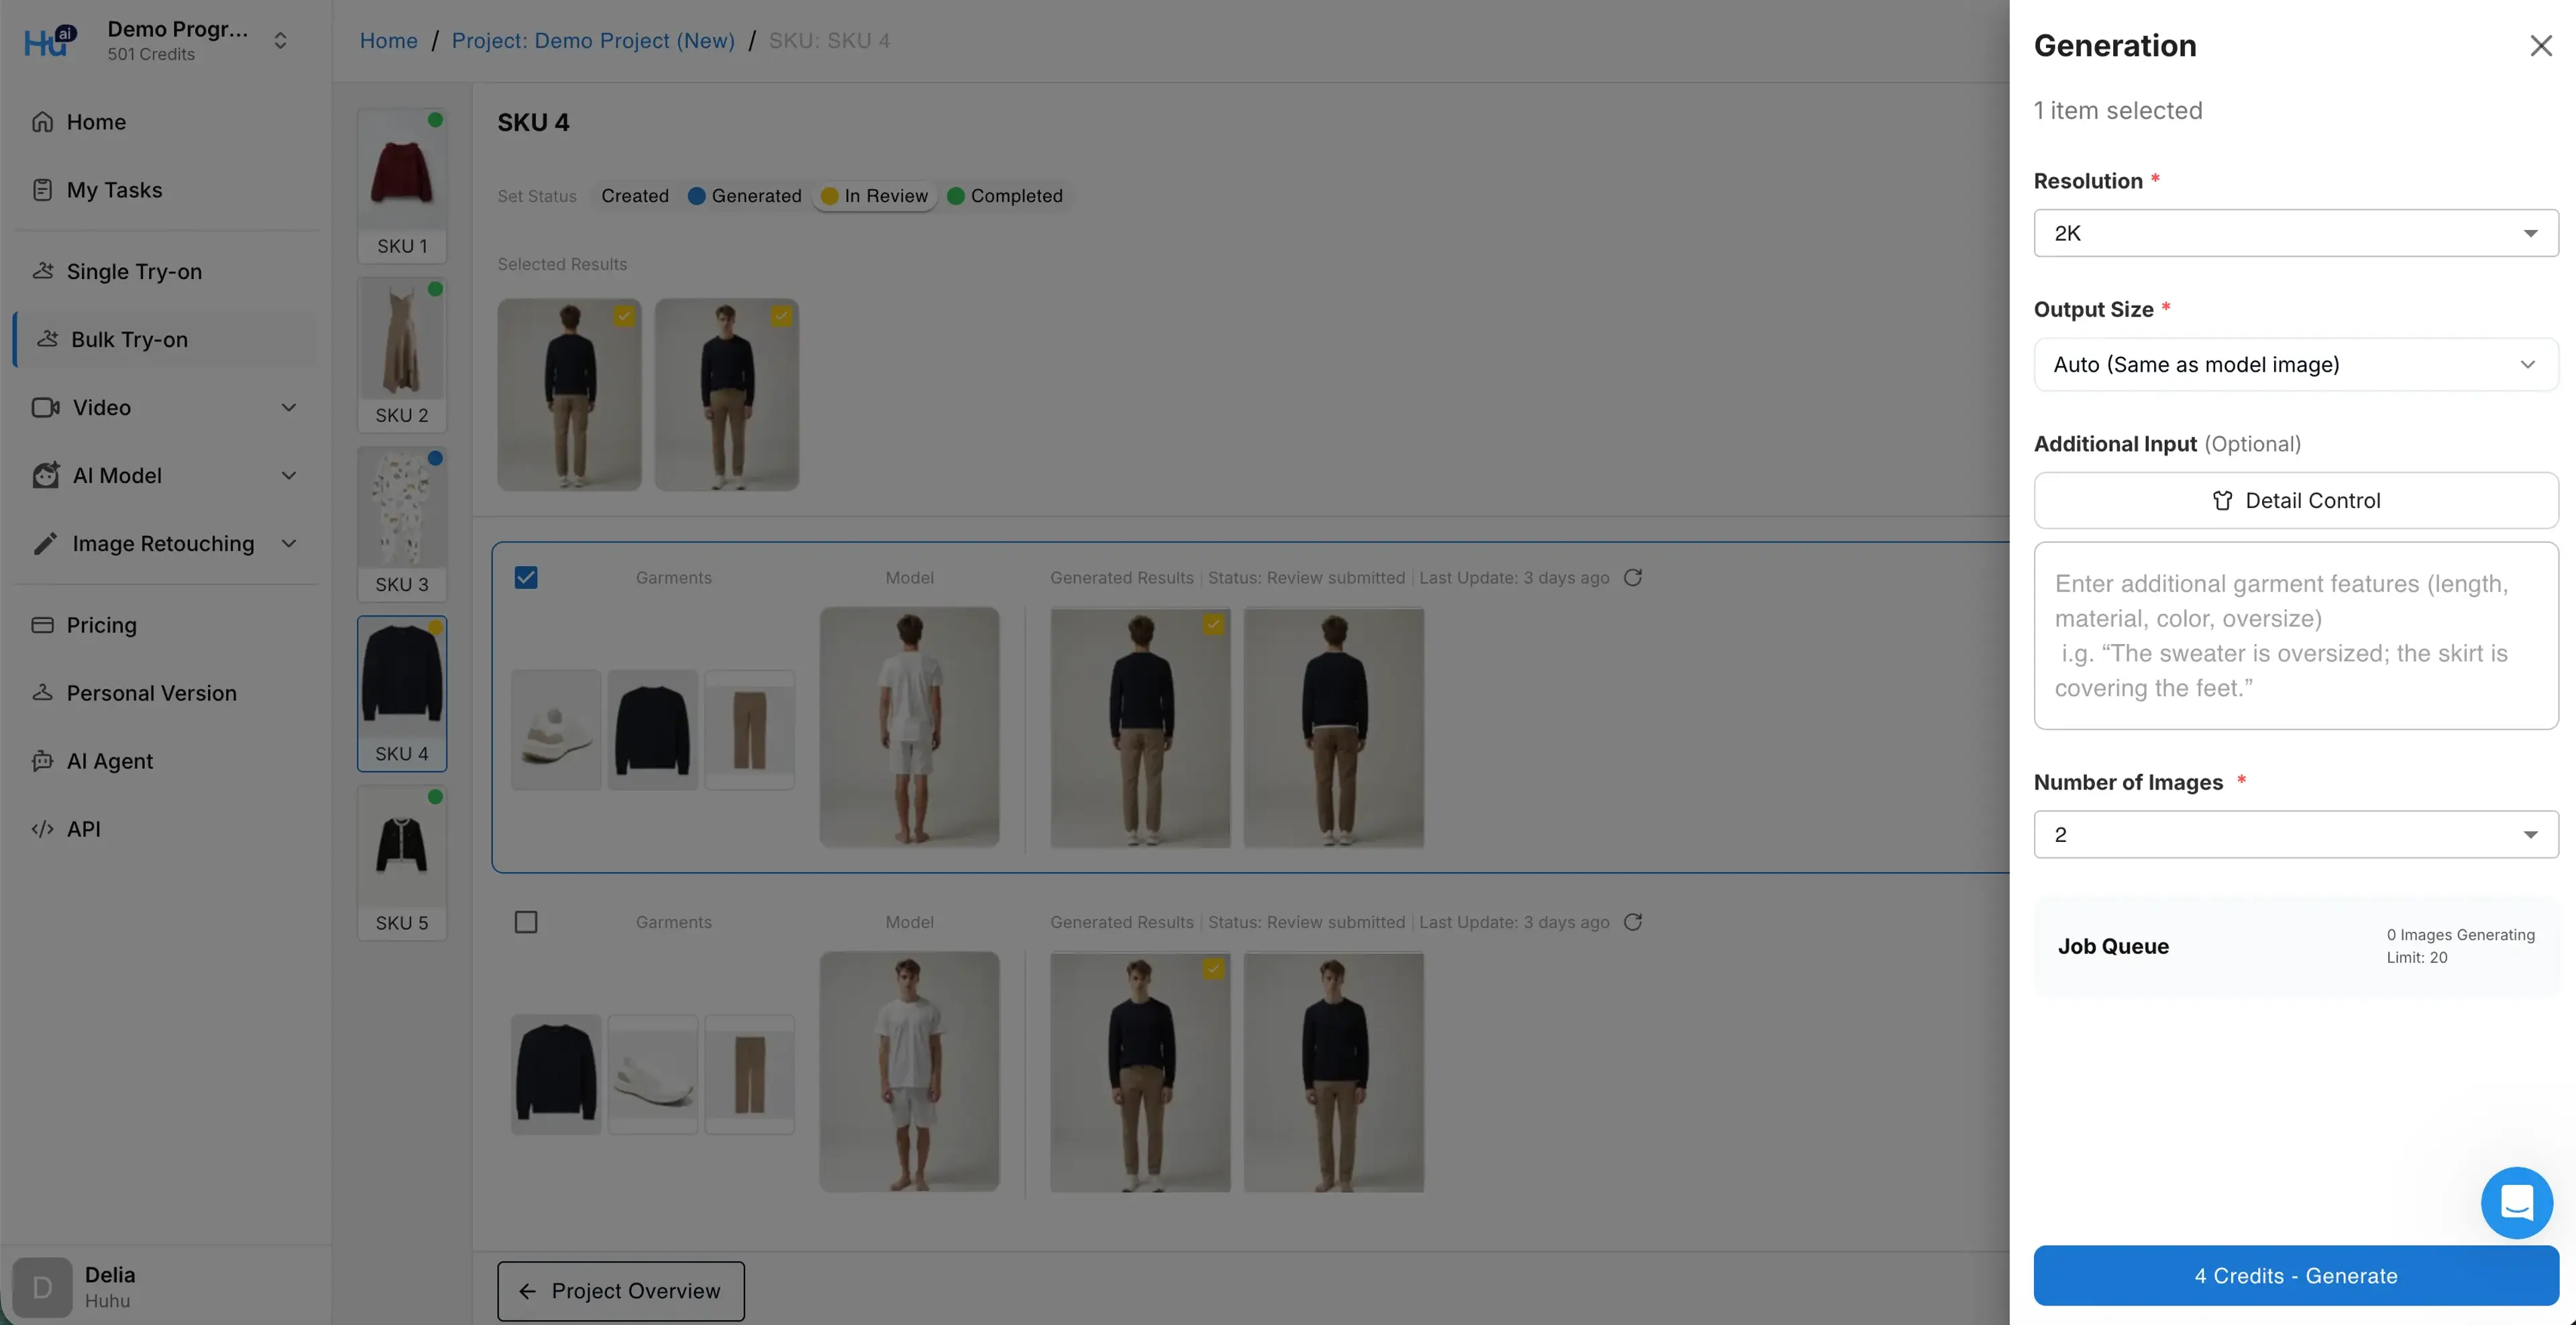
Resolution options: 2K and 4K
Aspect ratio options: Auto (Same as model image), 3:4, 1:1, 2:3, 4:5, 9:16

You’ll see how many credits you’ll be charged for the tasks you select to process. You will also see how many tasks you can run in concurrent.
You can control the detail of your try on results using the detail control feature such as fitting, tucking, length and opening of the sleeves and pants. You can also use additional prompts to control the try-on results. You can also leave everything as default, and simply click the generate button to start the generation.
Maximum concurrent job limit
Currently for a free tier, there’s a maximum concurrent job limit of 10 jobs. If the total number of concurrent jobs you intended to generate surpasses the limit, you cannot start the generation.
You can uncheck the SKU tasks to lower your number of submitted jobs to be able to submit the job.
You can also upgrade your plan to a higher tier to unlock more concurrent job limits.
Step 10: Review Generation Results
Once the generation starts, you’ll be brought to the SKU page.
In a few seconds you will see the results in the SKU page. Switch the SKU from the left to check through the generated results in each of the SKUs.
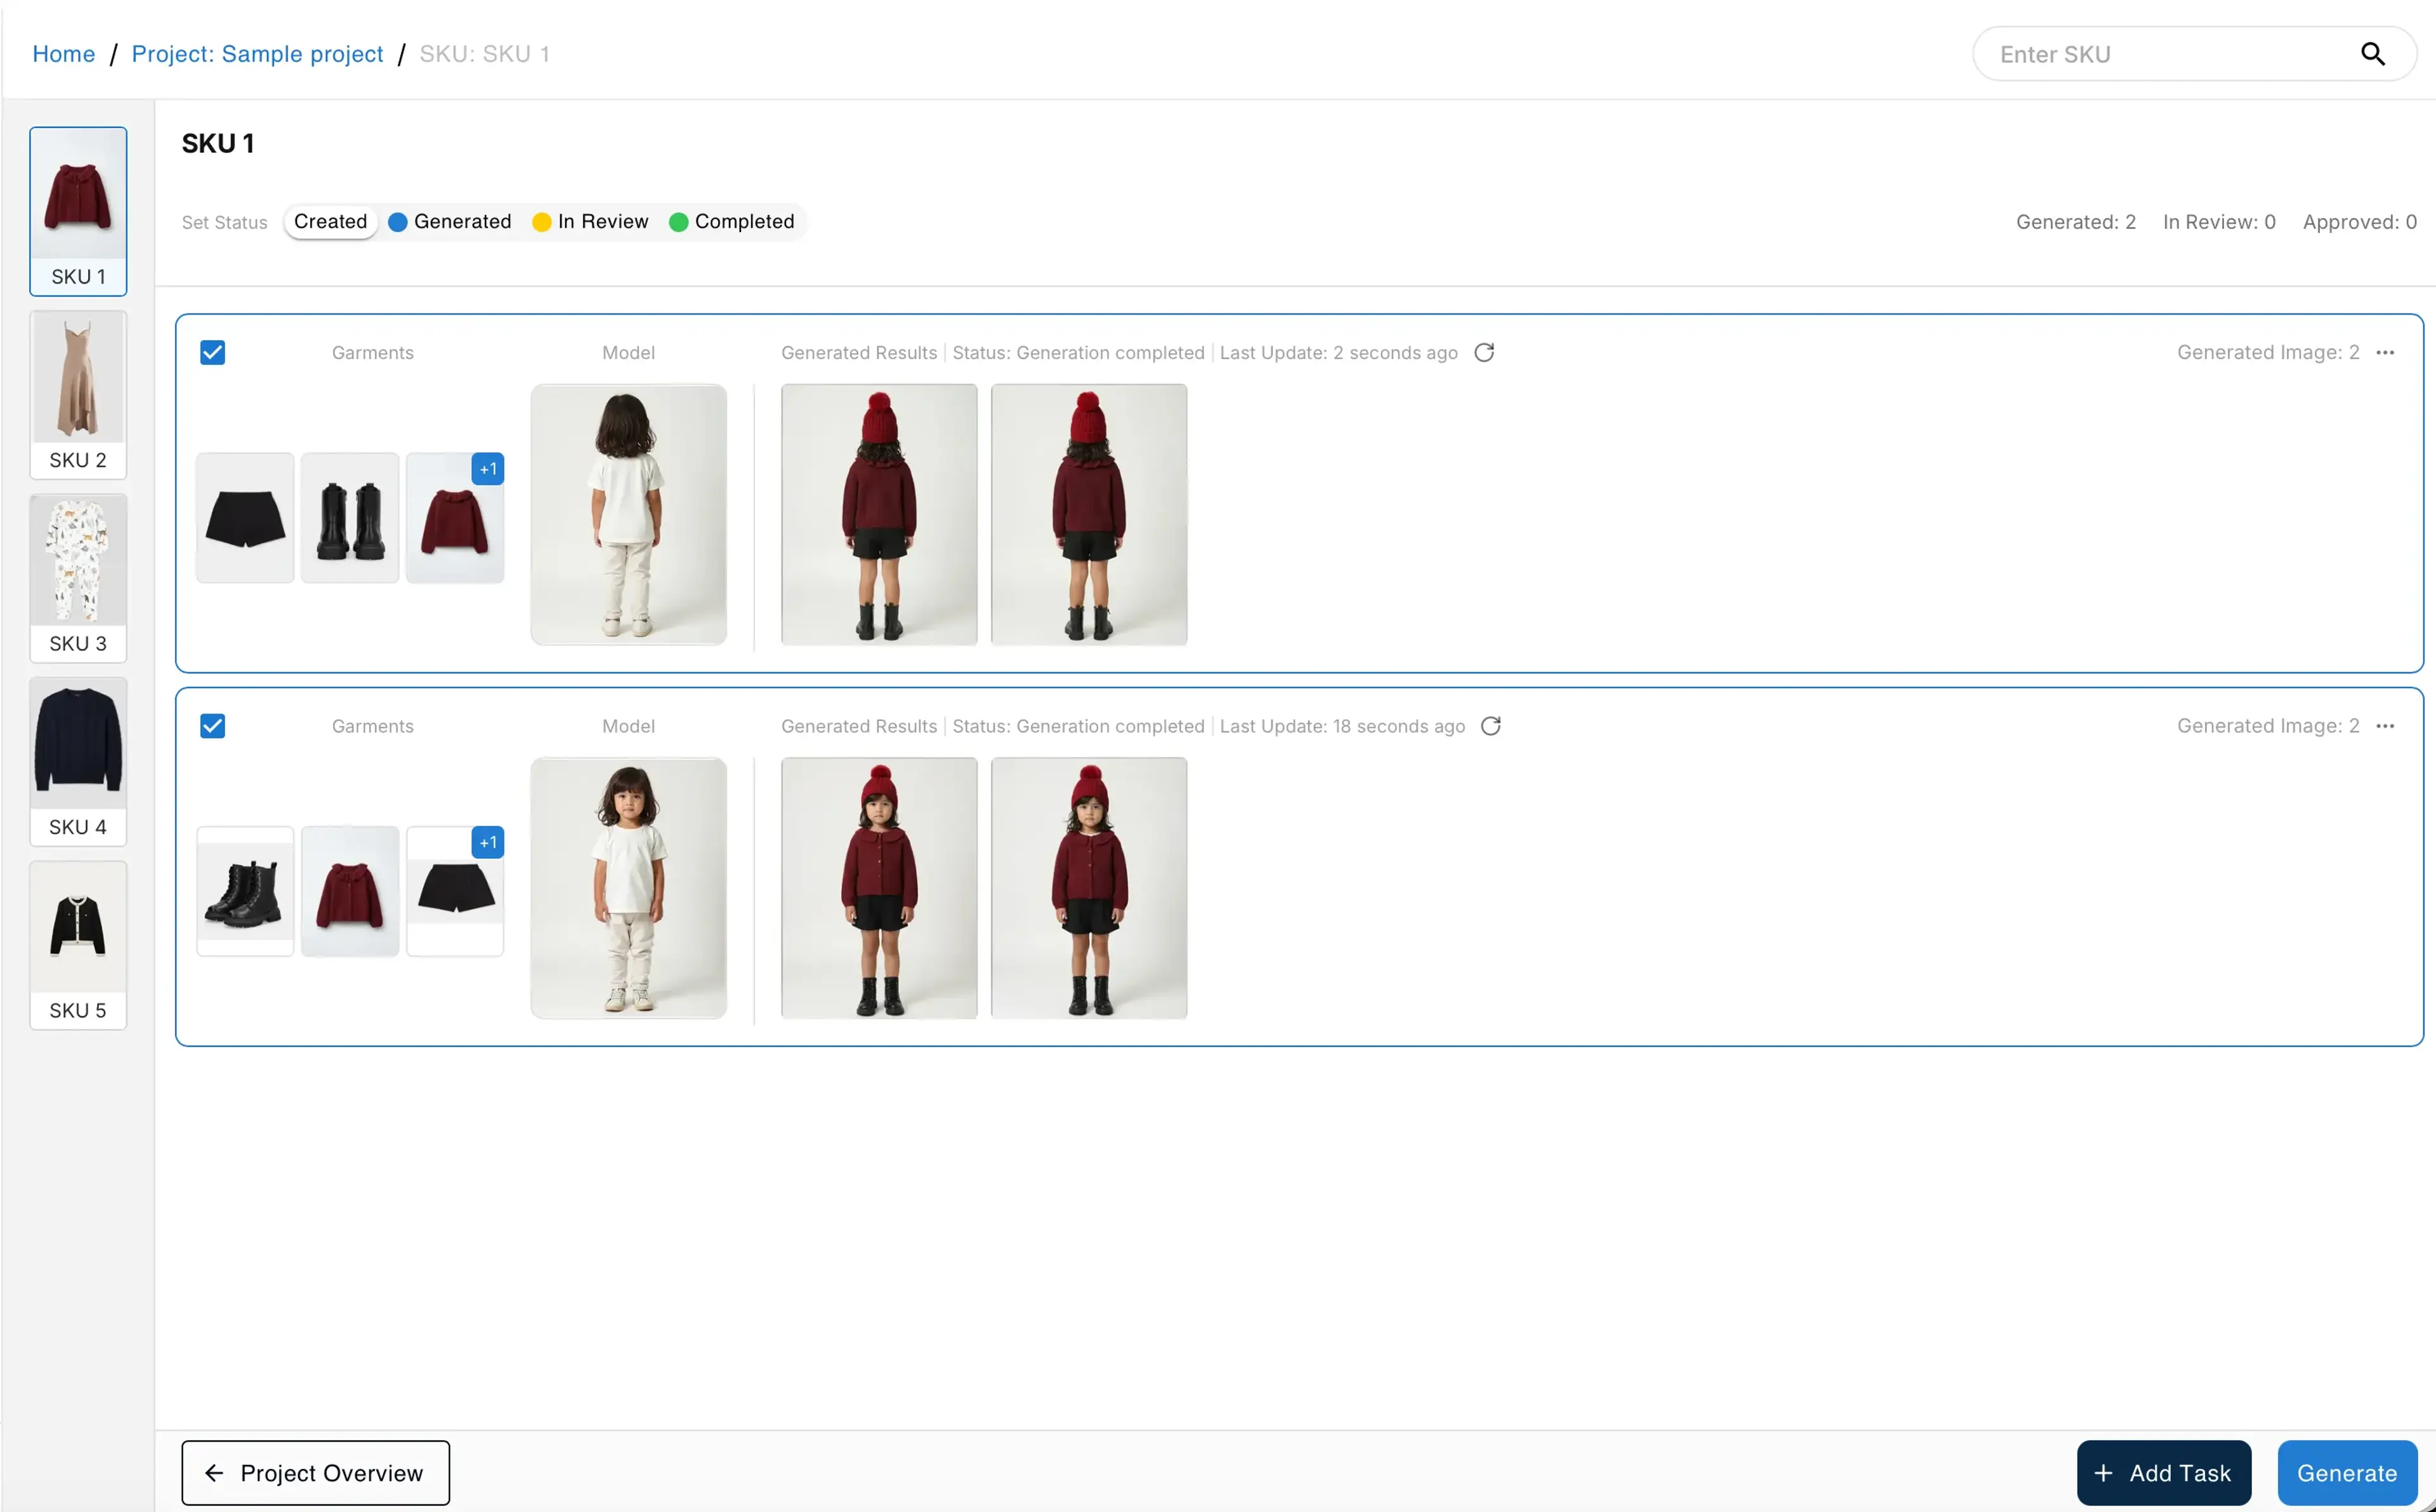
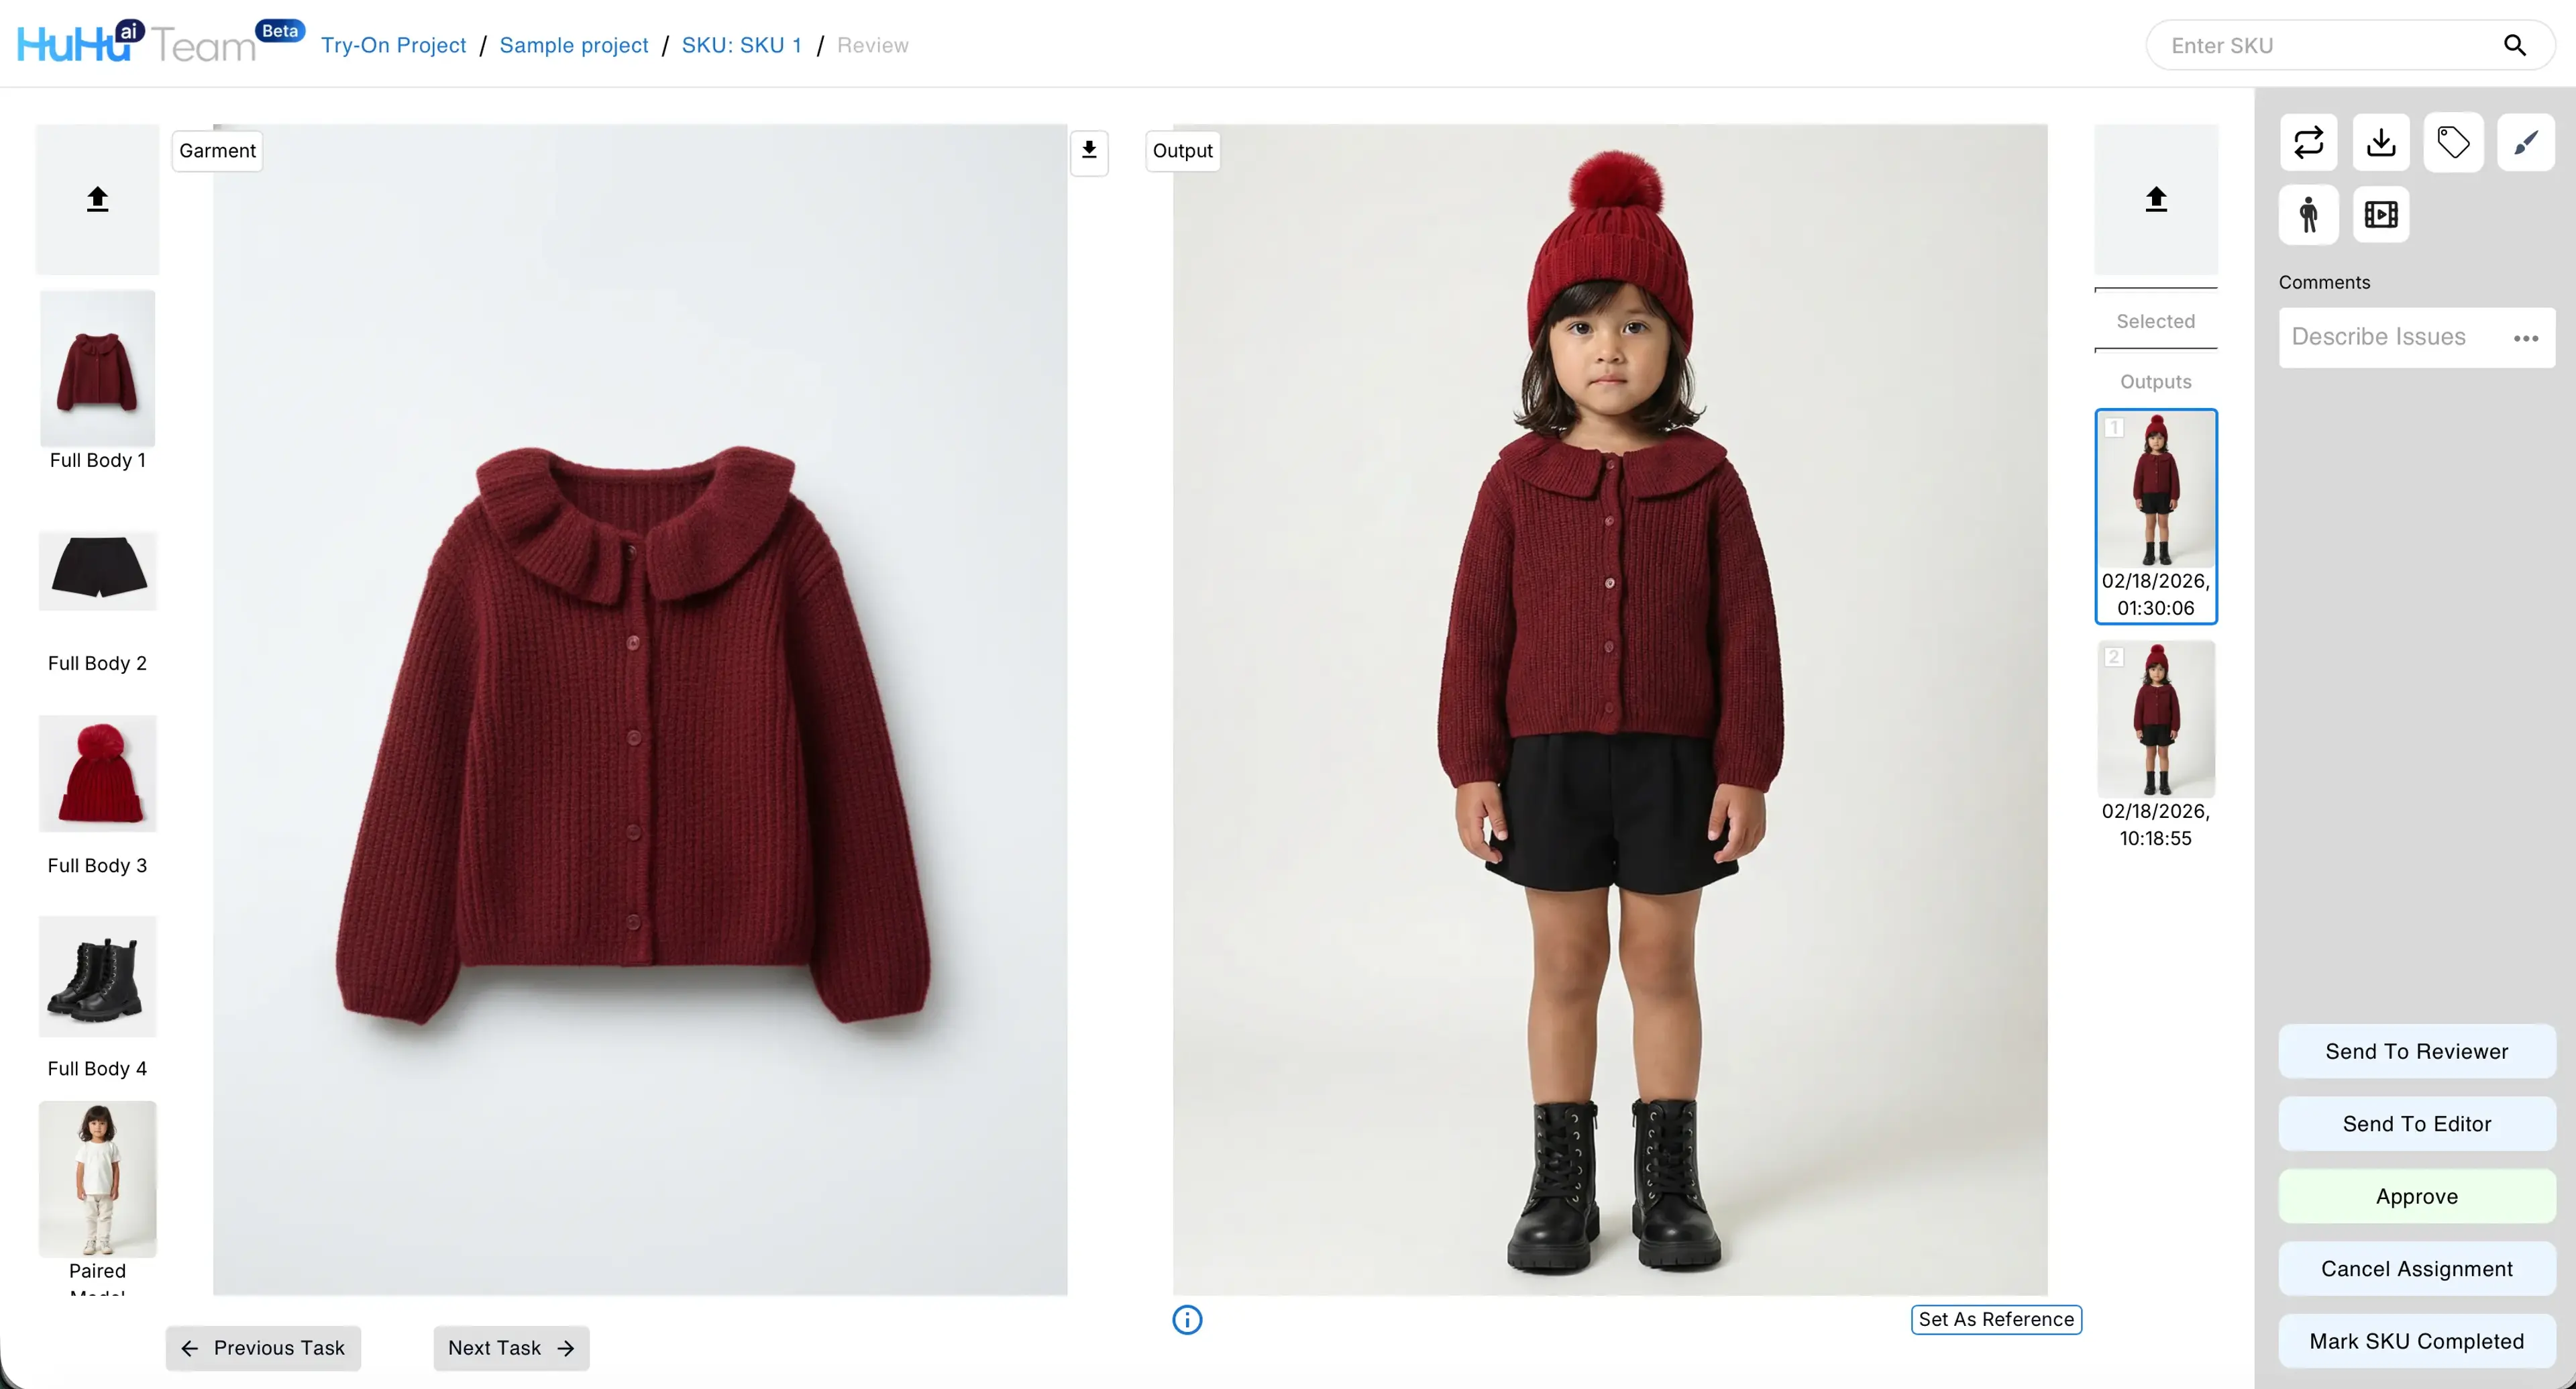
Click the image on the generated results column to review the image.
Related Tutorials
How to Control the Details of Try-On Results
Learn how to use the Detail Control feature to precisely adjust garment fitting, sleeve styles, pants length, and other clothing details in your try-on results.
How to Generate More Views and Poses from a Try-On Image
Learn how to generate more views and poses from a finalized try-on image, including using preset pose categories and creating custom poses.
How to Regenerate Try-On Images
Learn three ways to regenerate try-on images: with the same input, using a result as model image, or using a result as garment image for consistent looks.